Halloween Brownies
Halloween Brownies are a fun and festive treat that brings a perfect blend of rich chocolate and playful spooky decorations to your table. These brownies are moist and fudgy with…
Tip: save now, cook later.Halloween Brownies are a fun and festive treat that brings a perfect blend of rich chocolate and playful spooky decorations to your table. These brownies are moist and fudgy with a deep chocolate flavor that everyone loves, and they’re topped with cute Halloween-themed candies or frosting to get you into the spooky spirit.
I always enjoy making these brownies because they’re so flexible—you can keep them simple or go all out with little candy eyes, orange and black sprinkles, or even a drizzle of white chocolate “spider webs.” I find that decorating them is half the fun, especially if you have kids helping out or just want to add a playful touch.
These brownies are great for sharing at Halloween parties or for a special treat while watching scary movies at home. I like to serve them with a cold glass of milk, but they’re just as good on their own. Plus, make-ahead brownie mixes keep them easy to whip up whenever you want a little holiday fun!

Key Ingredients & Substitutions
Butter: Butter keeps the brownies rich and moist. You can swap for coconut oil or a plant-based margarine if needed, though flavor might be a bit different. I prefer unsalted butter so I can control salt levels.
Oreo Cookies: These add texture and fun to the brownies. If you want a different crunch, try chocolate chips or crushed other cookies like Biscoff for a twist. For a dairy-free option, use dairy-free sandwich cookies.
Orange Food Coloring: This makes the frosting festive and bright. If you want a natural option, try using a small amount of carrot juice or pumpkin puree, but the color will be softer.
How Do You Layer Brownie Batter and Frosting Without Mixing Them?
Layering batter and frosting can feel tricky—you want a distinct frosting layer without blending it too much.
- Bake the first half of the batter partially (about 15 mins) so it sets slightly but is still soft.
- Spread the frosting carefully on this warm but not hot layer; it helps the frosting stick without melting completely.
- Pour the remaining batter gently over the frosting, spreading it slowly to keep layers separate.
- Bake again until done. This creates a fun, layered effect you can see in every bite.
Take your time spreading the frosting; using an offset spatula helps keep it smooth and even without breaking the brownie layer below.
Equipment You’ll Need
- 9×9 inch baking pan – perfect size for brownies and easy to line with parchment for clean removal.
- Mixing bowls – you’ll need at least two for wet and dry ingredients, keeping things organized.
- Whisk or electric mixer – helps blend the frosting smooth and mix batter thoroughly.
- Offset spatula or butter knife – great for spreading the frosting evenly without breaking the brownie layer.
- Measuring cups and spoons – essential for accurate ingredient amounts to get perfect brownies every time.
Flavor Variations & Add-Ins
- Add 1/2 cup chopped nuts (walnuts or pecans) to the batter for a crunchy texture that pairs well with chocolate.
- Swap crushed Oreos with candy corn pieces on top for a classic Halloween feel and sweet burst.
- Mix 1/2 cup peanut butter into the frosting for a creamy, nutty twist that balances the rich brownie.
- Stir 1 teaspoon cinnamon or pumpkin pie spice into the batter to add warm, autumn flavors perfect for Halloween.
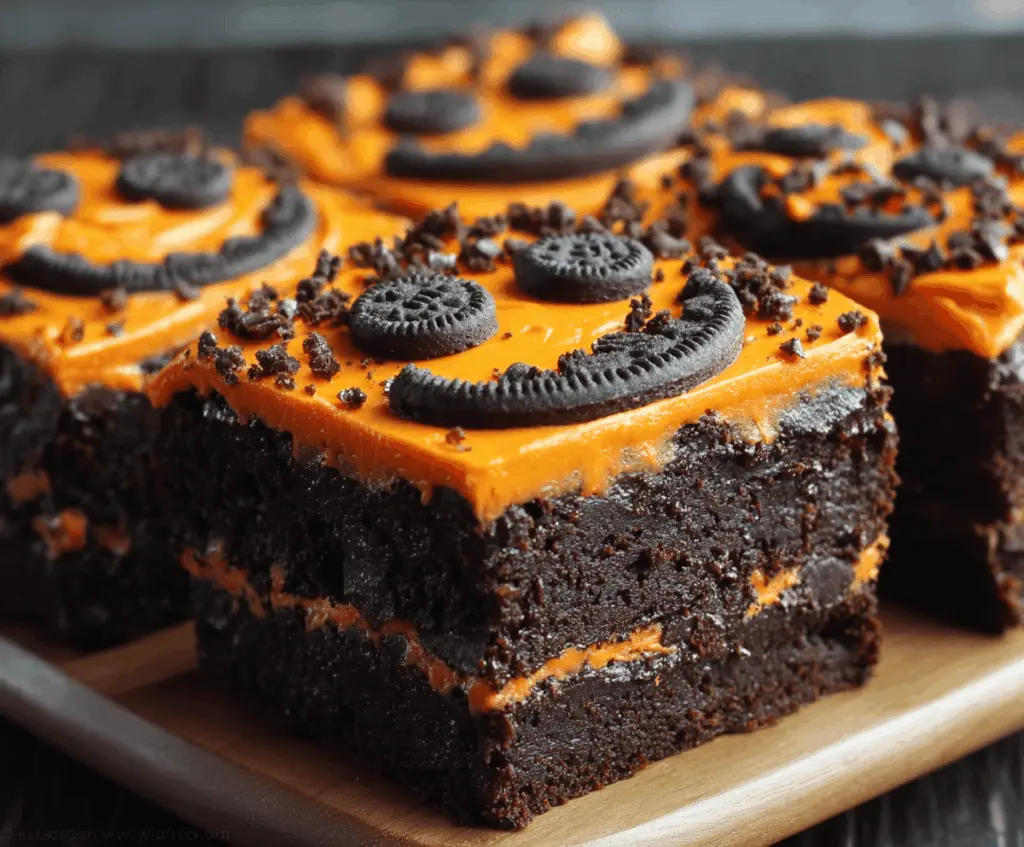
Halloween Brownies with Orange Frosting and Oreo Decorations
Ingredients You’ll Need:
For the Brownies:
- 1 cup (2 sticks) unsalted butter
- 2 cups granulated sugar
- 4 large eggs
- 1 teaspoon vanilla extract
- 1 cup all-purpose flour
- 3/4 cup unsweetened cocoa powder
- 1/2 teaspoon salt
- 1 cup crushed Oreo cookies (about 12 Oreos)
For the Orange Frosting:
- 1/2 cup (1 stick) unsalted butter, softened
- 2 cups powdered sugar
- 2 tablespoons milk (more if needed)
- 1 teaspoon vanilla extract
- Orange food coloring
Decorations:
- Oreo cookies (whole or halved) to create faces
- Crumbled Oreo cookies for sprinkling
How Much Time Will You Need?
This recipe takes about 15 minutes for initial prep and partial baking, 5 minutes for assembling frosting and batter layers, then another 20-25 minutes to finish baking. After that, let the brownies cool completely for about 30-60 minutes before frosting and decorating. Overall, plan for around 1.5 to 2 hours from start to finish.
Step-by-Step Instructions:
1. Preparing the Brownie Base:
Preheat your oven to 350°F (175°C). Grease a 9×9 inch baking pan or line it with parchment paper for easy cleanup. In a large bowl, melt the butter and stir in the sugar until mixed well. Add eggs one at a time, beating well after each, then stir in the vanilla extract.
In a separate bowl, sift together the flour, cocoa powder, and salt. Gradually blend the dry ingredients into the wet mixture until just combined. Gently fold in the crushed Oreo cookies.
Pour half the batter into the baking pan and spread it evenly. Bake for about 15 minutes — the layer should be partially set but not fully cooked.
2. Adding the Frosting Layer:
While the first layer cools slightly, prepare the orange frosting by beating softened butter until creamy. Gradually add powdered sugar, then milk and vanilla extract, mixing until smooth. Add orange food coloring a few drops at a time until you get the color you want.
Spread a thin, even layer of the frosting over the partially baked brownie base.
3. Finishing the Brownies and Decorating:
Pour the remaining brownie batter over the frosting layer, and smooth it out gently. Bake for another 20–25 minutes, until a toothpick inserted near the center comes out with moist crumbs. Avoid overbaking to keep the brownies fudgy.
Allow the brownies to cool completely on a wire rack. Once cooled, spread the remaining orange frosting on top evenly.
Decorate each brownie square with Oreo cookies—cut them into halves or pieces to create eyes and smiles for fun Halloween faces. Sprinkle some crushed Oreos over the frosting to add texture and extra spooky flair.
Cut into squares, serve, and enjoy your festive Halloween treats!
Can I Use a Different Type of Cookie Instead of Oreos?
Absolutely! You can substitute Oreos with any sandwich cookies or your favorite chocolate cookies. Just crush them similarly to maintain the texture within the brownies and for decorating.
Can I Make These Brownies Ahead of Time?
Yes! You can bake the brownies a day in advance and keep them stored in an airtight container at room temperature. Add the frosting and decorate right before serving to keep everything fresh.
How Should I Store Leftover Halloween Brownies?
Store leftovers in an airtight container at room temperature for up to 3 days. If you want to keep them longer, refrigerate for up to a week or freeze for up to 3 months. Thaw frozen brownies overnight at room temperature before serving.
What Can I Do If I Don’t Have Orange Food Coloring?
If you don’t have orange food coloring, you can mix red and yellow food coloring to create orange, or use natural colorings like carrot juice or pumpkin puree for a softer orange hue in the frosting.