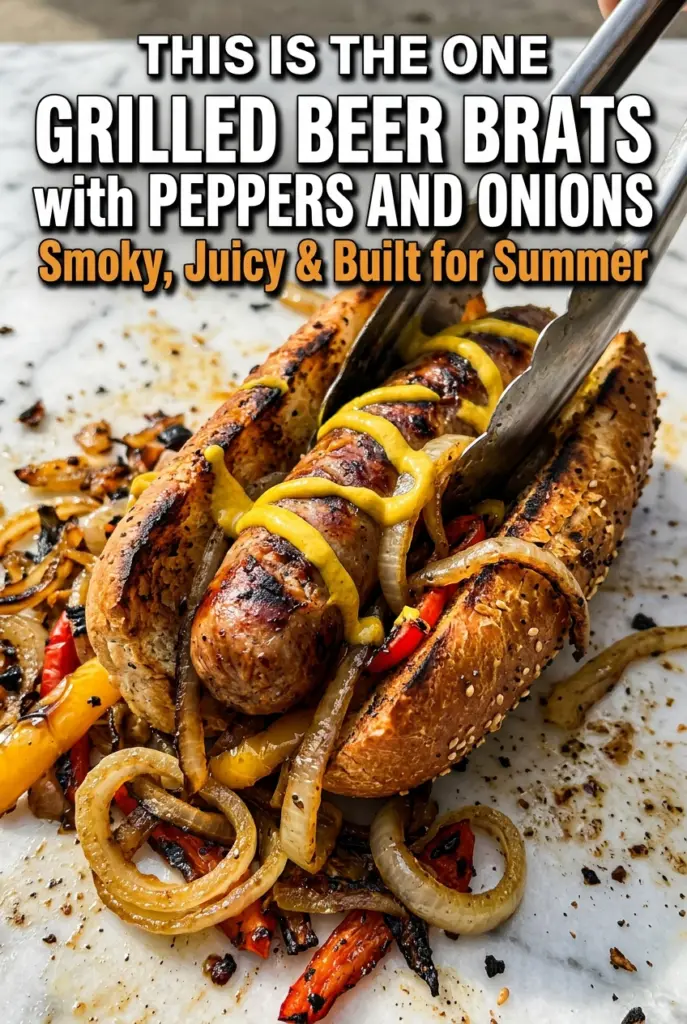
Grilled Beer Brats with Peppers and Onions
Juicy bratwurst, softened first in beer and onions, then finished over a hot grill, gives you that crackled snap on the outside and a tender, smoky bite inside. The beer…
Tip: save now, cook later.Juicy bratwurst, softened first in beer and onions, then finished over a hot grill, gives you that crackled snap on the outside and a tender, smoky bite inside. The beer bath keeps the links plump instead of splitting and drying out, and the grill adds the char that makes a brat taste like it belongs at the center of the plate, not buried under toppings.
The part that separates a great brat from a mediocre one is the temperature control. A gentle simmer in beer cooks the sausages through without bursting the casings, and the quick trip to the grill gives you color without turning the fat inside the sausage into a mess on the grates. The peppers and onions pick up a little smokiness too, which keeps the whole sandwich from tasting one-note.
Below you’ll find the simple timing that keeps everything hot at the same moment, plus the little details that matter if you want the brats to stay juicy and the vegetables to stay sweet instead of limp.
The beer simmer kept the brats juicy, and I loved that they didn’t split open on the grill. The peppers got just the right char and the onions were sweet, not mushy.
Save these grilled beer brats with peppers and onions for the nights when you want a charred, juicy dinner that comes together fast.
The Beer Simmer That Keeps Brats From Bursting on the Grill
Most people try to cook brats straight over high heat and end up with casing splits, flare-ups, and links that are browned outside but still pale in the middle. The beer bath solves that problem. It cooks the sausages gently first, so the grill only has to finish the exterior instead of doing the whole job at once.
The other thing that matters is not boiling the liquid. A hard boil shakes the casings around and pushes the fat out before the brat has a chance to stay juicy. Keep it at a steady simmer, turn the links once, and stop the cook when they feel firm but still bouncy. That gives you a brat that snaps when you bite into it instead of leaking onto the plate.
- Lager or pale beer — Use a beer you’d actually drink. It adds a mild malt backbone without taking over the sausage. A bitter IPA can work, but it brings more bite than I want here.
- Bratwurst links — Fresh bratwurst works best because it stays juicy through the simmer and grill. Fully cooked brats can be used, but cut the simmer time down so they don’t get tough.
- Yellow onion — The onion in the beer bath seasons the liquid and perfumes the brats from the outside in. Save the sliced rings for the grill if you want the best texture; the rough slices in the pan are there to flavor, not serve.
- Bell peppers — Red and yellow peppers bring sweetness that balances the mustard and the rich sausage. Any color works, but sweeter peppers hold up best over direct heat.
- Smoked paprika — This is what gives the vegetables a little campfire depth even if your grill doesn’t run especially smoky. It doesn’t replace the grill flavor, but it rounds it out.
Building Char on the Brats Without Drying Them Out
The Gentle Simmer
Put the brats, beer, sliced onion, garlic powder, and black pepper into a skillet or foil pan and bring the liquid to a gentle simmer over medium heat. You want small bubbles, not a rolling boil. Turn the sausages halfway through so they cook evenly and pick up flavor on all sides. If the liquid is boiling hard, lower the heat right away or the casings can split before you ever get them to the grill.
Getting Color on the Grill
Move the peppers and onions onto the grill first so they can soften while the brats finish their bath. Toss them occasionally so the edges char without burning black in one spot. Pull them off when the onions are translucent and the peppers have collapse around the edges but still hold their shape. Then grill the brats over medium-high heat until the skins are browned and blistered and the links feel hot all the way through with a little spring when pressed.
Toast the Buns Last
Set the buns cut-side down on the grill only after the brats and vegetables are ready. They need just a minute or two to pick up color and a little crunch. If you leave them on too long, they go dry and brittle instead of warm and lightly crisp. A toasted bun gives the brat structure, which matters once the peppers and onions hit the top.
Dairy-Free and Naturally Gluten-Free Serving Style
The brat itself is already dairy-free, and if you serve it on a gluten-free bun or in a lettuce wrap, the whole meal stays easy to adapt. Check the beer label if you need strict gluten-free cooking, since not every lager is safe for that. The texture stays the same; you’re mostly changing the carrier, not the flavor.
Swap the Beer for Broth
If you don’t want to cook with beer, use chicken broth plus a splash of apple cider vinegar or white wine vinegar. You’ll lose the mild malt flavor, but the broth still keeps the brats moist and gives the onions something savory to absorb. The vinegar adds back a little brightness so the finished sandwich doesn’t taste flat.
Make It Hotter or Milder
Spicy brown mustard gives the finished brat more bite, while yellow mustard keeps it classic and sharper. You can also add sliced jalapeños to the grill basket if you want heat with the peppers and onions. Keep the brat itself unchanged; the sausage already has enough richness to handle a punchier topping.
Storage and Reheating
- Refrigerator: Store cooked brats and vegetables separately in airtight containers for up to 4 days. The buns will go stale, so keep those out of the fridge unless you don’t mind reheating them wrapped in foil.
- Freezer: The cooked brats freeze well for up to 2 months. The peppers and onions soften more after thawing, so I don’t freeze them unless I have leftovers I plan to use in eggs or chopped sandwiches.
- Reheating: Warm the brats covered in a skillet with a splash of water over low heat, or reheat them in a 325°F oven until hot. Don’t blast them in the microwave unless you’re fine with split casings and rubbery texture.
Questions I Get Asked About This Recipe

Grilled Beer Brats with Peppers and Onions
Ingredients
Equipment
Method
- Add the bratwurst links, roughly sliced onion, beer, garlic powder, and black pepper to a large skillet or aluminum foil pan.
- Bring to a gentle simmer over medium heat and cook for 15–20 minutes, turning brats halfway through, without boiling.
- Preheat your grill to medium-high heat, around 400°F.
- Toss the sliced bell peppers and onion rings with olive oil, salt, black pepper, and smoked paprika until evenly coated.
- Place peppers and onions directly on the grill grates or in a grill basket and cook for 10–12 minutes, tossing occasionally, until softened and lightly charred.
- Remove peppers and onions and set aside.
- Remove brats from the beer bath and place directly on the hot grill.
- Grill brats for 4–5 minutes per side, until skin is golden-brown with visible charred grill marks and brats snap when pressed.
- Toast the buns cut-side down on the grill for 1–2 minutes until golden.
- Load each bun with a brat, pile on the grilled peppers and onions, and finish with your mustard or favorite condiments.
- Serve immediately while brats are hot and the peppers and onions are still lightly charred.