

Red White and Blue Cupcakes
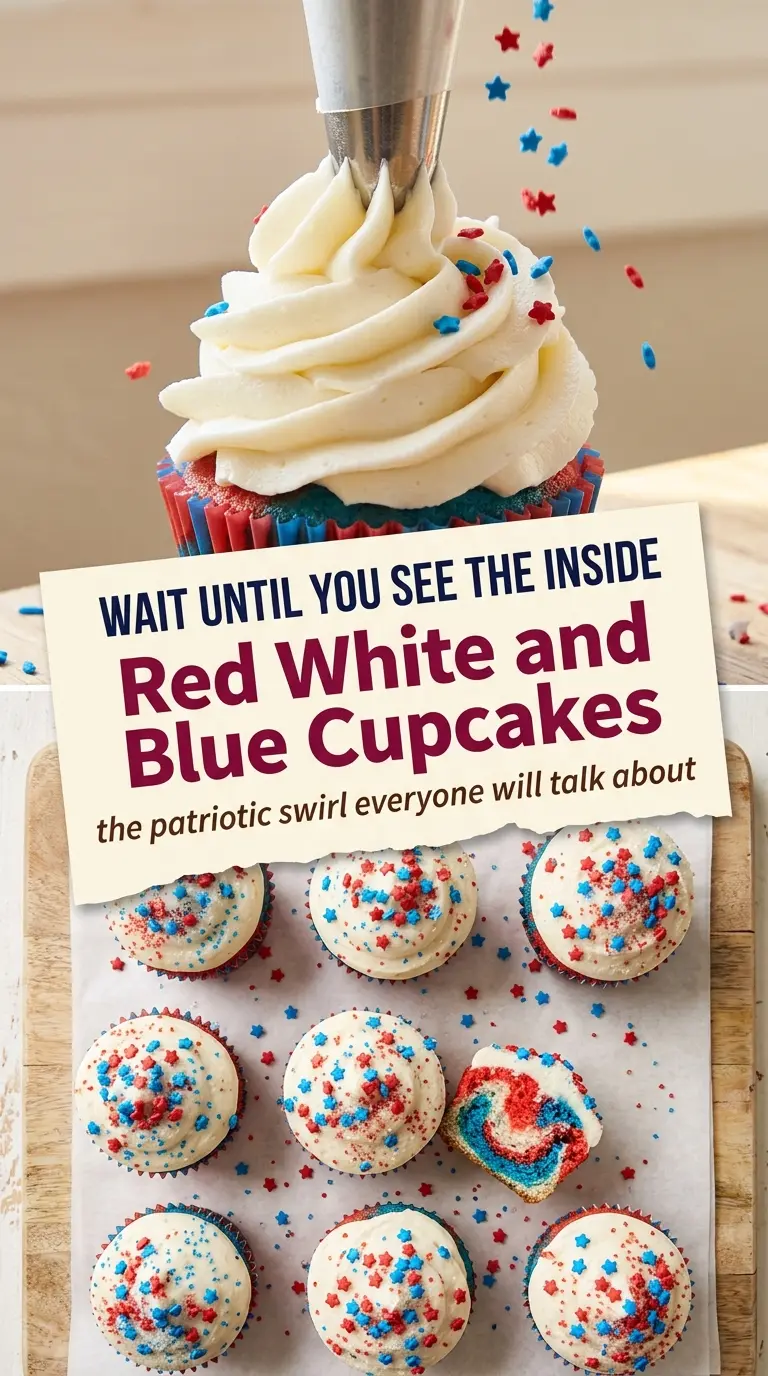
Red, white, and blue cupcakes hit that sweet spot between playful and polished: soft vanilla cake, a bright striped swirl inside, and a tall cap of buttercream that holds its…
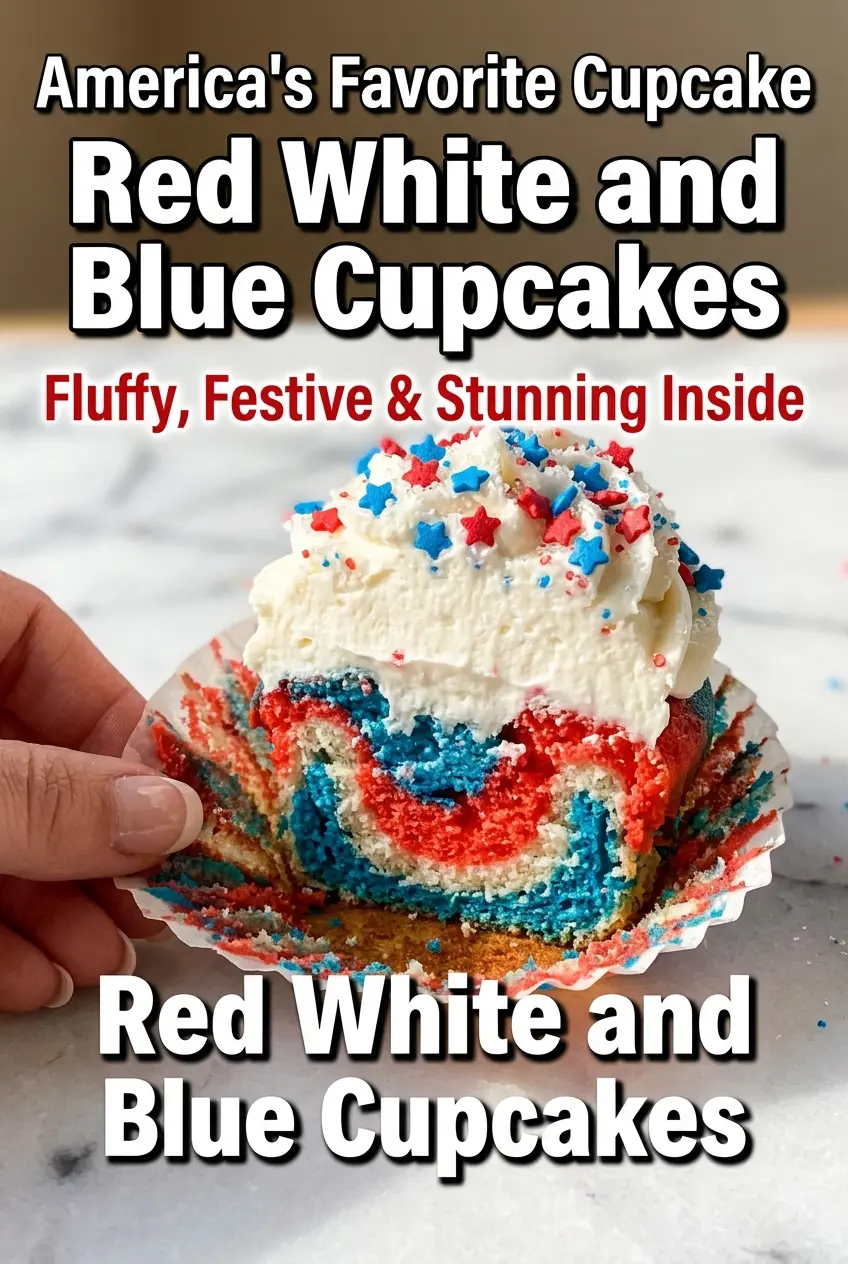
Tip: save now, cook later.Red, white, and blue cupcakes hit that sweet spot between playful and polished: soft vanilla cake, a bright striped swirl inside, and a tall cap of buttercream that holds its shape without tasting heavy. The first bite gives you buttery crumb and a clean vanilla finish, then the colors show up in every slice like a little surprise for the table. They’re the kind of dessert people lean toward before they’ve even finished dinner.
The batter stays light because the butter and sugar are beaten until pale and fluffy, then the flour and milk are added in alternating turns so the cupcakes don’t turn dense. Gel food coloring matters here. It gives you strong color without thinning the batter the way liquid dye can, which is how you keep the swirl distinct instead of pastel and muddy. The frosting uses a full cup of butter, but the powdered sugar and cream are balanced so it pipes tall and stays stable at room temperature.
Below, I’ve included the little details that matter most: how to swirl the batter without blending the colors away, what to watch for when you’re mixing the buttercream, and a few smart swaps if you need to adjust the recipe for a different crowd.
The cupcakes baked up super fluffy and the swirl stayed clear instead of turning pink and purple. I also loved that the frosting held its shape for the whole party without sliding off in the heat.
These red, white, and blue cupcakes are the kind of party dessert that disappears fast, with a clean vanilla swirl and tall buttercream swirls that hold up beautifully.
The Trick to Keeping the Colors Separate Instead of Muddied Together
The biggest mistake with swirled cupcakes is treating the batter like you’re marbling a cake. Too much swirling turns three distinct colors into one dull shade, and once that happens there’s no fixing it in the oven. The goal is a few clean spoonfuls layered into the liner, then one or two gentle passes with a toothpick just to create movement.
Using gel coloring instead of liquid dye keeps the batter thick enough to hold those layers. That matters because thin batter runs together before it even reaches the oven. Bake them just until the tops spring back and a toothpick comes out clean; overbaking dries out the crumb and makes the colors look less vivid once sliced.
What Each Ingredient Is Doing in These Cupcakes
- All-purpose flour — This gives the cupcakes enough structure to hold the swirled batter without becoming chewy. Cake flour will make them a little softer, but all-purpose keeps the crumb sturdy enough for a generous frosting swirl.
- Baking powder — This is what helps the cupcakes rise into a light, even dome. If it’s old, the cakes bake up flat and the swirl looks dense instead of fluffy.
- Unsalted butter — Softened butter is what creates that rich, tender crumb and the creamy frosting base. If you only have salted butter, use it and skip the pinch of salt in the frosting.
- Gel food coloring — This is the ingredient that makes the whole recipe work visually. Liquid coloring can thin the batter and blur the colors, but gel keeps the red and blue bold without changing the texture.
- Whole milk — The fat in whole milk helps keep the crumb soft. In a pinch, 2% works, but skim milk will give you a drier cupcake.
- Heavy cream — A small amount loosens the buttercream just enough to whip into a light, pipeable frosting. Milk can substitute here, but the frosting won’t be quite as plush.
Building the Swirl, Then the Frosting
Mix the batter until it’s just combined
Beat the butter and sugar until the mixture turns pale and fluffy, then add the eggs one at a time so the batter stays smooth. Once the flour and milk start going in, switch to low speed and stop as soon as the last streak of flour disappears. If you overmix at this stage, the cupcakes bake up tight and the crumb loses that soft, buttery texture.
Layer the colors with a light hand
Divide the batter into three bowls, tint two of them, and drop alternating spoonfuls into each liner. Don’t pack the batter in or stir aggressively inside the cup. One or two gentle swirls with a toothpick is enough to create that striped look without turning the whole cupcake one color.
Bake just until the tops spring back
These cupcakes are done when the tops bounce back lightly and a tester comes out clean from the center. If the edges brown deeply before the middle is set, your oven is probably running hot, so start checking a couple minutes early. Let them cool in the pan for five minutes, then move them to a rack so the bottoms don’t get soggy from trapped steam.
Whip the buttercream until it turns airy
Start the frosting by beating the butter until it looks creamy and smooth before adding the sugar. If you dump everything in at once, the texture turns grainy and heavy. Add the cream a little at a time until the frosting is light enough to pipe but still stiff enough to hold a tall swirl.
How to Adapt These Cupcakes for Different Tables
Gluten-Free Version
Use a cup-for-cup gluten-free baking blend that includes xanthan gum. The cupcakes will still rise well, but the crumb will be a little more delicate, so let them cool completely before moving or frosting them.
Dairy-Free Swap
Use a plant-based butter that works for baking and replace the milk and cream with unsweetened oat milk. The cupcakes stay soft, though the frosting may be a touch less rich and will need a little extra powdered sugar to pipe cleanly.
Make Them Without a Piping Tip
Spoon the frosting on top and swirl it with the back of a spoon. You’ll lose the bakery-style ridges, but the cupcakes still look festive once the sprinkles go on.
Storage and Reheating
- Refrigerator: Store frosted cupcakes in an airtight container for up to 5 days. The cake stays moist, but the frosting firms up in the fridge.
- Freezer: Freeze unfrosted cupcakes for up to 2 months. Wrap them well and thaw at room temperature before frosting so condensation doesn’t smear the color.
- Reheating: These are best served at room temperature, not warmed. If they’ve been chilled, let them sit out for 30 to 45 minutes so the buttercream softens and the crumb tastes tender again.
Answers to the Questions Worth Asking
Red White and Blue Cupcakes
Ingredients
Equipment
Method
- Preheat your oven to 350°F (175°C). Line a 12-cup muffin tin with cupcake liners.
- Whisk the all-purpose flour, baking powder, and salt in a medium bowl, then set aside.
- Beat the softened unsalted butter and granulated sugar in a large bowl on medium-high speed for 3–4 minutes until pale and fluffy.
- Add the eggs one at a time, beating well after each addition, then mix in pure vanilla extract.
- Reduce speed to low and alternate adding the flour mixture and whole milk in 3 additions, beginning and ending with flour; mix just until combined.
- Divide the batter evenly into 3 bowls, leaving one bowl plain (white), then tint one bowl with Red gel food coloring and one with Blue gel food coloring until vibrant.
- Drop alternating spoonfuls of red, white, and blue batter into each liner, filling about ⅔ full, then swirl once or twice with a toothpick.
- Bake for 18–22 minutes, until a toothpick inserted into the center comes out clean and the tops spring back lightly.
- Cool in the pan for 5 minutes, then transfer to a wire rack to cool completely.
- Beat the softened unsalted butter on medium speed for 2 minutes until creamy.
- Add powdered sugar one cup at a time, mixing on low until incorporated.
- Mix in heavy cream, pure vanilla extract, and a pinch of salt.
- Beat on high for 3–4 minutes until the frosting is light, fluffy, and bright white.
- Fit a piping bag with a large star tip and pipe a tall swirl onto each cooled cupcake.
- Immediately decorate each cupcake with red, white, and blue star sprinkles, and add sanding sugar and mini flag picks if desired while the frosting is still soft.
- Serve the cupcakes at room temperature.
- Store leftovers in an airtight container at room temperature for up to 2 days, or refrigerate for up to 5 days.