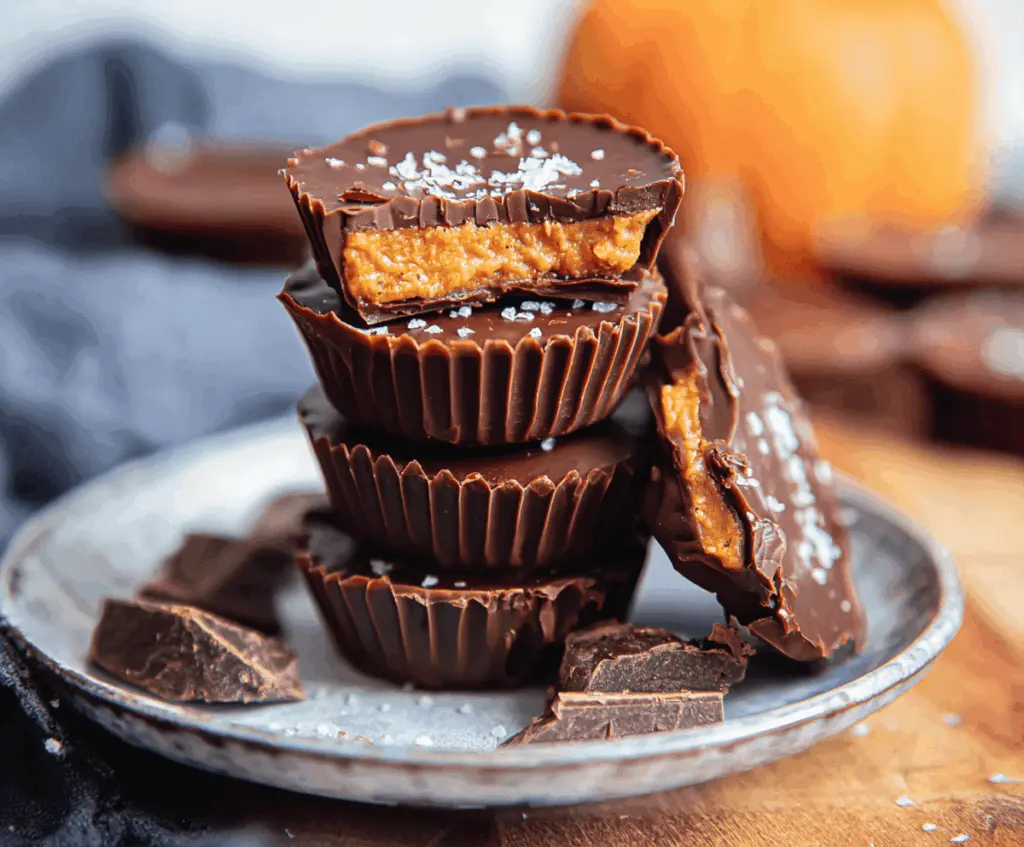
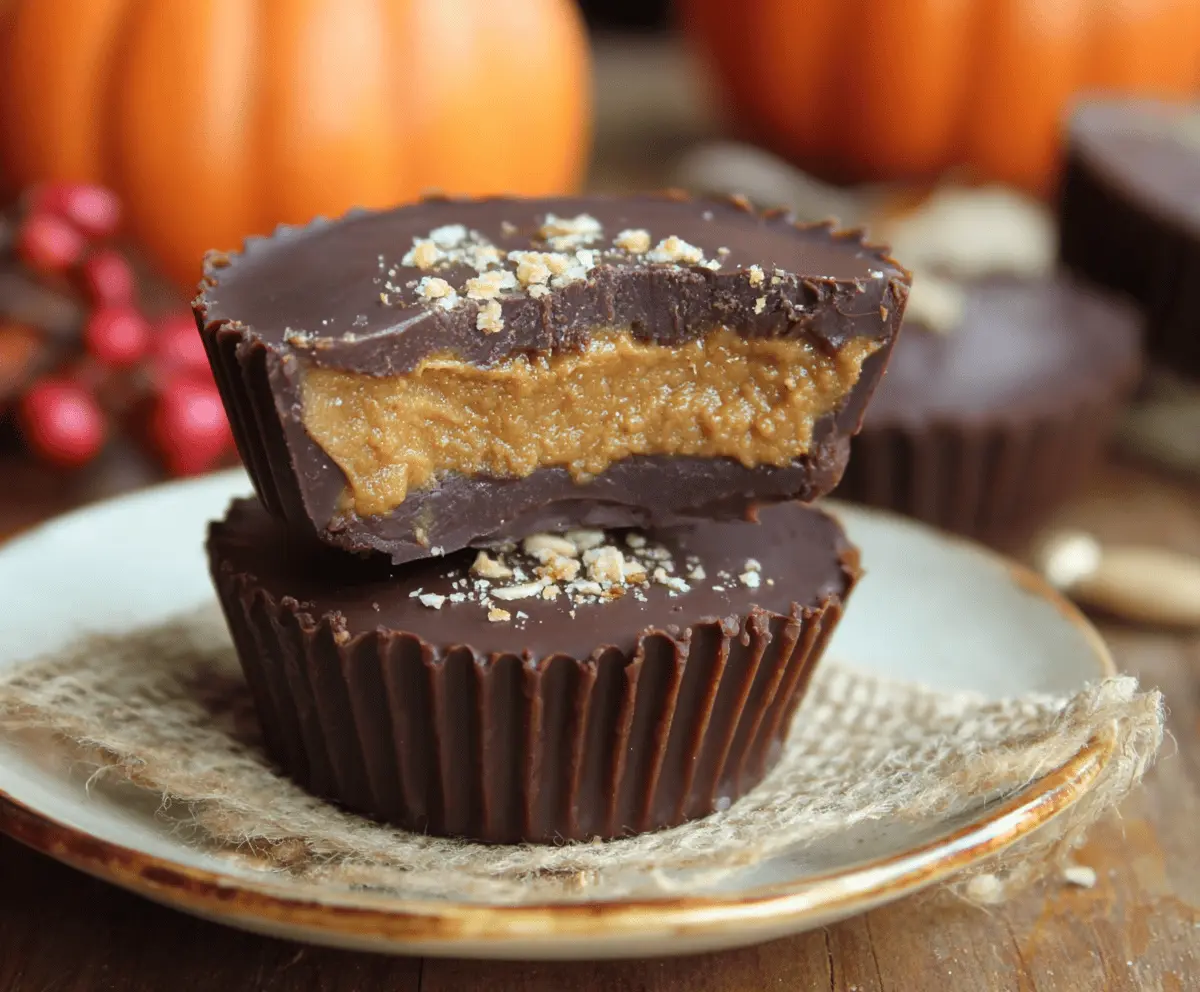
Dairy Free Chocolate Pumpkin Butter Cups
Dairy Free Chocolate Pumpkin Butter Cups are a delicious little treat that combines rich chocolate with smooth, flavorful pumpkin. These cups have a creamy pumpkin filling that's sweetened just right…
Tip: save now, cook later.Dairy Free Chocolate Pumpkin Butter Cups are a delicious little treat that combines rich chocolate with smooth, flavorful pumpkin. These cups have a creamy pumpkin filling that’s sweetened just right and wrapped in a layer of dairy-free chocolate, making them perfect for those who avoid dairy but still want a tasty dessert. The pumpkin adds a nice, cozy fall touch, while the chocolate keeps things fun and satisfying.
I love making these butter cups because they’re easy to whip up and feel a bit special, especially when pumpkin season rolls around. One tip I’ve found helpful is to use good-quality dairy-free chocolate since it really makes a difference in taste and texture. Plus, they’re fun to eat straight from the fridge or at room temperature, depending on your mood.
These cups are great to share with friends or keep on hand for when a sweet craving hits. I often pack a few in my lunch box or leave them out for guests. They’re a simple way to enjoy fall flavors with a chocolatey twist, and everyone seems to agree they’re a real treat—even people who aren’t dairy-free!
Key Ingredients & Substitutions
Dairy-free chocolate: Use quality dairy-free dark chocolate or chips for the best melting and flavor. If you prefer, vegan semi-sweet or bittersweet chocolate work well, too.
Pumpkin puree: Make sure to use plain pumpkin puree, not pumpkin pie filling which contains added sugars and spices. If you’re out of pumpkin, butternut squash puree makes a nice substitute.
Nut butter: I like almond butter here, but sunflower seed butter is a great nut-free option. Peanut butter can also be used if you enjoy its flavor.
Sweetener: Maple syrup adds a rich, natural sweetness that complements the pumpkin. Agave nectar works well, or you can try brown rice syrup for a milder taste.
Pumpkin pie spice: This blend brings warm, cozy notes. You can tweak the spices by adding cinnamon, nutmeg, or ginger if you want to tailor it to your taste.
How Do I Get Smooth, Even Layers in My Butter Cups?
Layering the chocolate and pumpkin filling evenly takes a little care but makes the cups look and taste great.
- Melt chocolate gently in short bursts (20 seconds) and stir well to avoid burning.
- Pour a thin bottom layer of chocolate and freeze to harden before adding the filling—this keeps layers separate.
- Use a small spoon to gently smooth the pumpkin filling on top without mixing into the chocolate.
- Cover the filling fully with melted chocolate, then chill thoroughly to set everything firmly before removing from liners.
- If your chocolate firms too quickly while spreading the top layer, gently warm it again to maintain a pourable texture.
Equipment You’ll Need
- Mini muffin tin – keeps the butter cups uniform and easy to handle.
- Paper muffin liners – make removing the cups simple and mess-free.
- Microwave-safe bowl – perfect for melting the dairy-free chocolate in short bursts.
- Small spoon or cookie scoop – helps layer the chocolate and pumpkin filling neatly.
- Spatula – great for mixing the pumpkin filling smoothly without lumps.
Flavor Variations & Add-Ins
- Swap pumpkin for sweet potato puree for a sweeter, earthier flavor that still pairs perfectly with chocolate.
- Add a pinch of cinnamon or cayenne pepper to the filling for a warm or spicy twist.
- Stir in chopped pecans or walnuts to the pumpkin filling for extra crunch and texture.
- Use peanut butter instead of almond or sunflower seed butter to get a classic peanut butter and chocolate combo.
Dairy Free Chocolate Pumpkin Butter Cups
Ingredients You’ll Need:
- 1 cup dairy-free dark chocolate chips or chopped dairy-free chocolate
- ½ cup canned pumpkin puree (not pumpkin pie filling)
- ¼ cup natural nut butter (such as almond butter or sunflower seed butter for nut-free option)
- 2 tablespoons pure maple syrup or agave nectar
- ½ teaspoon pumpkin pie spice
- ½ teaspoon vanilla extract
- Pinch of salt
- Flaked sea salt, for sprinkling on top (optional)
How Much Time Will You Need?
This recipe takes about 15 minutes to prepare plus at least 30 minutes for chilling to let the butter cups fully set and firm up. It’s a quick and easy treat that you chill in the freezer so it’s ready to enjoy soon after making!
Step-by-Step Instructions:
1. Prepare the Muffin Tin:
Line a mini muffin tin with paper liners and set it aside.
2. Melt the Chocolate:
Place half of the dairy-free chocolate chips into a microwave-safe bowl. Melt in 20-second intervals, stirring after each, until smooth and fully melted.
3. Make the Chocolate Base:
Spoon about 1 teaspoon of melted chocolate into the bottom of each paper liner. Use a spoon to spread the chocolate evenly. Place the muffin tin in the freezer for about 10 minutes so the chocolate hardens.
4. Prepare the Pumpkin Filling:
In a medium bowl, mix together pumpkin puree, nut butter, maple syrup, pumpkin pie spice, vanilla extract, and a pinch of salt until smooth and creamy.
5. Add Pumpkin Filling:
Take the muffin tin out of the freezer. Spoon about 1 rounded tablespoon of pumpkin filling onto the hardened chocolate layer in each cup. Smooth the tops gently.
6. Cover with Chocolate:
Melt the remaining chocolate and spoon it over the pumpkin filling in each cup, making sure to cover the filling completely.
7. Add a Finishing Touch:
If you like, sprinkle a little flaked sea salt on top of each cup for a nice salty contrast.
8. Chill to Set:
Return the muffin tin to the freezer and chill for at least 30 minutes, or until the butter cups are completely firm.
9. Serve and Store:
Once set, remove the butter cups from the liners. Store them in an airtight container in the refrigerator or freezer until you’re ready to enjoy.
Can I Use Frozen Pumpkin Puree for the Filling?
Yes! Just thaw it completely in the fridge or at room temperature before using. Make sure to drain any excess liquid to keep the filling smooth and not too watery.
Can I Substitute the Nut Butter?
Absolutely! Almond butter and sunflower seed butter are great options, but peanut butter or cashew butter work well too. Just choose your favorite or what you have on hand.
How Should I Store These Butter Cups?
Store them in an airtight container in the fridge for up to a week or in the freezer for longer storage. Let them sit at room temperature for a few minutes before eating if they’re too firm.
Can I Make These Ahead of Time?
Definitely! You can make the butter cups and keep them chilled in the refrigerator or freezer until ready to serve. They hold up well and taste just as delicious later on.