Halloween Graveyard Dirt Cups
Halloween Graveyard Dirt Cups are a fun and spooky treat that's perfect for celebrating the season. They combine creamy chocolate pudding with crunchy cookie crumbs, topped with gummy worms and…
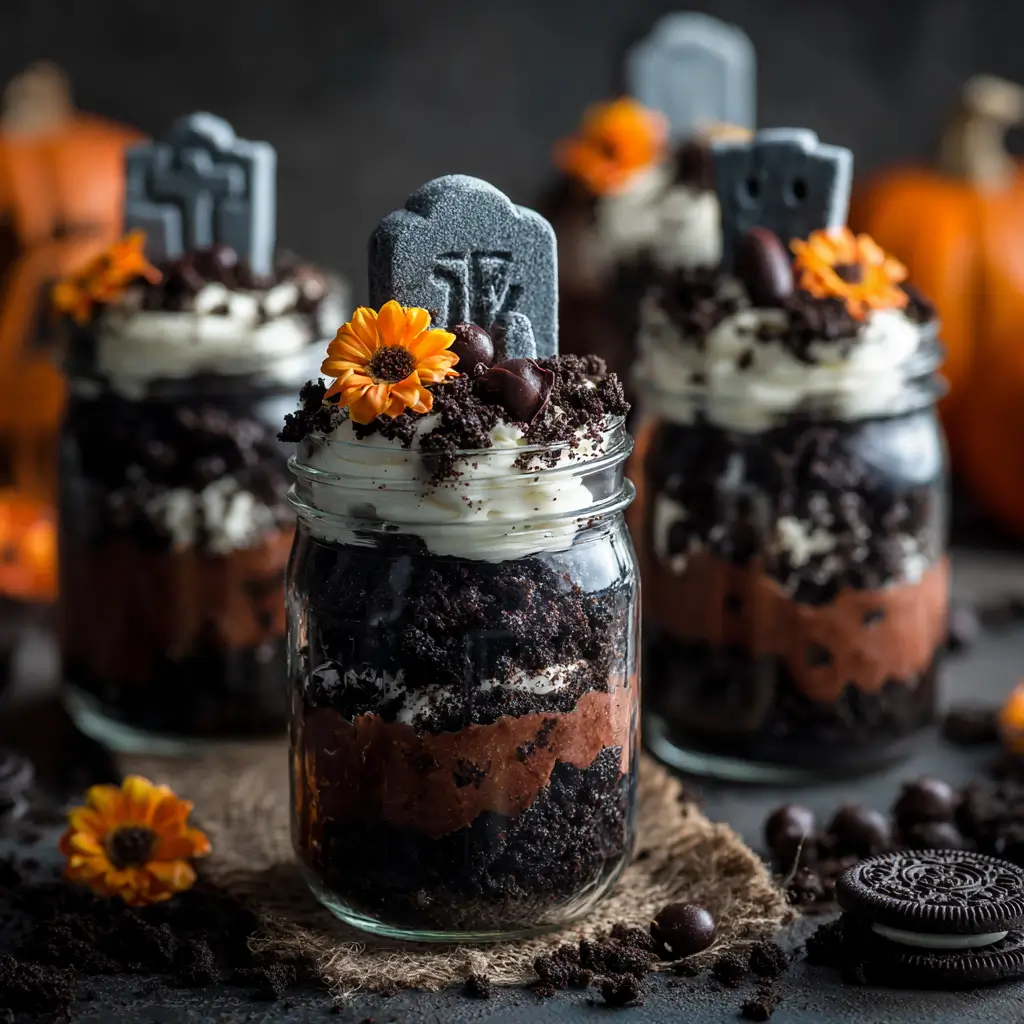
Tip: save now, cook later.Halloween Graveyard Dirt Cups are a fun and spooky treat that’s perfect for celebrating the season. They combine creamy chocolate pudding with crunchy cookie crumbs, topped with gummy worms and edible tombstones to create a mini edible graveyard. The mix of smooth, crunchy, and chewy textures makes every bite interesting and delicious.
I love making these cups for Halloween parties because they are easy to put together and always a big hit with kids and adults alike. My favorite part is creating little tombstones with cookies or candy and arranging gummy worms so they look like they’re crawling out of the dirt. It’s a playful way to get everyone smiling and excited about dessert.
These dirt cups are perfect to serve in clear cups or small bowls so you can see all the layers. I often add a little more cookie crumbs on top for extra crunch, and it’s fun watching guests dig in with their spoons. They’re a great combo of sweet and creepy that really sets the mood for Halloween celebrations.
Key Ingredients & Substitutions
Chocolate sandwich cookies: These create the “dirt” and add crunch. Oreo cookies work best for their intense chocolate flavor. If you’re avoiding gluten, try gluten-free chocolate cookies or crushed chocolate graham crackers.
Instant pudding mixes: Chocolate and vanilla flavors offer nice contrast. You can make pudding from scratch if you prefer homemade, but instant is quick and easy.
Heavy cream: Whipping the cream adds lightness to the vanilla pudding. If you want a lighter option, use whipped topping (like Cool Whip).
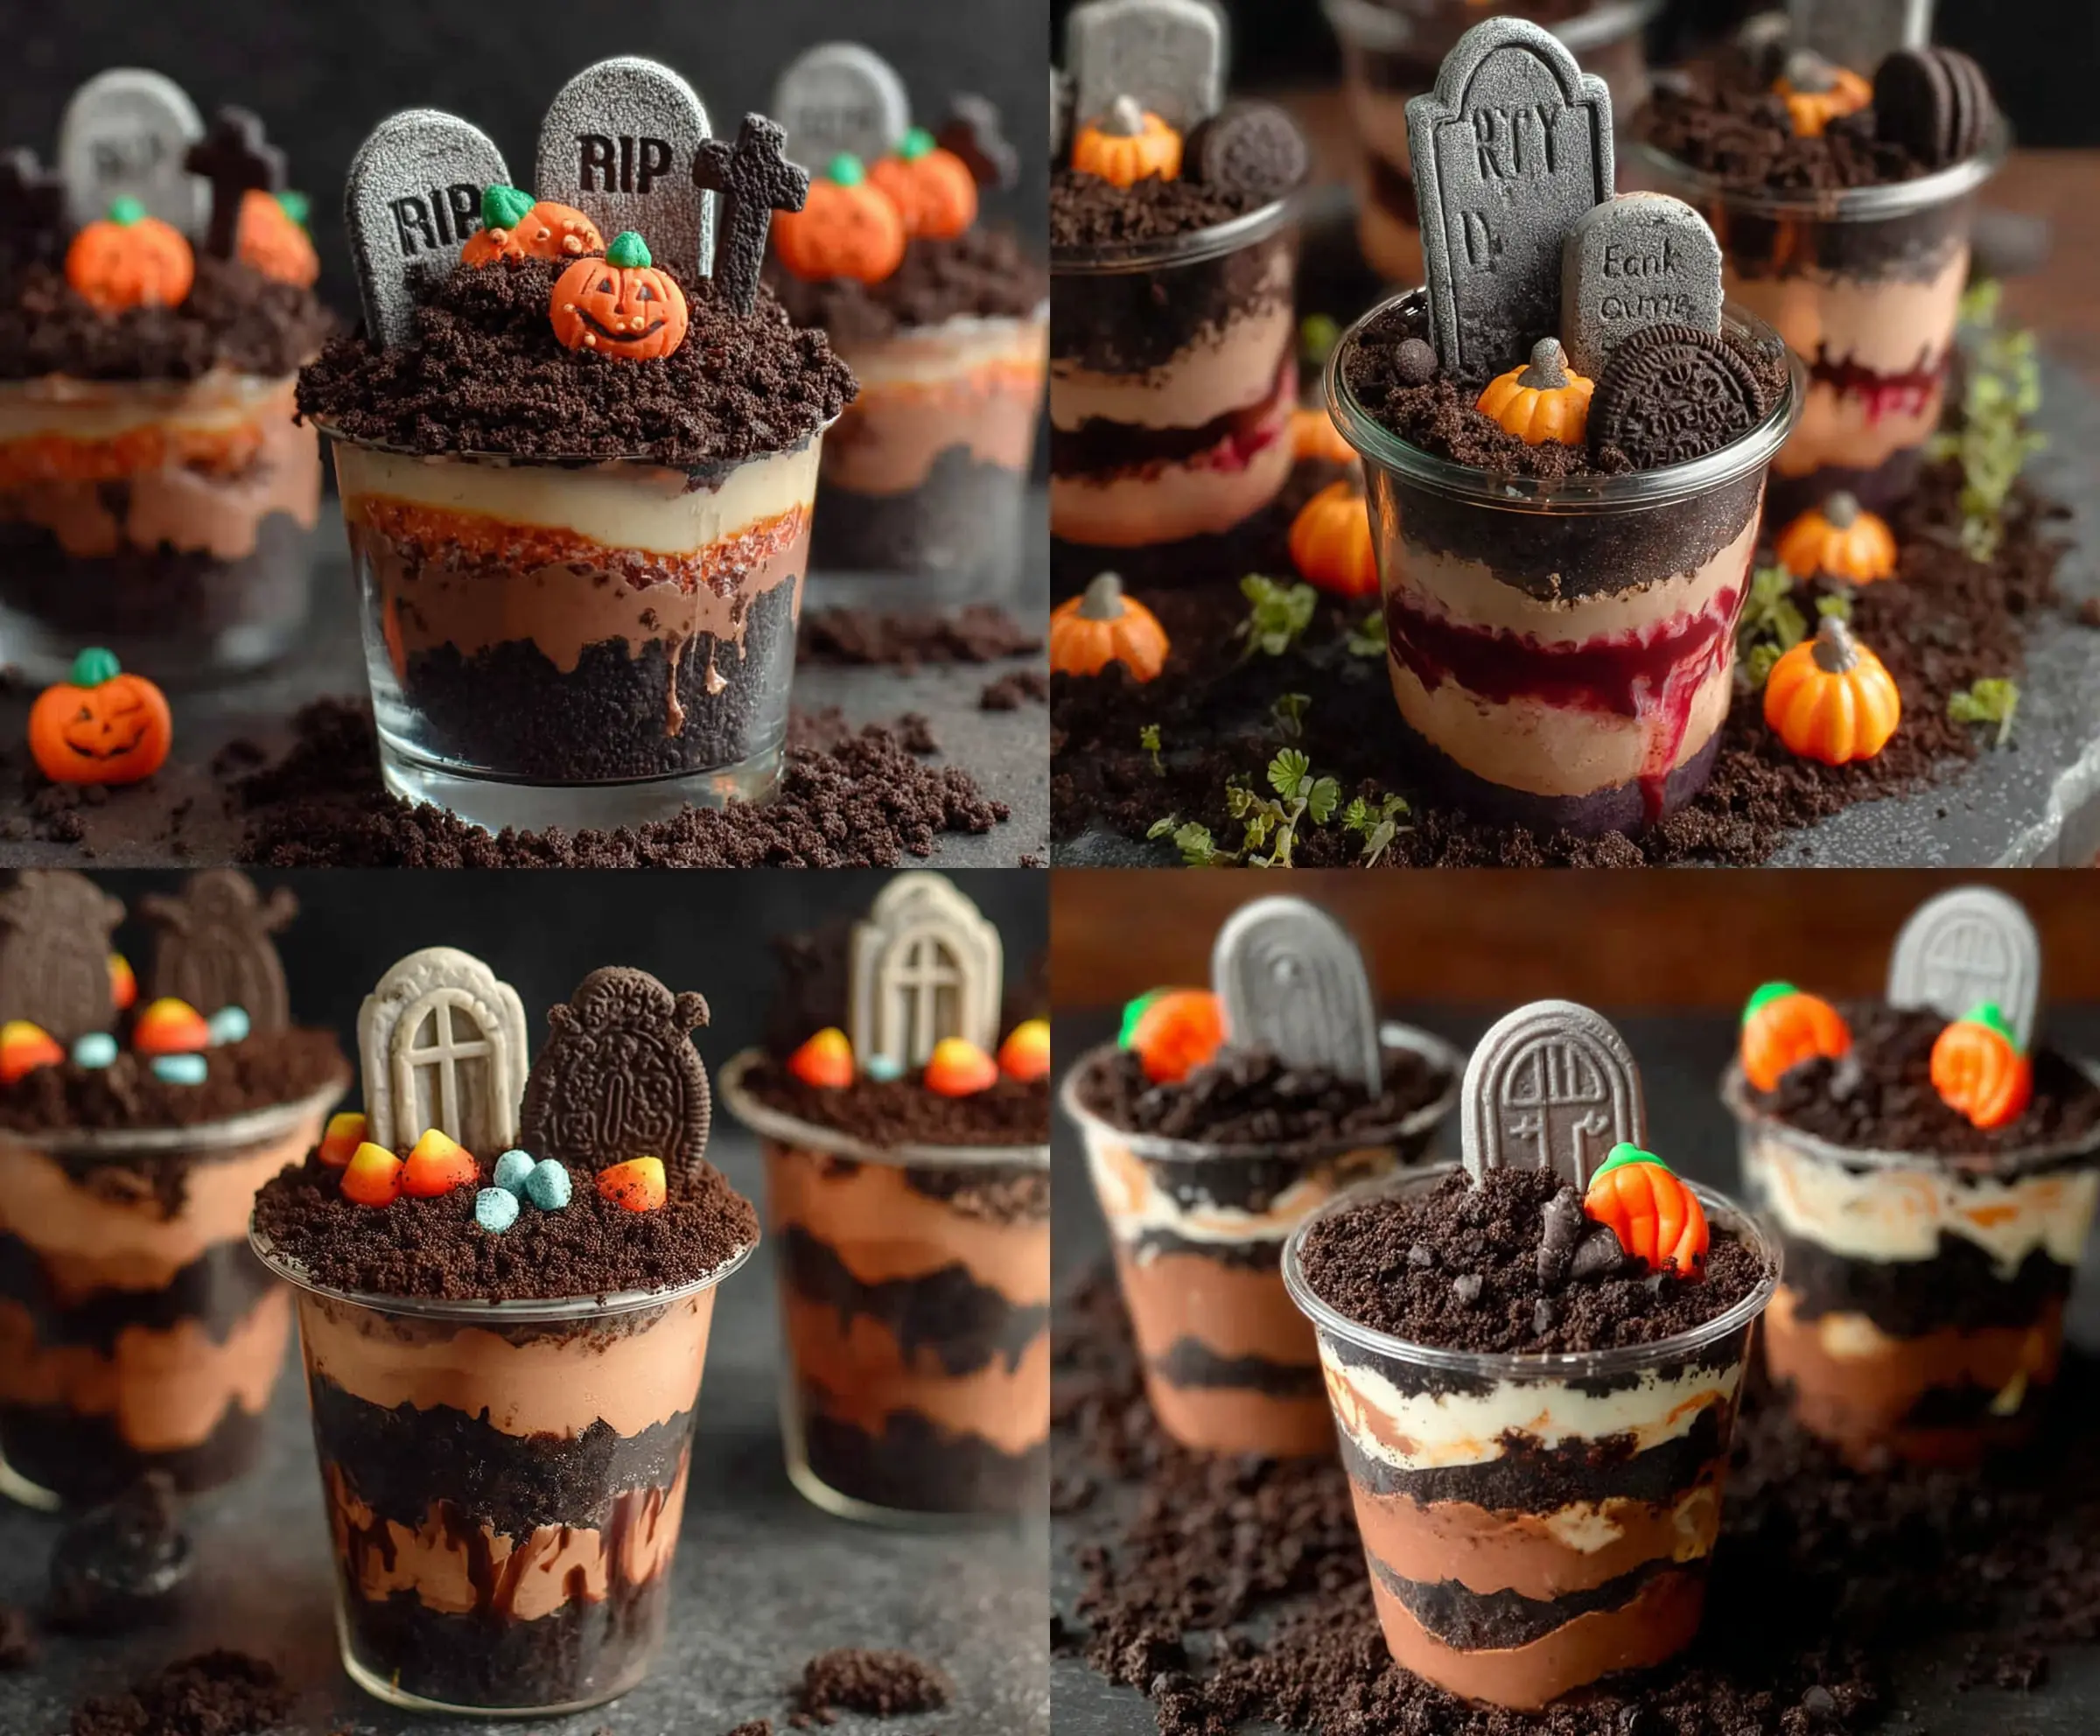
Raspberry or strawberry jam: This adds a “bloody” look and a fruity tang. It’s optional, but it gives the cups a fun Halloween twist. You can swap with any red fruit jam or skip it entirely.
Decorations: Candy tombstones, pumpkins, and candy corn bring the graveyard theme to life. If you don’t have these, use chocolate chips, gummy worms, or simply crushed cookies for a spooky feel.
How Do You Make the Layers Look Neat and Tidy?
Layering your dirt cups makes them more fun and eye-catching. Here’s how to keep your layers clean and defined:
- Use clear cups so you can see the dirt and pudding layers clearly.
- Spoon carefully: Gently spoon pudding and crumbs into the cup, avoiding the sides to keep layers distinct.
- Layer thickness: Try to keep each layer about the same thickness for balance.
- Chill between layers (optional): Put your cups in the fridge for a few minutes after adding a layer to firm them up before adding the next one.
- Add decorations last: Place tombstones and other candy on top just before serving to keep them looking fresh.
Taking a little extra time with layering creates an impressive dessert that looks just as good as it tastes!
Equipment You’ll Need
- Clear serving cups – These show off the fun layers of pudding and cookie crumbs perfectly.
- Mixing bowls – You’ll need a couple to prepare the different puddings and whip the cream separately.
- Whisk – Helps you mix pudding packets smoothly without lumps.
- Electric mixer or hand whisk – Essential for whipping the heavy cream to soft peaks.
- Spoons or small spatulas – Great for layering pudding and crumbs neatly into cups.
- Food processor or plastic bag & rolling pin – Use either to crush cookies finely for the “dirt” texture.
Flavor Variations & Add-Ins
- Use peanut butter or butterscotch pudding instead of chocolate for a nutty or caramel twist that adds warmth.
- Add chopped nuts or toffee bits between layers for extra crunch and a little salt contrast.
- Swap gummy worms for candy eyeballs or chocolate bones to mix up the creepy decorations.
- Stir a pinch of cinnamon or chili powder into the cookie crumbs to add subtle spice and depth.
Halloween Graveyard Dirt Cups
Ingredients You’ll Need:
Dirt & Layers:
- 4 cups chocolate sandwich cookies (like Oreos), finely crushed (for “dirt”)
- 2 cups milk
- 2 packets (3.4 oz each) instant chocolate pudding mix
- 1 packet (3.4 oz) instant vanilla pudding mix
- 1 cup heavy cream
- 2 tbsp powdered sugar
- 1 tsp vanilla extract
Optional Bloody Layer:
- 1 cup raspberry or strawberry jam
Decorations:
- Candy tombstones (edible candy or cookie tombstones with “RIP”)
- Candy pumpkins (marzipan or fondant pumpkins)
- Candy corn
- Small chocolate crosses or chocolate chips
Time You’ll Need
This recipe takes about 15 minutes to prepare and assemble. Allow at least 1 hour chilling time in the refrigerator to set the layers well before serving.
Step-by-Step Instructions:
1. Prepare the Puddings
In a large bowl, whisk together the chocolate pudding mixes with 2 cups cold milk until thick and smooth, about 2 minutes. In a separate bowl, whisk the vanilla pudding mix with 2 cups cold milk. Chill both puddings in the refrigerator for at least 5 minutes.
2. Whip the Cream and Lighten Vanilla Pudding
In a chilled bowl, whip the heavy cream with powdered sugar and vanilla extract until stiff peaks form. Gently fold half of this whipped cream into the vanilla pudding to give it a light, creamy texture.
3. Prepare the Cookie Crumbs
Reserve about 3 cups of your finely crushed cookies for layering and decorating. Keep extra crumbs for topping the cups.
4. Assemble the Layers
Spoon a layer of cookie crumbs into the bottom of each clear cup to create the base “dirt” layer. Next, add a layer of chocolate pudding, followed by the lightened vanilla pudding.
5. Add Optional “Bloody” Jam Layer
If you like, add a thin drizzle or layer of raspberry or strawberry jam over the vanilla pudding for a bloodied graveyard effect.
6. Repeat Layers and Finish
Continue with another cookie crumb layer, chocolate pudding, and vanilla pudding until the cups are almost full. Top each cup generously with cookie crumbs to resemble dirt.
7. Decorate & Serve
Stick candy tombstones, pumpkins, candy corn, and chocolate crosses into the cookie crumb topping. Chill the cups for at least 1 hour so they set nicely. Serve cold with spoons and enjoy digging into your spooky treat!
Can I Use Homemade Pudding Instead of Instant Mix?
Absolutely! Homemade pudding works great and adds a rich, fresh flavor. Just prepare it according to your favorite recipe, then chill until thick before layering.
How Long Can I Store These Dirt Cups?
Store the dirt cups covered in the refrigerator for up to 3 days. Keep decorations like candy tombstones separate until just before serving to keep them looking their best.
Can I Make These Ahead of Time?
Yes! These are perfect for making a few hours or even a day ahead. Just assemble the layers and chill. Add the decorations right before serving for the freshest look.
What Can I Substitute for Candy Tombstones?
If you can’t find candy tombstones, use cookies shaped like tombstones, chocolate bars, or even print paper tombstone cutouts on toothpicks for a fun DIY decoration.