Homemade Peanut Butter Cups
Homemade Peanut Butter Cups are a classic treat that brings together the creamy richness of peanut butter and the smooth sweetness of chocolate. They’re the perfect mix of salty and…
Tip: save now, cook later.Homemade Peanut Butter Cups are a classic treat that brings together the creamy richness of peanut butter and the smooth sweetness of chocolate. They’re the perfect mix of salty and sweet with a satisfying crunch from just the right amount of peanut butter. Making them at home means you can tweak the flavors and ingredients to suit your own taste, whether you like them more chocolatey or extra nutty.
I love making these peanut butter cups because the process is fun and surprisingly simple, plus the end result feels like a fancy gift you made yourself. One tip I always follow is to chill the peanut butter filling before coating it in chocolate — this helps everything set nicely and stay together when you bite in. It’s a small step that makes a big difference, trust me!
Whenever I bring these to a party or share them with friends, they always disappear fast. I think part of the charm is how nostalgic they are; they remind me of childhood snacks but with a homemade twist that makes them feel extra special. I like to keep a few in the fridge for when I need a little pick-me-up during the day — a perfect sweet moment without any fuss.
Key Ingredients & Substitutions
Peanut Butter: Creamy peanut butter works best for a smooth, creamy filling. Natural peanut butter is great but sometimes a little oil separates—just give it a good stir before measuring. You can swap for almond or cashew butter for a different nutty flavor.
Butter: Unsalted butter adds richness and helps the filling set nicely. If you’re dairy-free, try using coconut oil or a vegan butter alternative to keep the texture creamy.
Powdered Sugar: This sweetens and thickens the filling. If you want a less sweet treat, reduce the amount slightly. For a natural option, you could try coconut sugar, but it might change the texture a bit.
Chocolate Chips: Semi-sweet works well to balance the sweetness of the peanut butter, but you can use dark or milk chocolate based on your preference. If you prefer dairy-free, look for vegan chocolate chips or use baking chocolate bars broken into pieces.
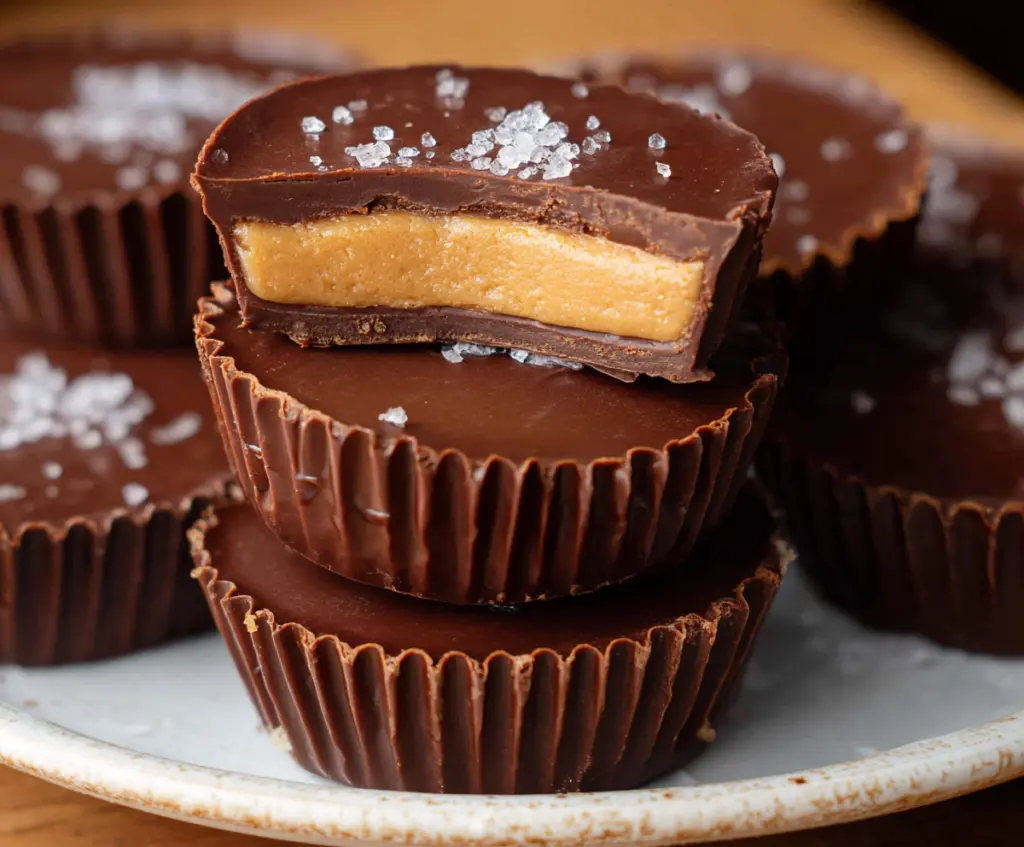
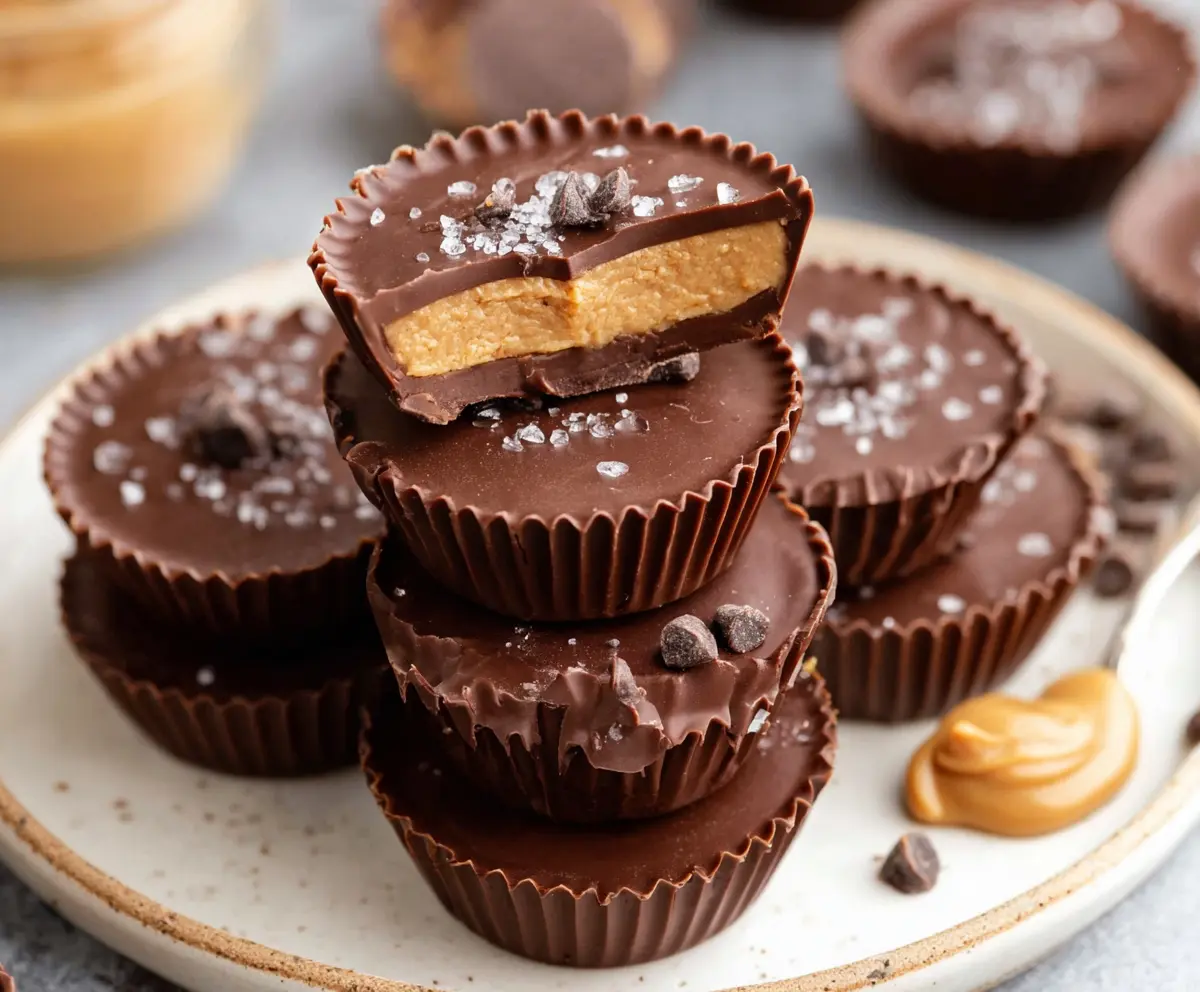
Flaky Sea Salt: This isn’t just for decoration—sprinkling a little on top enhances the flavors and provides a nice contrast to the sweet chocolate and peanut butter. If you don’t have flaky salt, a small pinch of regular salt works too.
How Do You Get the Perfect Chocolate and Peanut Butter Layers to Set Nicely?
Chilling and layering are key to getting neat, delicious peanut butter cups that hold together.
- Make sure your peanut butter filling is cold and firm before adding it. Refrigerate it for 15-20 minutes after mixing so it thickens well.
- After pouring the chocolate base in the liners, chill them for about 10 minutes until they set solid. This keeps the layers from blending together.
- Once the peanut butter layer is added, cover it with melted chocolate and smooth the top quickly before the chocolate hardens.
- Refrigerate the finished cups for at least an hour so everything firms up perfectly.
Following these steps helps each layer stay distinct and makes for a satisfying bite every time. Patience at the chilling steps is totally worth it for the clean look and great texture!
Equipment You’ll Need
- Muffin tin – keeps your peanut butter cups shaped and neat while setting.
- Paper cupcake liners – make it easy to remove cups without sticking.
- Microwave-safe bowl – perfect for melting chocolate smoothly in short bursts.
- Spoon or small spatula – great for spreading chocolate and scooping peanut butter filling.
- Mixing bowl – to combine your peanut butter filling ingredients evenly.
- Refrigerator – essential for chilling and setting the layers properly.
Flavor Variations & Add-Ins
- Swap peanut butter for almond or cashew butter to try a different nutty flavor.
- Add mini chocolate chips or chopped nuts inside the peanut butter layer for extra texture.
- Mix a pinch of cinnamon or a drop of peppermint extract into the filling to add a tasty twist.
- Top with crushed pretzels or toffee bits before chilling to combine salty crunch with sweet chocolate.
How to Make Homemade Peanut Butter Cups?
Ingredients You’ll Need:
For The Peanut Butter Filling:
- 1 cup creamy peanut butter (natural or regular)
- 1/4 cup unsalted butter, softened
- 1/4 cup powdered sugar, sifted
- 1/2 teaspoon vanilla extract
For The Chocolate Coating:
- 2 cups semi-sweet or dark chocolate chips
- 1 teaspoon coconut oil (optional, for smoother chocolate)
- Flaky sea salt, for sprinkling on top
How Much Time Will You Need?
This recipe will take about 10 minutes for preparation and mixing, plus roughly 1 hour for chilling the peanut butter cups to set completely. Most of the time is hands-off while the cups firm up in the fridge, making this an easy and rewarding treat to prepare.
Step-by-Step Instructions:
1. Prepare Your Cups:
Line a standard muffin tin with paper cupcake liners. This will help your peanut butter cups hold their shape and make them easy to remove once they’re ready.
2. Make the Peanut Butter Filling:
Combine the peanut butter, softened butter, powdered sugar, and vanilla extract in a medium bowl. Stir until smooth and well blended. Pop this mixture into the fridge for 15-20 minutes to let it firm up a bit. This helps the filling hold together better in your cups.
3. Melt the Chocolate:
In a microwave-safe bowl, melt the chocolate chips with the coconut oil (if you’re using it) in 30-second increments. Stir after each interval until the chocolate is completely smooth and melted.
4. Create the Chocolate Base:
Spoon about one tablespoon of melted chocolate into the bottom of each lined muffin cup. Use the back of your spoon to spread it evenly. Then, chill the muffin tin in the fridge for 10 minutes so this bottom layer becomes firm.
5. Add the Peanut Butter Layer:
Take the peanut butter filling out of the fridge. Scoop about a tablespoon and place it onto the solid chocolate base in each cup. Gently flatten the layer, making sure it stays thick and neat.
6. Cover with More Chocolate:
Pour or spoon more melted chocolate over the peanut butter filling, covering it completely. Smooth the top to create a nice even surface.
7. Add a Finishing Touch:
Sprinkle a small pinch of flaky sea salt on top of each peanut butter cup. This adds a lovely salty crunch that complements the sweet and creamy layers beautifully.
8. Chill Until Set:
Place your peanut butter cups in the fridge for at least 1 hour, or until they are fully firm and set.
9. Serve and Store:
Remove the peanut butter cups from the liners and enjoy them chilled or at room temperature. Store any leftovers in an airtight container in the refrigerator to keep them fresh.
Can I Use Natural Peanut Butter in This Recipe?
Yes, you can! Just make sure to stir natural peanut butter well before measuring, as it tends to separate. The texture might be slightly softer, so chilling the filling a bit longer can help it firm up nicely.
How Should I Store Homemade Peanut Butter Cups?
Store them in an airtight container in the refrigerator for up to 1 week. If you want to keep them longer, you can freeze them for up to 2 months—just thaw in the fridge before enjoying.
Can I Substitute the Chocolate?
Absolutely! You can use milk chocolate, dark chocolate, or even vegan chocolate chips depending on your preference or dietary needs. Just melt and work with them the same way.
Is There a Way to Make These Ahead of Time?
Yes! Prepare the peanut butter cups and store them in the fridge until you’re ready to serve. They keep well and can be made a day or two in advance for convenience.