No Bake Oreo Icebox Cake
No Bake Oreo Icebox Cake is a simple and delicious treat that’s perfect for any occasion. It’s made with layers of crunchy Oreo cookies and creamy whipped filling that soften…
Tip: save now, cook later.No Bake Oreo Icebox Cake is a simple and delicious treat that’s perfect for any occasion. It’s made with layers of crunchy Oreo cookies and creamy whipped filling that soften into a cake-like texture as it chills in the fridge. This dessert is refreshingly cool and has just the right balance of chocolatey crunch and sweet creaminess.
I love making this cake when I need something quick but still impressive. Since there’s no baking involved, it’s almost foolproof, and kids love helping layer the cookies and cream. One tip I always share is to let it chill overnight if you can—it makes the layers meld together perfectly and makes it even tastier the next day.
My favorite way to serve this is straight from the fridge, maybe with a scoop of vanilla ice cream or a drizzle of chocolate sauce on top for an extra special touch. It’s a great dessert to bring to parties or just to enjoy on a warm day when you want something cool and sweet without turning on the oven.
Key Ingredients & Substitutions
Oreo Cookies: These give the cake its signature crunch and chocolate flavor. If you prefer, you can try gluten-free Oreos or chocolate wafer cookies as a substitute.
Heavy Whipping Cream: Whipping cream adds lightness to the filling. For a lighter version, try whipped coconut cream, making it suitable for dairy-free diets.
Cream Cheese: This adds richness and creaminess. You could replace it with mascarpone or Greek yogurt for a tangier taste, but cream cheese works best for texture.
Powdered Sugar & Vanilla Extract: These sweeten and flavor the cream. You can swap powdered sugar with a natural sweetener like powdered erythritol if you want less sugar.
Chocolate Pudding: This layer adds a smooth chocolate finish. Use homemade pudding or a dairy-free vegan pudding mix to fit your dietary needs.
How Do You Get the Cream So Fluffy and Smooth?
Whipping the cream properly is key to the cake’s fluffy texture. Here’s how to do it right:
- Make sure the heavy cream is very cold—it whips better when chilled.
- Use a chill bowl and beaters if you can, for quicker whipping.
- Whip the cream until soft peaks form, meaning when you lift the whisk, the peaks hold but curl over slightly.
- When folding the cream into the cream cheese, do it gently to keep the mixture light and airy.
Taking your time here ensures your filling is both light and sturdy enough to hold the Oreo layers well.
Equipment You’ll Need
- 9×13 inch baking dish – perfect size for layering and chilling the cake evenly.
- Mixing bowls – you’ll need at least two for whipping cream and blending cream cheese.
- Electric mixer or hand mixer – makes whipping cream and cream cheese smooth and easy.
- Rubber spatula – great for folding whipped cream gently without deflating it.
- Plastic wrap – helps cover the cake tightly while it chills in the fridge.
Flavor Variations & Add-Ins
- Swap Oreos for chocolate chip cookies for a less intense chocolate flavor.
- Add a layer of fresh strawberries for a fruity, fresh contrast to the creaminess.
- Mix in some crushed peppermint candies during winter holidays for a festive touch.
- Use peanut butter filling or add a drizzle of peanut butter sauce for a rich, nutty twist.
No Bake Oreo Icebox Cake
Ingredients You’ll Need:
Main Ingredients:
- 36 Oreo cookies (about 2 packages)
- 3 cups heavy whipping cream
- 8 oz cream cheese, softened
- 1 cup powdered sugar
- 2 tsp vanilla extract
- 1 cup chocolate pudding (prepared or instant)
- Optional garnish: crushed Oreos or mini Oreos
How Much Time Will You Need?
This easy dessert takes about 20 minutes to prepare. Then, you’ll need to refrigerate it for at least 6 hours, or overnight if possible, so the Oreo cookies soften and the layers meld into a creamy, cake-like texture. The longer it chills, the better it tastes!
Step-by-Step Instructions:
1. Whip the Cream:
In a large mixing bowl, use an electric mixer to whip the heavy cream until soft peaks form. This means the cream holds its shape but is still light and fluffy. Set it aside for now.
2. Mix the Cream Cheese Filling:
In another bowl, beat together the softened cream cheese, powdered sugar, and vanilla extract until smooth and creamy.
3. Combine the Fillings:
Gently fold the whipped cream into the cream cheese mixture. Be careful when mixing so you keep all that light, fluffy texture. Now you have your creamy Oreo filling ready!
4. Assemble the Cake:
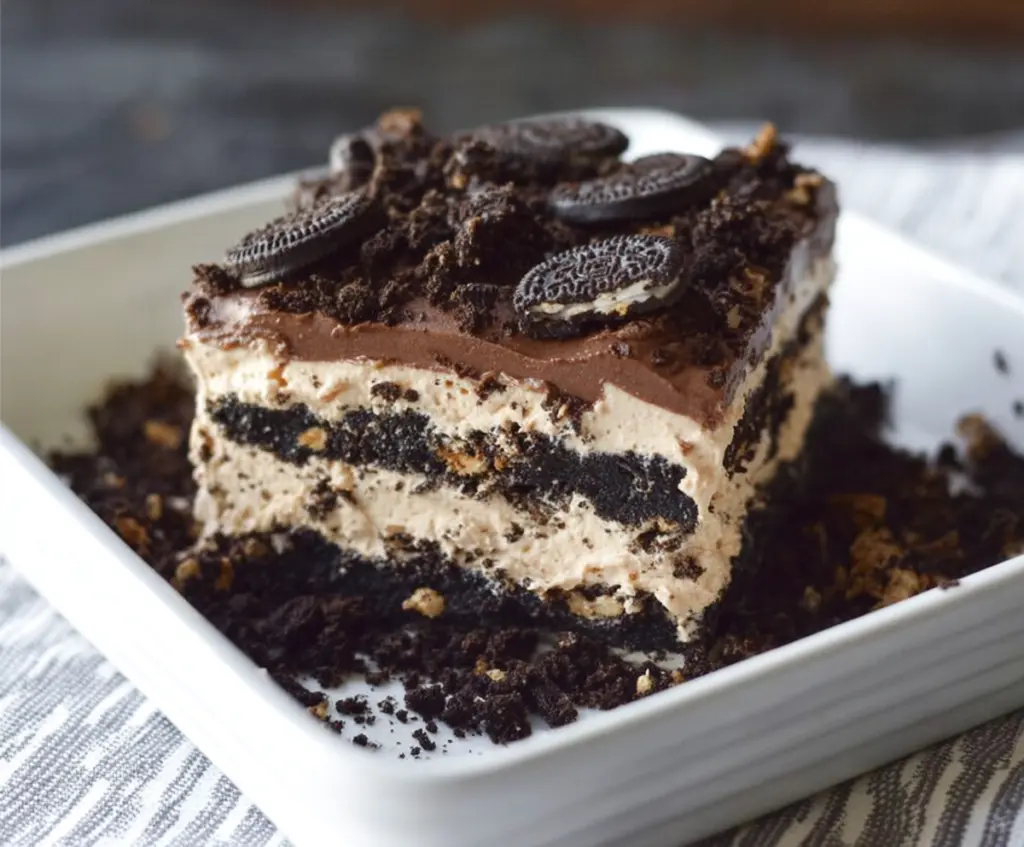
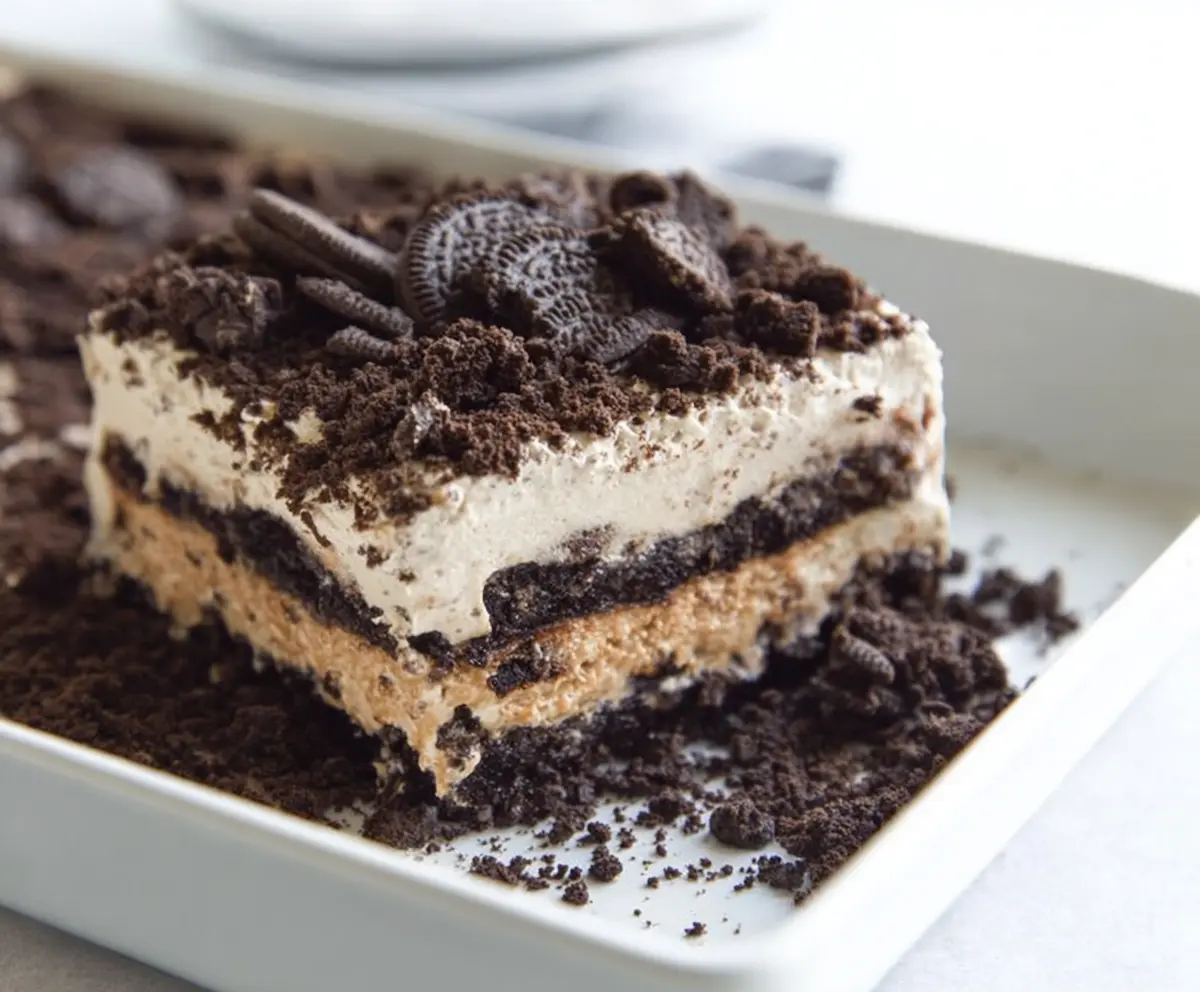
Spread a thin layer of the cream filling on the bottom of a 9×13 inch dish. Next, add a single layer of Oreo cookies over the cream. Don’t worry if some cookies break — just use pieces to cover the bottom evenly.
5. Layer and Finish:
Spread another layer of the cream filling over the Oreos. Then add another layer of Oreos, followed by spreading the chocolate pudding over the cookie layer. Finally, top with the remaining cream filling.
6. Garnish and Chill:
Sprinkle crushed Oreos or mini Oreos on top for a fun finish. Cover the dish tightly with plastic wrap, then refrigerate for at least 6 hours or overnight. This chilling step is important for softening the cookies and blending all the flavors together.
7. Serve and Enjoy:
When ready, slice the cake into squares and serve chilled. Enjoy the creamy, chocolatey goodness!
Can I Use Frozen Oreos for This Recipe?
It’s best to use Oreos at room temperature for even softening, but if you have frozen cookies, just let them thaw completely before assembling the cake.
Can I Make This Cake Ahead of Time?
Absolutely! In fact, making it a day ahead is ideal. Chill it overnight to let the cookies soften fully and the flavors meld beautifully.
How Should I Store Leftovers?
Keep any leftovers covered tightly in the refrigerator. They stay fresh for up to 3 days—just make sure to keep it cold to maintain the creamy texture.
Can I Substitute the Cream Cheese?
You can try mascarpone for a milder flavor or Greek yogurt for tanginess, but cream cheese provides the best texture and richness for this cake.