Rustic No-Knead Rosemary Garlic Bread
Rustic No-Knead Rosemary Garlic Bread is a wonderfully simple loaf that fills your kitchen with the warm, inviting smell of fresh herbs and garlic. With a crust that’s golden and…
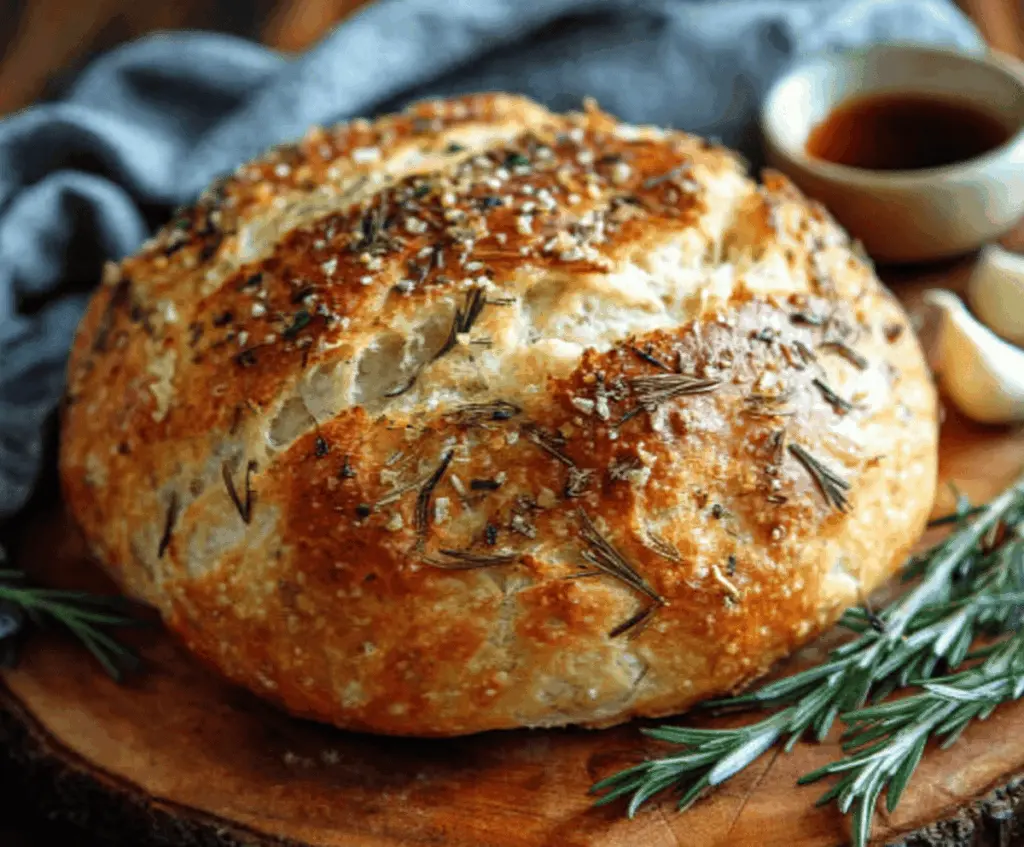
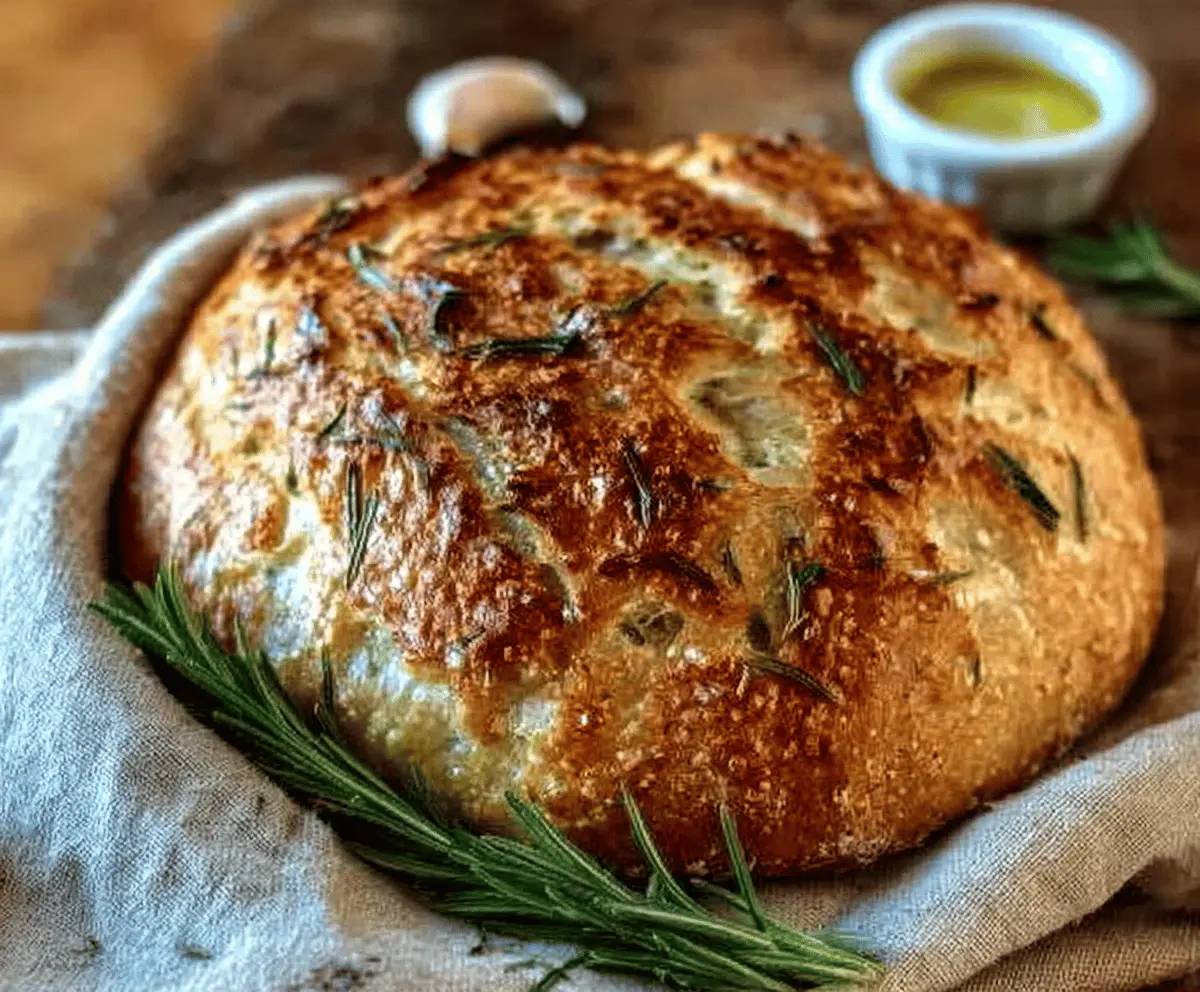
Tip: save now, cook later.Rustic No-Knead Rosemary Garlic Bread is a wonderfully simple loaf that fills your kitchen with the warm, inviting smell of fresh herbs and garlic. With a crust that’s golden and crisp and a soft, tender inside, this bread has all the charm of a traditional homemade loaf without the hassle of kneading. The rosemary adds just the right touch of earthiness, making every bite feel fresh and comforting.
I love making this bread because it’s so easy to prepare and feels like a real treat with minimal effort. Just mix, let the dough rest, and pop it in the oven. There’s something really satisfying about pulling a rustic loaf out of the oven that looks and tastes like it came from a bakery. I sometimes tuck in a bit more garlic or sprinkle extra rosemary on top before baking to give it a little personal twist.
This bread goes perfectly with soups, salads, or just dipped in olive oil. I often serve it alongside a big bowl of tomato soup or alongside a simple cheese plate when friends come over. It’s one of those breads that makes any meal feel a bit cozier and more special. Plus, leftovers toast up beautifully the next day for an easy snack!
Key Ingredients & Substitutions
Flour: All-purpose flour works perfectly to give the bread structure and a soft crumb. If you want a nuttier flavor and denser texture, try bread flour or mix in some whole wheat flour. Just note, whole wheat may need more water.
Instant Yeast: It’s great for no-knead recipes because it activates quickly. You can use active dry yeast but dissolve it in water first. No yeast? Try a sourdough starter, but preparation will take longer.
Rosemary: Fresh rosemary brings a bright, piney flavor. If fresh isn’t available, dried rosemary can work but use less since it’s more concentrated. You could also try thyme or oregano for a different twist.
Garlic: Fresh garlic really makes this bread stand out. If you prefer milder garlic notes, roast it first or use roasted garlic paste.
Olive Oil: Adds moisture and richness to the dough and crust. You can substitute with another neutral oil like vegetable or avocado oil but olive oil gives that signature flavor.
How Do You Get That Perfect Crust and Soft Inside Without Kneading?
The secret to this bread’s texture is the no-knead method combined with a long rise and high heat baking in a covered Dutch oven which traps steam.
- Mix the dough gently until just combined—don’t overwork it. This creates a more open crumb.
- Let the dough rise for 12-18 hours at room temperature. This long fermentation develops flavor and gluten naturally without kneading.
- Shape the dough lightly and give it a short rest. This helps it relax and keeps bubbles intact.
- Heat your Dutch oven in the oven before adding the dough. The hot pot creates steam, which crisps the crust beautifully.
- Bake covered first, then uncovered near the end. This two-step baking lets the bread rise fully and the crust brown deeply.
Patience is key! Avoid rushing the fermentation, and the result will be a crust that cracks with a crunch and a soft, chewy crumb inside.
Equipment You’ll Need
- Large mixing bowl – big enough to hold your dough as it rises and bubbles over time.
- Wooden spoon or spatula – perfect for mixing sticky, shaggy dough without getting your hands messy.
- Kitchen towel or plastic wrap – keeps your dough covered and cozy while it rises.
- Dutch oven with lid – essential for creating steam to get that crispy, golden crust.
- Cooling rack – lets your bread cool evenly so the crust stays crisp and the inside sets.
Flavor Variations & Add-Ins
- Add sun-dried tomatoes and chopped basil for a fresh, Italian twist that pairs well with olive oil dips.
- Mix in grated Parmesan or Pecorino cheese for a richer, salty flavor that melts into the crust.
- Swap rosemary for fresh thyme or sage to change the herb aroma, especially nice in fall or winter.
- Include toasted pine nuts or chopped olives in the dough for extra texture and a Mediterranean touch.
Rustic No-Knead Rosemary Garlic Bread
Ingredients You’ll Need:
For The Bread:
- 3 cups all-purpose flour
- ¼ teaspoon instant yeast
- 1 ¼ teaspoons salt
- 1 ½ cups warm water (about 110°F/43°C)
- 2 tablespoons olive oil (plus more for brushing)
- 3 cloves garlic, minced or finely chopped
- 2 tablespoons fresh rosemary, chopped (plus extra for topping)
- Coarse sea salt or flaky salt for sprinkling on top
How Much Time Will You Need?
This bread requires about 15 minutes to prepare, 12 to 18 hours for the dough to rise, and about 50 minutes to bake. The long rise time helps develop the bread’s wonderful flavor and texture without any kneading.
Step-by-Step Instructions:
1. Mixing The Dough:
In a large mixing bowl, whisk together the flour, instant yeast, and salt. Pour in the warm water and olive oil. Use a wooden spoon or spatula to mix until you get a shaggy dough where all the flour is moistened. Stir in the minced garlic and chopped rosemary evenly throughout the dough.
2. First Rise:
Cover the bowl with plastic wrap or a clean kitchen towel. Let the dough sit at room temperature for 12 to 18 hours. You’ll know it’s ready when it’s bubbly and has doubled in size.
3. Shaping The Dough:
Turn the dough onto a floured surface. Gently fold it a few times to shape into a rough ball. Cover loosely with a kitchen towel and let it rest for about 30 minutes.
4. Baking Setup:
While the dough rests, preheat your oven to 450°F (230°C). Place a heavy, oven-safe Dutch oven with its lid inside to heat up. Be careful removing this—it will be very hot.
5. Baking The Bread:
Lightly oil the bottom of the Dutch oven to prevent sticking. Transfer the dough carefully into it. Brush the top with olive oil and sprinkle additional rosemary and a bit of coarse salt. Cover with the lid and bake for 30 minutes.
6. Finishing The Crust:
Remove the lid and bake for another 15 to 20 minutes until the bread is a deep golden brown and has a crisp crust.
7. Cooling and Serving:
Carefully remove the bread from the Dutch oven and cool it on a wire rack for at least 30 minutes to allow the crumb to set. Slice and serve warm or at room temperature, perfect for dipping or alongside your favorite meals.
Can I Use Active Dry Yeast Instead of Instant Yeast?
Yes, you can! Just dissolve the active dry yeast in the warm water first and let it sit for about 5-10 minutes until bubbly before mixing it with the flour and other ingredients.
How Should I Store Leftover Bread?
Store leftover bread in a paper bag or bread box at room temperature for up to 2 days to maintain the crust’s crispness. For longer storage, wrap tightly and freeze slices for up to 3 months, then toast before eating.
Can I Add More Garlic or Herbs?
Absolutely! Feel free to increase the garlic or rosemary to suit your taste. You can also experiment by adding other herbs like thyme or oregano for different flavor profiles.
Do I Need a Dutch Oven to Bake This Bread?
A Dutch oven is ideal because it traps steam, giving the bread a crispy crust. If you don’t have one, you can bake the dough on a preheated baking stone or sheet and add a pan of hot water in the oven to create steam, but results may vary slightly.