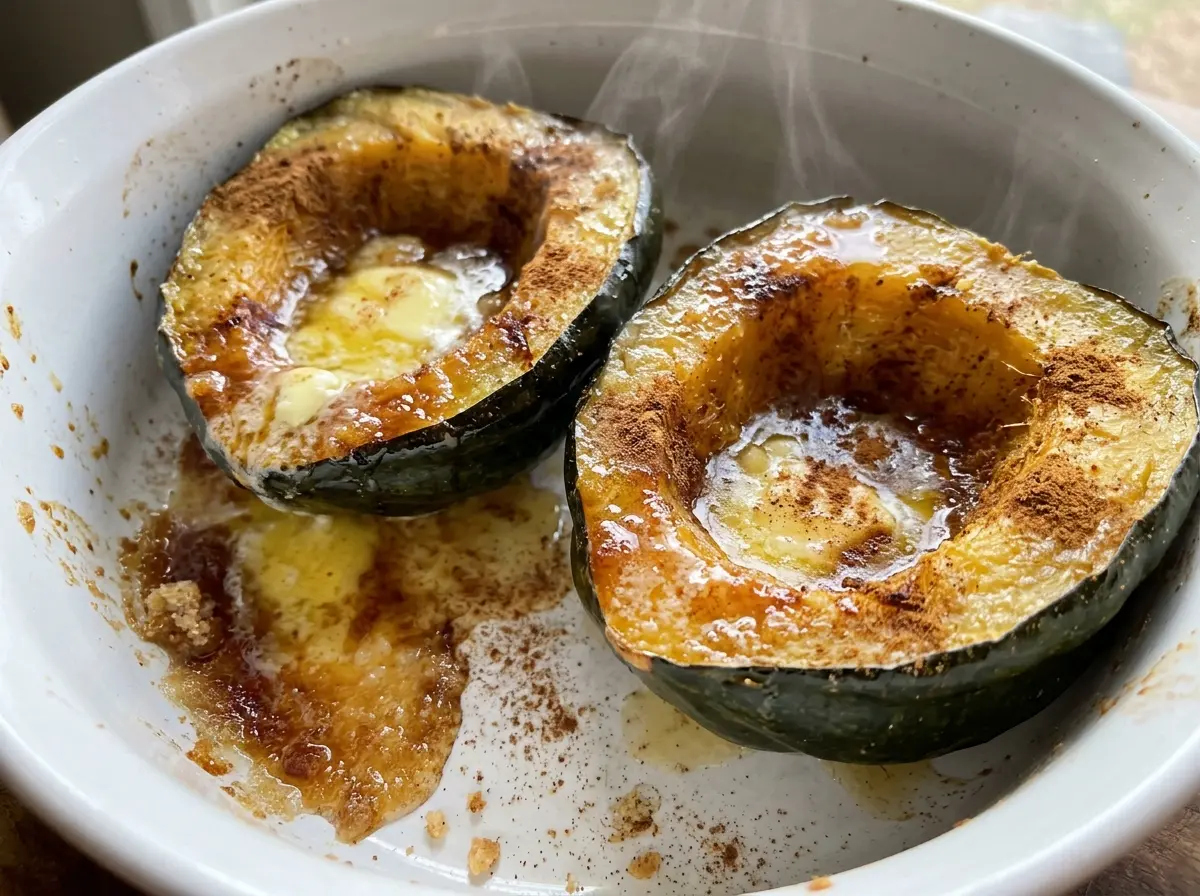
The butter sinks into the hollow of each squash half, and the brown sugar melts into it as the edges turn golden. The first time I made baked acorn squash, I expected the oven to do all the work; what I learned is that a little attention to the cut and the size of the squash makes the difference between tender, evenly seasoned halves and a firm center. These classic baked acorn squash halves are simple, but they give you a generous spoonful of buttery sweetness in every serving.
I cut each squash lengthwise from stem to blossom end, then set the halves cut side up in a baking dish. That broad, natural cavity holds the butter, brown sugar, and salt in place while the flesh softens. Medium squash of about the same size also tend to finish closer together, though the fork test is more useful than watching the clock alone. The result is tender squash with a lightly sweet center and enough savory salt to keep it from tasting like dessert.
Kitchen Note
When you scoop out the seeds, take the loose stringy fibers with them, but don’t dig into the firm flesh. A clean, intact cavity gives the butter and brown sugar a place to sit without leaving thin spots in the squash.
Save these classic baked acorn squash halves for a simple side with tender flesh and a buttery brown sugar center.
Why the Squash Cavity Is the Best Place for the Brown Sugar
Acorn squash has a natural bowl where the seeds sit, and halving it lengthwise turns that bowl into a little pocket for the seasoning. Keeping the halves cut side up means the butter and brown sugar stay with the flesh as they warm, rather than immediately running onto the pan. The 9×13-inch baking dish gives all four halves room to sit in that position while they soften.
The proportions are deliberately restrained. Brown sugar sweetens the squash without burying its earthy flavor, and the kosher salt helps keep the buttery center balanced. Because the ingredients are divided among the four cavities, each half gets its own portion instead of leaving one end plain and another overly sweet. This approach also makes serving straightforward: each person gets a half with the melted mixture right where it belongs.
Size matters more than a perfectly exact timer. Medium squash around the same weight give you similar portions and are more likely to become tender at roughly the same pace. If one half is thicker than the others, don’t assume every piece is ready at once; check the flesh itself rather than relying only on color or the edges.
What the Squash, Butter, and Brown Sugar Each Bring

- Acorn squash — Choose squash that feel firm and heavy for their size, without soft or damaged spots. Medium squash close to the same size make portions that bake at a more similar pace. Their shape is useful here: each half has a cavity that can hold the butter and sugar. Another squash may roast well, but it won’t give you quite the same classic bowl-shaped serving.
- Unsalted butter — Ordinary unsalted butter works well; its job is to melt into the squash and carry the brown sugar across the cavity. Unsalted gives you control over the seasoning alongside the kosher salt. Keep it in pieces so you can divide it among the halves without trying to spread cold butter over the raw flesh.
- Packed brown sugar — Brown sugar brings sweetness and a deeper, molasses-like note than plain sweetness alone. Pack it when measuring so the amount is consistent, and break up any hard clumps before dividing it. If you leave it out, the squash still bakes, but the finished dish loses its sweet, caramel-like center.
- Kosher salt — Salt keeps the butter and sugar from tasting flat and brings out the squash’s own flavor. Use kosher salt for the intended seasoning; different salts have different crystal sizes, so an equal volume of another kind won’t necessarily taste the same.
Cut, Fill, and Bake the Halves Without Losing the Filling
Make Four Stable, Open Halves
Heat the oven to 400°F, then cut each squash in half lengthwise from the stem end to the blossom end. This gives you two broad halves, each with a natural cavity, rather than narrow crosswise rings. Scoop out the seeds and stringy fibers so the center is clear. Keep your knife steady through the tough rind; if the squash shifts on the board, pause and reposition it before continuing.
Divide the Butter and Seasoning Evenly
Arrange the halves cut side up in a 9×13-inch baking dish. Divide the butter pieces, packed brown sugar, and kosher salt among the cavities, keeping the ingredients distributed across all four rather than loading one half more heavily. The butter doesn’t need to be softened or spread over the squash first. As it melts, it mingles with the brown sugar inside each hollow.
Use the Fork Test, Not Color Alone
Bake for 45 to 60 minutes, until a fork pierces the flesh easily. The exact point within that range depends on the squash; thicker flesh can take longer, and a browned rim doesn’t prove the center is tender. Test the thickest part of each half, not just the edge by the skin. Let the squash rest for 5 minutes before serving so the hot halves are easier to handle.
Two Simple Ways to Change the Sweetness or Richness
Leave Out the Brown Sugar for a Less-Sweet Side
Omit the brown sugar and divide the butter and kosher salt among the squash cavities as usual. The squash will bake the same way, but the center will taste more simply buttery and savory rather than sweet. This is a useful adjustment when the rest of the meal already has a sweet element.
Make It Dairy-Free by Omitting the Butter
For a dairy-free version, leave out the butter and keep the brown sugar and salt. The squash will still become tender, though the cavity won’t have the same rich, buttery finish and the sugar won’t melt into a sauce. This is an omission rather than a direct butter replacement, so expect a simpler result.
Storage and Reheating
- Refrigerator: Store cooked squash in an airtight container for up to 4 days. The flesh softens further as it sits, but the halves keep their shape if handled gently.
- Freezer: Freeze cooled portions in an airtight container for up to 3 months. Thaw them in the refrigerator; the texture will be softer after freezing, so the squash is best reheated gently.
- Reheating: Warm a portion in the microwave, loosely covered, until hot throughout. Avoid prolonged heating, which can dry the flesh and make the edges tougher.
Questions That Come Up While Making Baked Acorn Squash
Classic Baked Acorn Squash
Ingredients
Equipment
Method
- Preheat the oven to 400°F.
- Cut each squash in half lengthwise from stem to blossom end, then scoop out the seeds and stringy fibers.
- Set the squash halves cut side up in a 9x13-inch baking dish and divide the butter, brown sugar, and salt among the cavities.
- Bake for 45 to 60 minutes, until the flesh is tender when pierced with a fork.
- Let the squash rest for 5 minutes before serving.