The corn goes into the skillet cold from the freezer, and for a few minutes the butter seems to disappear under all those kernels. Keep it moving now and then, and the corn turns hot and tender before the cream ever hits the pan. That order is what gives this creamy stovetop corn with butter a silky coating instead of a thin, milky puddle.
I like this as a quick side when plain corn needs a little more substance but I don’t want to fuss with a sauce in a separate pan. The butter gives the corn a rich base, while heavy cream simmers down just enough to cling to each kernel. It’s a short stovetop recipe, but letting the corn heat through first makes the finish much more dependable.
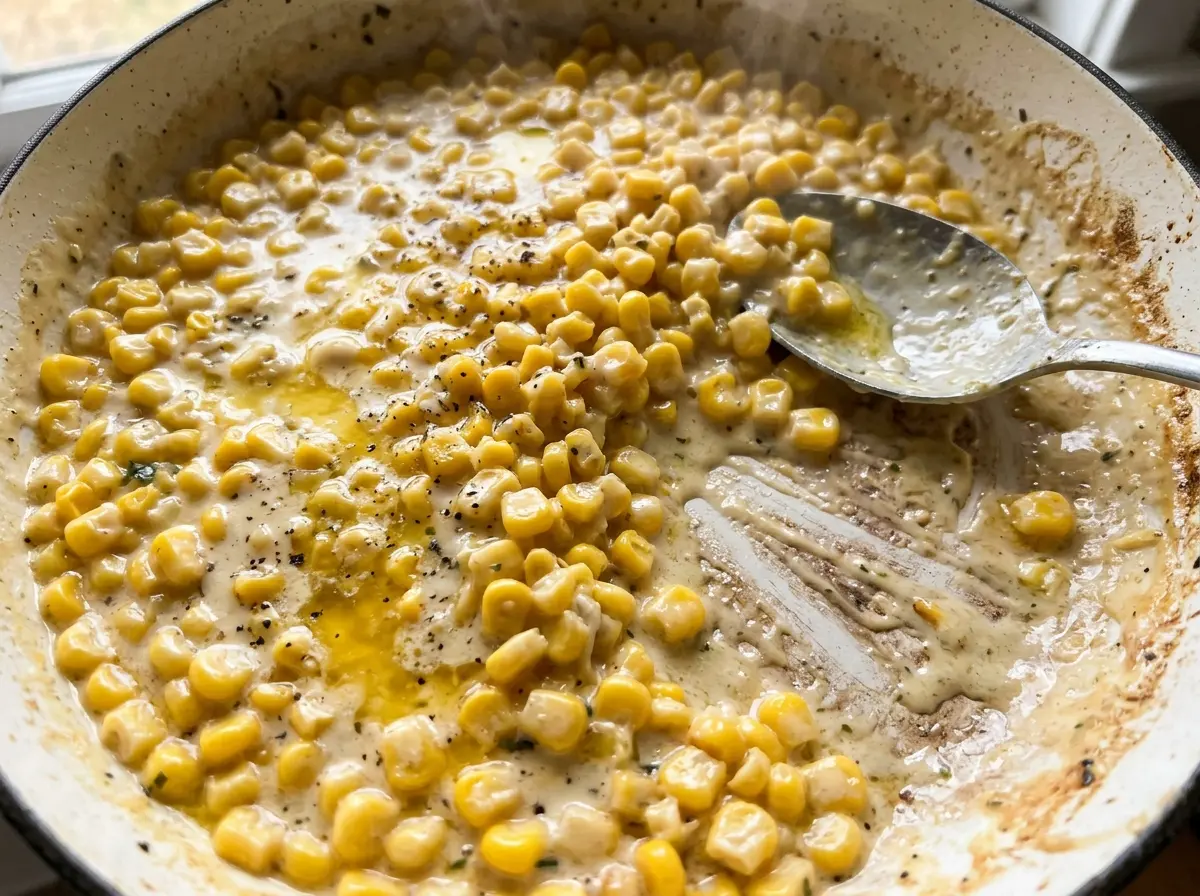
Once the cream has thickened slightly, the kernels look glossy and the sauce gathers lightly around them. The result is creamy without burying the sweet, familiar taste of corn.
Kitchen Note
I add the corn straight from the freezer, without thawing it first. Stir it now and then as it warms so the kernels heat evenly before the cream goes in.
Save this creamy stovetop corn with butter for a quick side with tender kernels and a sauce that clings in every bite.
Why the Corn Goes In Before the Cream
Frozen corn carries a little moisture on its surface, and adding cream before the kernels are hot can leave you waiting for both the corn and the sauce to catch up. Heating the corn in the butter first gives it time to become tender and lets excess surface moisture cook away before the cream is added. Then the cream has a shorter, clearer job: simmer until it lightly coats the corn.
That’s also why I don’t rush the first stage. The corn should be hot and tender before you stir in the cream, salt, and pepper. If you add the cream while the kernels are still cold, the skillet temperature drops and the sauce takes longer to thicken. Keeping the steps in this order gives you a creamy coating without needing a thickener or a second pan.
The finish should be modest, not a heavy blanket of sauce. The cream thickens slightly as it simmers uncovered, and the corn stays the star of the side dish.
What the Butter, Corn, and Cream Each Bring

- Frozen corn — A bag of frozen kernels keeps this side convenient and gives you kernels that are ready to cook without shucking. Use corn that still smells clean and sweet when opened; freezer burn can leave dry, pale patches and a stale taste. Fresh kernels can replace frozen in the same weight, but cook them until tender before adding the cream rather than relying on the frozen-corn timing.
- Unsalted butter — Butter melts around the corn and gives the finished cream a rounded, buttery taste. Unsalted butter lets you control the seasoning more easily; if salted butter is what you have, reduce the kosher salt to 1/4 teaspoon.
- Heavy cream — Its richness helps the sauce thicken and coat the kernels during a brief simmer. Half-and-half can be used in the same amount, but expect a lighter, thinner coating; it won’t have quite the same richness as heavy cream.
- Kosher salt and black pepper — They season the corn without taking over its taste. If you use fine table salt instead of kosher salt, start with less and taste before adding more, since fine grains pack more tightly in a measuring spoon. White pepper can replace black pepper in the same amount for a gentler-looking finish.
Let the Corn Turn Tender Before the Cream Simmer
Start with Butter in the Skillet
Set a 12-inch skillet over medium heat and melt the butter. Give it a moment to melt across the pan, but don’t let it brown; the goal is a buttery base for the corn, not a toasted-butter flavor. If the butter begins to sizzle aggressively, lower the heat slightly before adding the kernels.
Heat the Frozen Kernels Through
Add the frozen corn and cook it for 5–7 minutes, stirring occasionally. At first, the kernels may look frosty and clump together, but they’ll loosen as they warm. They’re ready for the next step when they’re hot and tender; avoid adding the cream while cold centers remain.
Simmer Until the Cream Coats
Stir in the heavy cream, kosher salt, and black pepper, then lower the heat to medium-low. Simmer uncovered for 4–6 minutes, stirring occasionally so the cream heats evenly around the kernels. Look for a slight thickening and a glossy coating on the corn; the sauce shouldn’t reduce until dry or form a firm layer in the bottom of the skillet.
Simple Ways to Adapt This Creamy Corn
Make It Dairy-Free with Coconut Cream
Use dairy-free butter in place of the butter and unsweetened coconut cream in place of the heavy cream. Simmer until it lightly coats the corn; the result is still creamy, with a subtle coconut note that changes the flavor from the classic buttery version.
Make a Half Batch for Two
Use 1 tablespoon butter, 8 ounces frozen corn, 1/4 cup heavy cream, 1/4 teaspoon kosher salt, and 1/8 teaspoon black pepper. Cook the corn until hot and tender, then simmer with the cream and seasonings until the coating thickens slightly. Keep an eye on the smaller amount as it simmers so the sauce doesn’t reduce too far.
Storage and Reheating
- Refrigerator: Store leftovers in an airtight container for 3–4 days. The cream will thicken as it chills, so the corn may look less saucy straight from the fridge.
- Freezer: I don’t recommend freezing this dish; the cream can separate or turn grainy after thawing.
- Reheating: Reheat gently in a skillet over low heat, stirring often; loosen a thickened sauce with a small splash of cream. Heat leftovers to 165°F, and avoid boiling hard, which can make the sauce look uneven.
Questions That Come Up When Making Creamy Corn
Creamy Stovetop Corn with Butter
Ingredients
Equipment
Method
- Melt the butter in a 12-inch skillet over medium heat.
- Add the frozen corn and cook, stirring occasionally, for 5–7 minutes, until hot and tender.
- Stir in the heavy cream, salt, and black pepper.
- Simmer uncovered over medium-low heat for 4–6 minutes, stirring occasionally, until the cream thickens slightly and coats the corn.