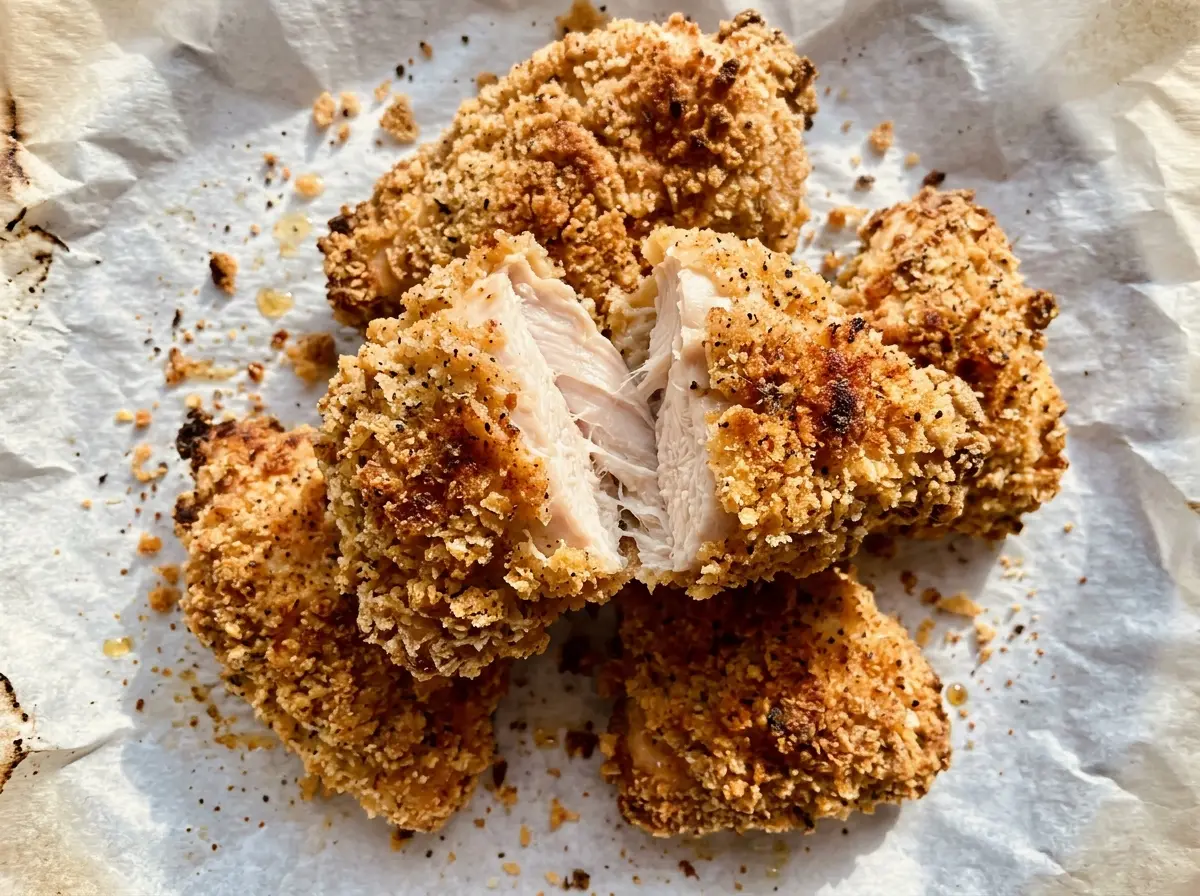
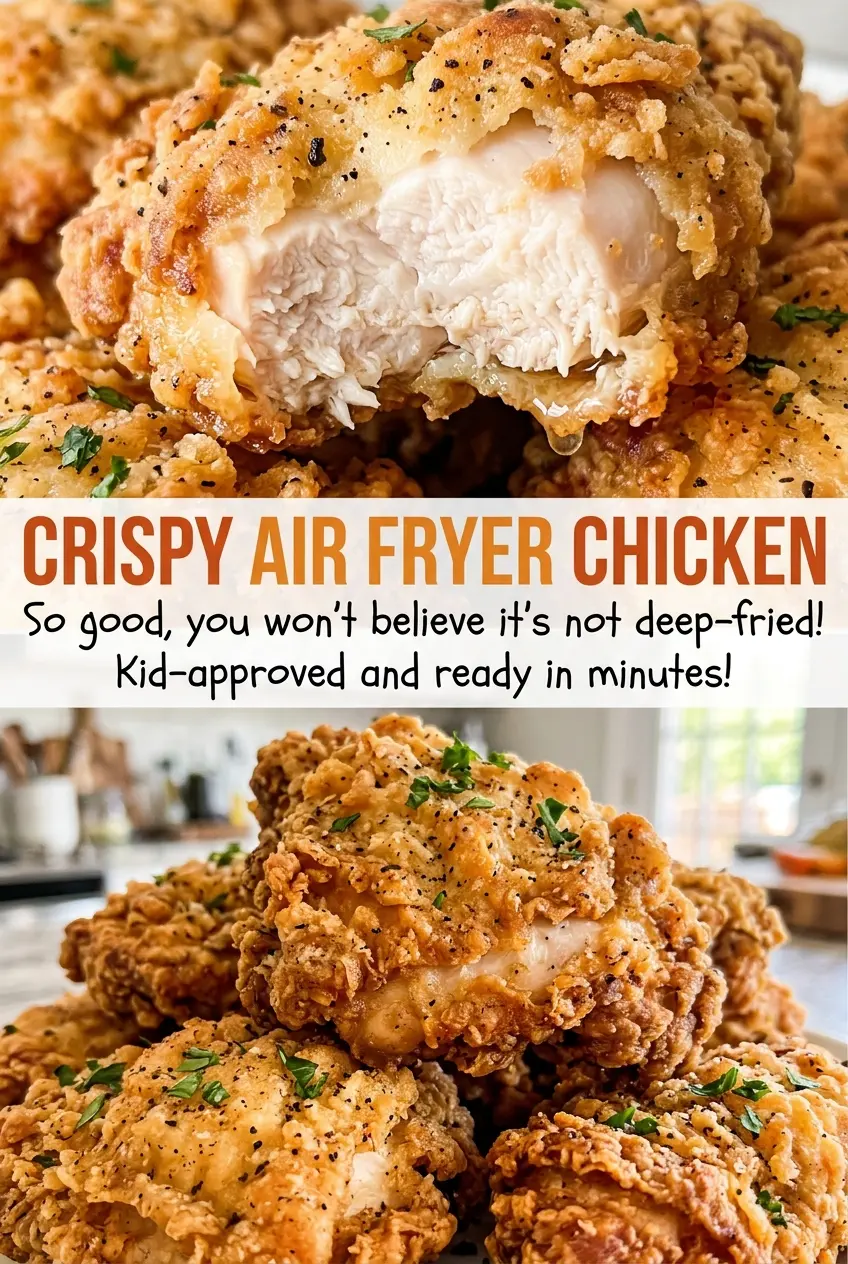
When the panko turns golden and the chicken stays juicy, a simple air fryer dinner feels like a little kitchen win. I like this method because it gives boneless chicken breasts a crunchy coating without needing a skillet full of oil. The cutlets cook quickly, and the three-bowl breading setup keeps the seasoning where it belongs: right on the chicken.
The coating works best when each cutlet gets a thin layer of flour before it meets the egg. That dry layer helps the egg cling, and pressing the chicken into the panko gives the crumbs a chance to stick instead of dropping into the basket. A light spray on both sides helps the panko brown as the air fryer circulates heat around the chicken. The result is a crisp, savory crust with tender chicken underneath.
Kitchen Note
A light, even spray on both sides makes a noticeable difference to the panko. Too much spray can weigh down the crumbs, so use a quick mist rather than soaking the coating.
Save this crispy air fryer chicken for a dinner with golden panko and tender, quick-cooking cutlets.
Why Half-Inch Cutlets Are the Sweet Spot for a Crisp Coating
Chicken thickness sets the pace for this recipe. Cutlets about half an inch thick give the hot air a manageable amount of chicken to cook through while the panko browns around it. If one piece is much thicker than the others, the coating on the thinner pieces may be ready before the center of the thick one reaches a safe temperature.
Even cutlets also make the halfway turn more useful: both sides get a chance to face the circulating heat, and you can compare their color as they cook. Start checking at the early end of the cooking range, because air fryers and cutlet shapes vary. Color is a helpful clue, but it can’t tell you whether the middle is cooked through. The thickest part needs to reach 165°F; that temperature check is what lets you pull the chicken with confidence instead of leaving it in until the crust gets too dark.
If the breasts aren’t already cut into even pieces, aim for cutlets with a consistent thickness before breading. A uniform shape matters more here than making every cutlet exactly the same length.
What Panko, Egg, and Flour Each Bring to This Chicken
- Chicken breasts — Boneless, skinless breasts are easy to cut into the even cutlets this method depends on. Ask the butcher to cut them into cutlets if you’d rather skip that prep. Keep the pieces close to the same thickness so they finish at a similar pace.
- All-purpose flour — The flour gives the egg a dry surface to cling to, creating a more dependable base for the crumbs. A basic store-brand flour works well. For a gluten-free version, use a cup-for-cup gluten-free flour blend in its place.
- Egg and water — Beating the egg with water makes a loose wash that coats the floured chicken without forming a heavy layer. A large egg is the right size for the quantities here; the water loosens it so it spreads across the cutlet more easily.
- Panko breadcrumbs — Panko’s larger, flaky crumbs create a more open, crisp coating than fine breadcrumbs. Choose plain panko so the salt and spices stay in balance. Regular dry breadcrumbs can replace it in the same amount, but the crust will be finer and less airy. Gluten-free panko is a good swap for a gluten-free batch.
- Paprika, garlic powder, black pepper, and kosher salt — These season the coating rather than relying on a dipping sauce for all the flavor. Ground spices from an ordinary pantry work; check that the garlic powder hasn’t clumped into hard pieces so it mixes evenly through the flour.
- Nonstick cooking spray — A light coat helps the air-fried crumbs brown. Use a spray intended for cooking, and apply it evenly rather than saturating the breading.
How to Bread and Air-Fry the Cutlets Without Losing the Crust
Get the Air Fryer Hot Before the Chicken Goes In
Preheat a 6-quart air fryer to 400°F, then lightly coat the basket with nonstick cooking spray. Starting with a hot basket gives the coating heat right away instead of leaving it to warm slowly. Set out three shallow bowls so the flour mixture, egg wash, and panko are easy to reach in order. Keep the chicken pieces nearby, but leave room to handle each one without rushing.
Build a Thin, Even Breading
Mix the flour with the salt, pepper, paprika, and garlic powder in the first bowl. Beat the egg with the water in the second, and put the panko in the third. Coat one cutlet in flour and shake off the extra before dipping it in the egg; a thick flour layer can turn pasty instead of crisp. Press the cutlet into the panko on both sides until the crumbs cover it from edge to edge.
Arrange the Cutlets With Space Around Them
Place the breaded pieces in a single layer in the basket, cooking in batches if they don’t fit without crowding. Leave a little breathing room so hot air can reach the coating rather than trapping steam between overlapping pieces. Lightly spray both sides of each cutlet. If the basket is full, hold the extra pieces for the next batch instead of stacking them.
Turn, Check the Center, and Rest
Air-fry at 400°F for 10 to 14 minutes, turning the cutlets halfway through. Look for a golden coating, then check the thickest part of every piece with an instant-read thermometer; it should reach 165°F. Thinner cutlets may finish sooner, so check them individually rather than assuming the whole batch is ready at once. Transfer the chicken to a plate and let it rest for 3 minutes before serving.
Simple Changes for a Different Coating or a Smaller Batch
Make the Coating Gluten-Free
Use a cup-for-cup gluten-free flour blend instead of all-purpose flour and gluten-free panko instead of regular panko, keeping the same quantities. The method stays the same, though the exact shade of golden brown can vary by brand. The coating will still have the contrast of a crisp crumb outside and a tender chicken center.
Leave Out the Paprika for a Milder Crust
Omit the paprika and keep the rest of the coating unchanged. You’ll lose its warm color and gentle pepper flavor, while the garlic powder, black pepper, and salt still season the crumbs. This is an easy adjustment if you want the coating to taste a little less earthy.
Storage and Reheating
- Refrigerator: Store cooled chicken in a covered container within 2 hours and use it within 3 to 4 days. The panko softens in the fridge, though the chicken remains good for reheating.
- Freezer: Freeze the cooked cutlets in a single layer until firm, then move them to a freezer-safe container with parchment between pieces. For best texture, use within 2 to 3 months; the crust may be less crisp after thawing.
- Reheating: Warm in a 350°F oven or air fryer until the center reaches 165°F. Avoid the microwave if you want to preserve the coating, since it tends to soften the panko.
Questions That Come Up When Air-Frying Breaded Chicken
Crispy Air Fryer Chicken – Cozy Dinner Recipe
Ingredients
Equipment
Method
- Preheat a 6-quart air fryer to 400°F.
- Lightly coat the air fryer basket with nonstick cooking spray.
- In a shallow bowl, mix the flour, salt, pepper, paprika, and garlic powder.
- In a second shallow bowl, beat the egg with the water.
- Place the panko in a third shallow bowl.
- Coat each chicken cutlet in the flour mixture, shaking off the excess.
- Dip each cutlet in the egg.
- Press each cutlet into the panko until fully coated.
- Arrange the cutlets in a single layer in the air fryer basket, working in batches if needed.
- Spray both sides lightly with nonstick cooking spray.
- Air-fry at 400°F for 10–14 minutes, turning halfway through, until the coating is golden and the thickest part of each cutlet reaches 165°F.
- Transfer the chicken to a plate and rest for 3 minutes before serving.