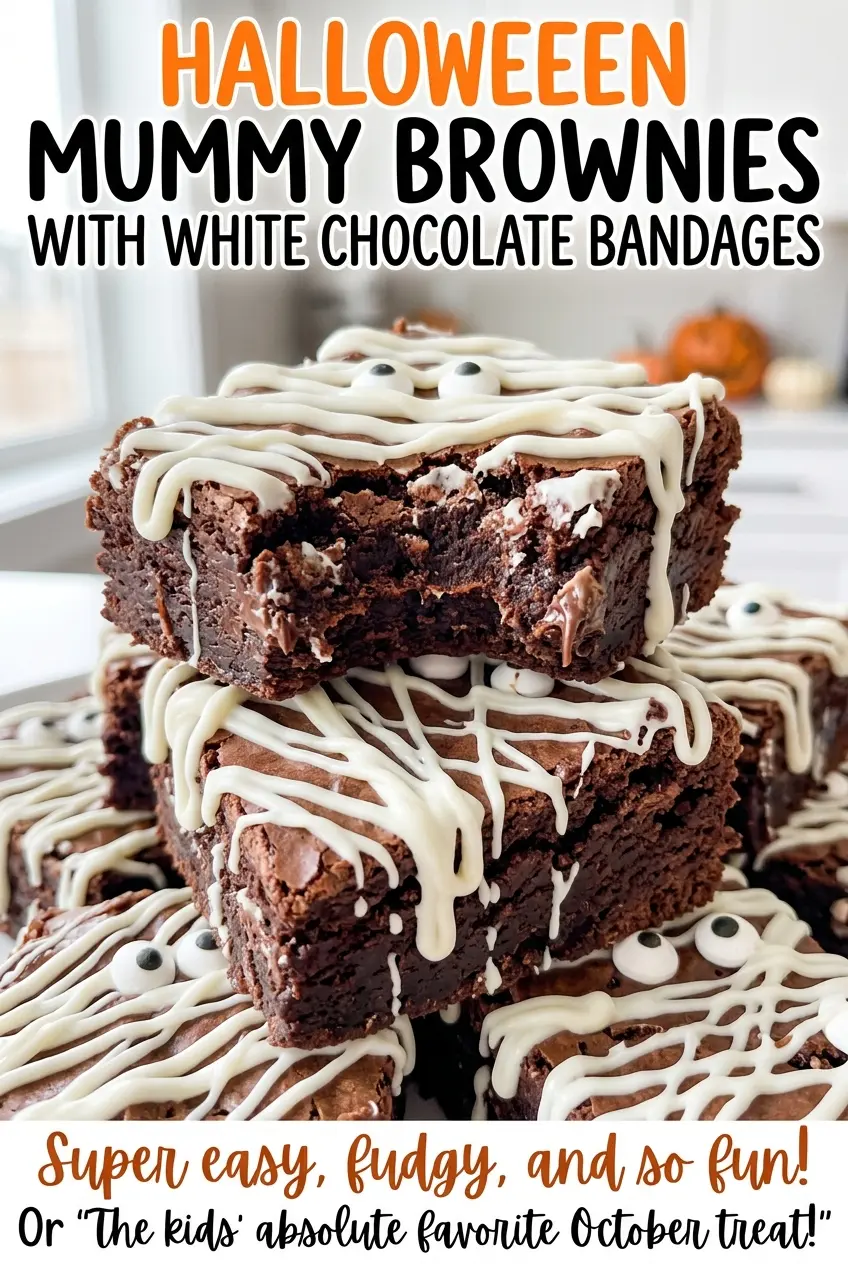
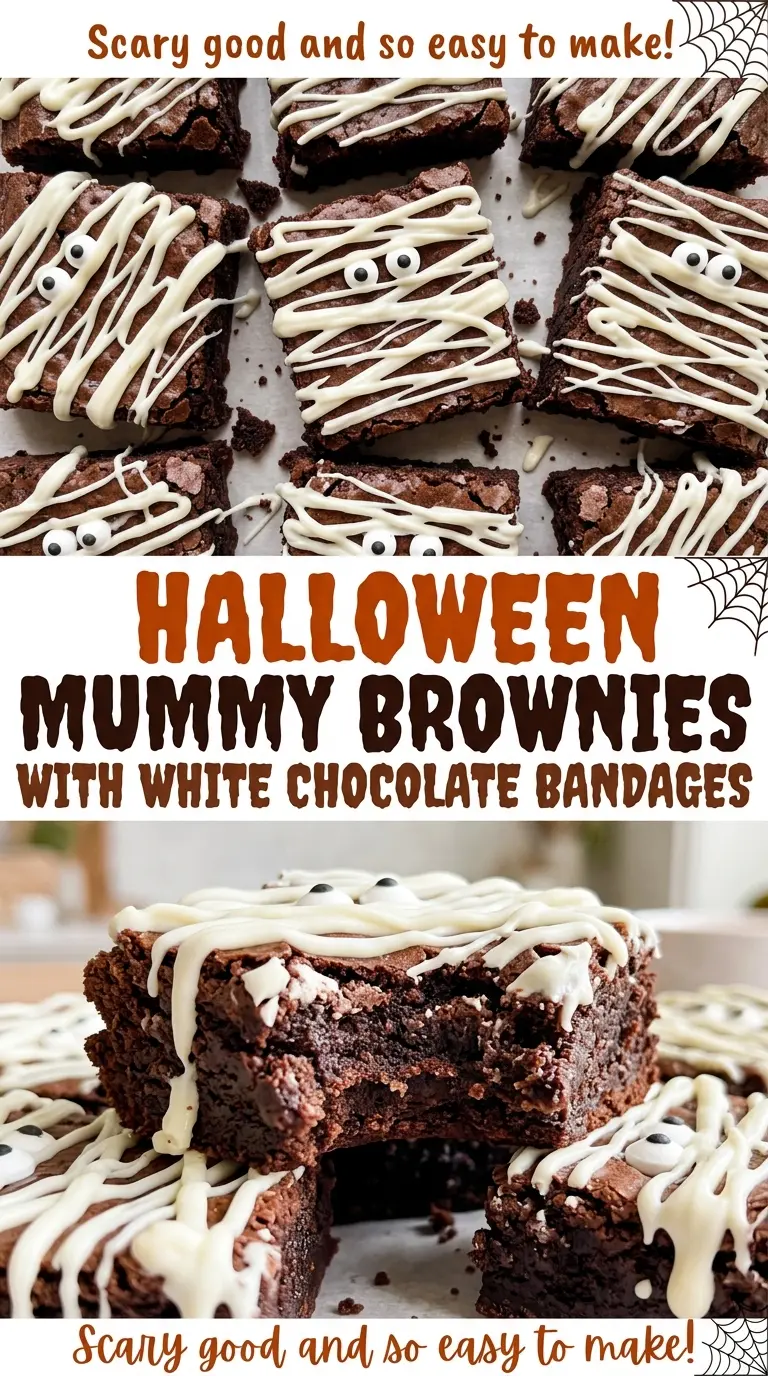
The brownies need to be completely cool before the white chocolate goes on; otherwise, those neat little mummy stripes slide right off the top. I learned to give the pan its full cooling time before lifting out the slab, which also makes the squares easier to cut without crumbling. These Halloween Mummy Brownies with White Chocolate Bandages have a rich cocoa base and just enough spooky detail to make each one feel special.
The batter comes together in one bowl, and you don’t need to bring out a mixer. The brownies bake until a toothpick shows moist crumbs, not until it comes out perfectly clean. Then a little melted white chocolate holds the candy eyes in place, and loose overlapping stripes make the bandages look convincing without any fussy decorating tools. Each brownie has a soft, chocolatey middle under its crisp white wrapping.
Kitchen Note
White chocolate can go from smooth to scorched quickly, so I keep the microwave at 50% power and use short bursts. Stir between each 20 seconds; the chips often finish melting as you stir.
Save these Halloween mummy brownies for a party tray: fudgy cocoa squares wrapped in white chocolate, with candy eyes peeking through.
Why a Clean Toothpick Is the Wrong Goal for These Mummy Brownies
These are meant to be soft and fudgy, not dry and cake-like. If you wait for a toothpick to come out completely clean, the brownies have likely baked past the point where the center stays tender. Look at what clings to the toothpick instead: moist crumbs are right, while shiny wet batter means the center needs more time.
The top should look set when you take the pan out, even though the middle is still soft. That contrast can feel like a close call, but the brownies continue to settle as they cool in the pan. Let them cool completely before cutting; a warm center is more likely to smear and break under the knife.
There’s a second reason not to overbake this batch: the white chocolate decoration is sweet and firm, so a dense, dry brownie underneath makes each bite feel heavy. A moist crumb gives the bandages a softer base and keeps the cocoa flavor front and center. Watch the surface and the toothpick together rather than relying on either cue alone.
What Gives These Brownies Their Fudgy Center and Pipeable Bandages
- Unsalted butter — It gives the brownie batter its richness and lets the listed salt stay in balance. Use butter that melts smoothly; salted butter isn’t a direct swap here because it changes the salt level.
- Granulated sugar — The sugar sweetens the cocoa and helps create the brownies’ tender, slightly crisp top. Keep it granulated rather than using powdered sugar, which behaves differently in a batter.
- Eggs — They hold the simple batter together and help it set in the oven. Use large eggs as listed; smaller eggs can leave the mixture short on structure.
- Unsweetened cocoa powder — Cocoa brings the chocolate flavor without adding extra sweetness. A good, fresh cocoa matters more than an expensive brand, but sweetened cocoa isn’t a like-for-like replacement because it changes the sugar balance.
- All-purpose flour — This modest amount gives the brownies enough structure to cut into squares without pushing them toward a cakey texture. For a gluten-free version, use a 1:1 gluten-free baking flour blend in the same amount; the crumb may be a little more delicate.
- White chocolate chips and vegetable oil — Chips are convenient for melting and piping, while the small amount of oil helps the melted chocolate flow into narrow stripes. If you use a white chocolate baking bar instead, replace the chips by weight with chopped white chocolate; keep the oil in the mixture.
- Candy eyeballs — These give each mummy its unmistakable face and sit in a small dab of melted chocolate. Check that you have two for every full-size brownie before you start decorating, so you don’t have to stop midway.
From One-Bowl Batter to Set White Chocolate Bandages
Prepare the Pan and Mix the Butter Base
Heat the oven to 350°F and line an 8-inch square baking pan with parchment, leaving overhang on two sides. Lightly grease the parchment and the exposed sides so the cooled slab releases cleanly. Melt the butter in a medium microwave-safe bowl, then whisk in the sugar until combined. Add the eggs one at a time, whisking after each, then whisk in the vanilla.
Stir the Cocoa Batter Just Until Smooth
Add the cocoa powder, flour, and salt to the butter mixture. Stir only until no dry streaks remain; a few extra turns after the flour disappears can make the brownies tougher. Spread the batter evenly in the prepared pan, nudging it into the corners so the center and edges bake at a similar pace. Don’t leave thick ridges across the surface, since they won’t level themselves in the oven.
Use Moist Crumbs, Then Cool the Slab Completely
Bake for 22 to 26 minutes, until the top looks set and a toothpick inserted in the center comes out with moist crumbs but no wet batter. If the toothpick is coated in wet batter, give the pan a little more time and check again. Cool the brownies completely in the pan, about 2 hours. Lift the slab out by the parchment overhang and cut it into 16 brownies once it’s cool.
Anchor the Eyes Before Piping the Stripes
Put the white chocolate chips and vegetable oil in a small microwave-safe bowl. Microwave at 50% power in 20-second bursts, stirring between bursts until smooth. Transfer the chocolate to a piping bag or resealable plastic bag and snip a small opening in one corner. Pipe a dab onto each brownie, press two candy eyeballs into each dab, then pipe irregular overlapping stripes while leaving the eyes uncovered; refrigerate for 15 minutes until the bandages set.
Two Easy Ways to Change the Mummy Brownie Format
Make a Gluten-Free Batch
Replace the all-purpose flour with the same amount of a 1:1 gluten-free baking flour blend. The brownies may have a slightly more delicate crumb, so cool the slab fully before lifting and cutting it; the cocoa-and-white-chocolate combination stays the same.
Turn Them into Mini Mummies
After the slab has cooled, cut it into 32 small pieces instead of 16 full-size brownies. Use one candy eyeball on each piece and pipe finer white chocolate stripes so the smaller faces don’t disappear under the bandages. The baking time stays tied to the same pan of brownies; only the cut and decorating pattern change.
Storage and Reheating
- Refrigerator: Store decorated brownies in an airtight container for up to 4 days. The chilled brownie will be firmer, and the white chocolate bandages will stay set.
- Freezer: Freeze the cooled, undecorated brownie slab or cut pieces, wrapped tightly, for up to 2 months. Thaw completely before adding the white chocolate and candy eyes for the neatest finish.
- Reheating: These are best served at room temperature rather than reheated; warming can soften or melt the white chocolate bandages.
Questions I Get Asked About These Halloween Mummy Brownies
Halloween Mummy Brownies with White Chocolate Bandages
Ingredients
Equipment
Method
- Heat the oven to 350°F.
- Line an 8-inch square baking pan with parchment paper, leaving overhang on two sides, and lightly grease the parchment and exposed sides.
- Melt the butter in a medium microwave-safe bowl.
- Whisk in the sugar until combined.
- Whisk in the eggs one at a time.
- Whisk in the vanilla extract.
- Add the cocoa powder, flour, and salt, and stir just until no dry streaks remain.
- Spread the batter evenly in the prepared pan.
- Bake for 22 to 26 minutes, until the top looks set and a toothpick inserted in the center comes out with moist crumbs but no wet batter.
- Cool completely in the pan, about 2 hours.
- Lift the brownies out using the parchment and cut into 16 brownies.
- Put the white chocolate chips and vegetable oil in a small microwave-safe bowl.
- Microwave at 50% power in 20-second bursts, stirring between bursts, until smooth.
- Transfer the melted chocolate to a piping bag or resealable plastic bag and snip a small opening in one corner.
- Pipe a small dab onto each brownie and press two candy eyeballs into each dab.
- Pipe irregular overlapping stripes across each brownie, leaving the eyes uncovered.
- Refrigerate for 15 minutes until the bandages are set.