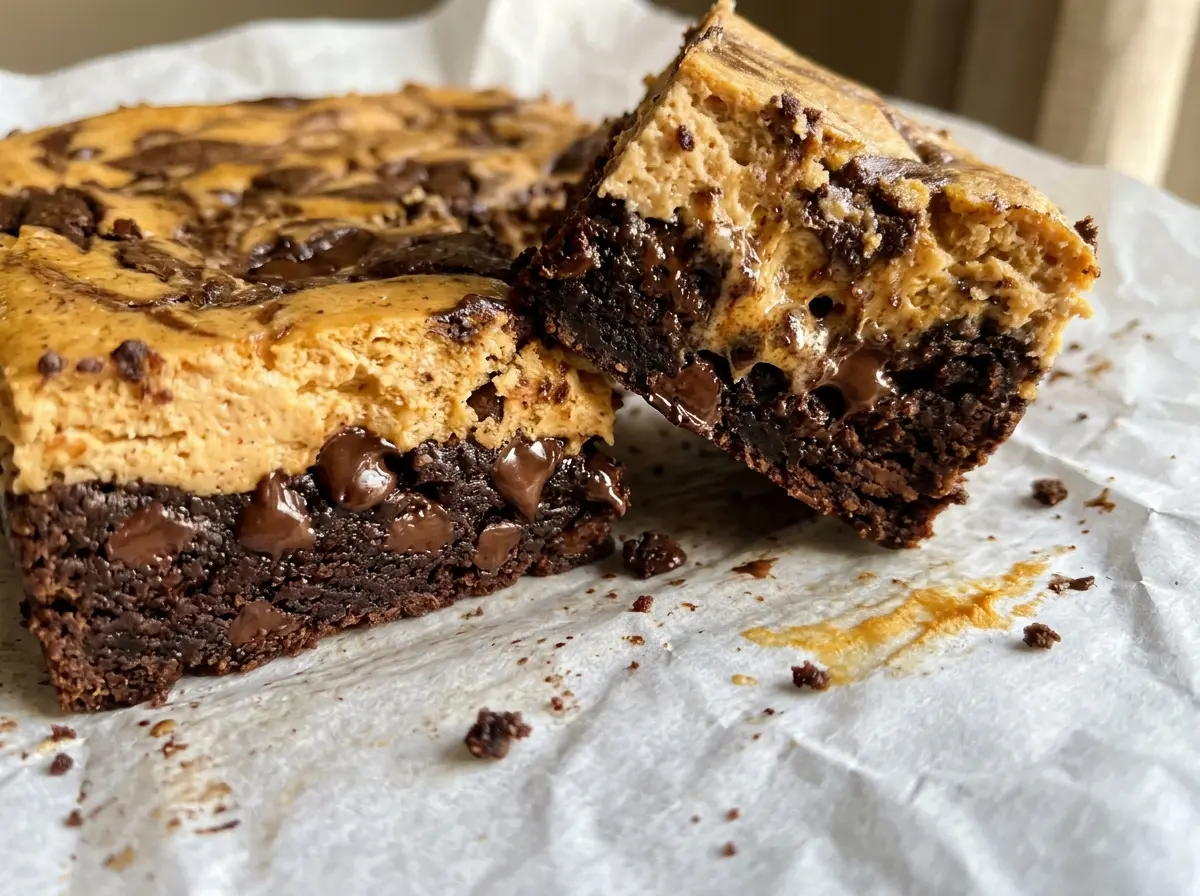
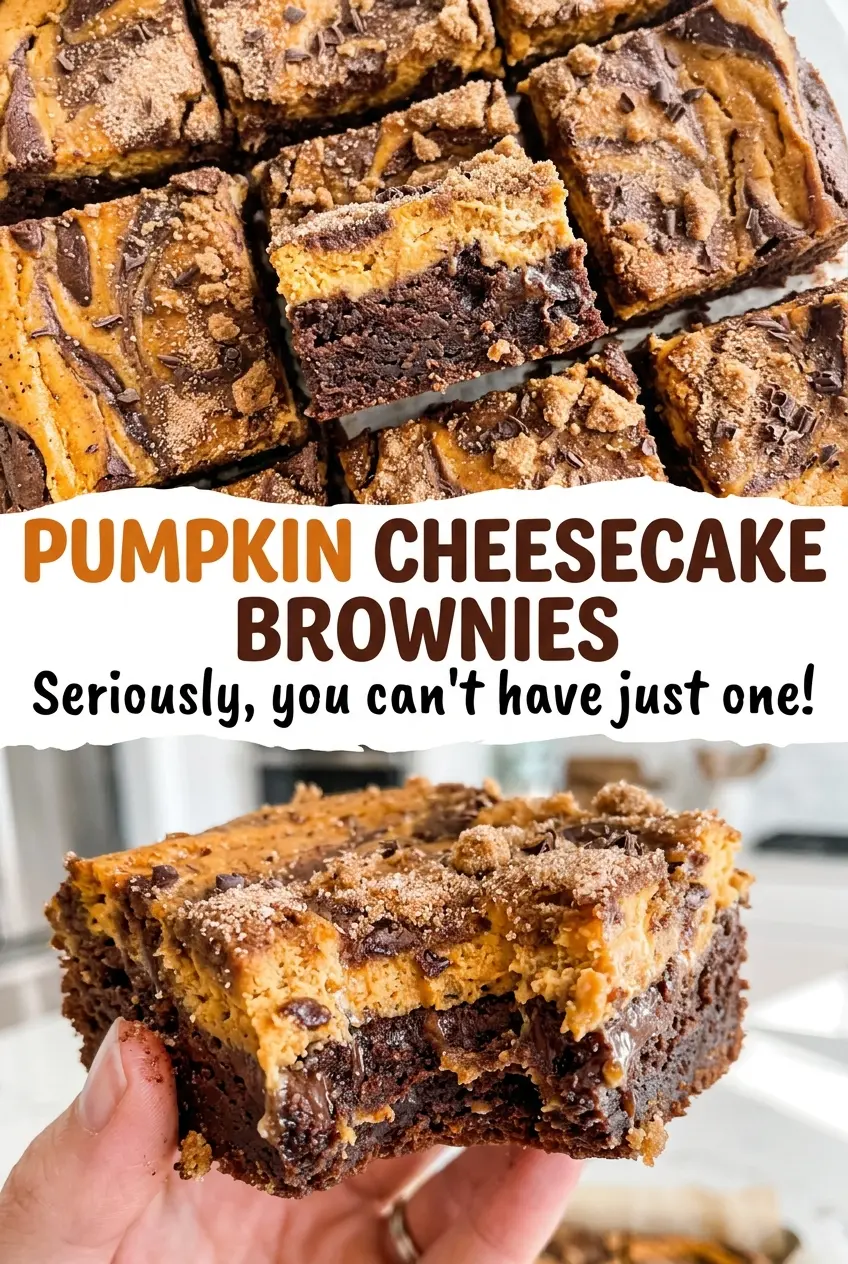
The first cut through pumpkin cheesecake brownies tells you whether they’ve had enough time to set: warm layers can slump together, while a chilled square shows off its dark brownie base and pale pumpkin stripe. I like this dessert because each piece has both a fudgy chocolate bite and a soft, gently spiced cheesecake layer without making two separate desserts.
The brownie batter does double duty here. Most of it becomes the base, and the rest is dotted over the pumpkin filling before a light swirl pulls the two together. Keep the swirl loose rather than stirring the layers into one another, and you’ll get distinct ribbons of pumpkin and chocolate in every square.
Kitchen Note
I get the cleanest squares after the pan has cooled completely and spent at least 2 hours in the refrigerator. Cutting before that chill can smear the pumpkin layer through the brownie instead of leaving clear edges.
Save these pumpkin cheesecake brownies for a bake when you want fudgy chocolate squares with a creamy pumpkin swirl.
Why the Toothpick Needs to Miss the Pumpkin Layer
A toothpick test gets tricky when a brownie has a cheesecake layer. If you push the pick through the pumpkin filling, it can come out coated even when the brownie portion is ready. That result doesn’t tell you much about the chocolate batter, so choose a spot that’s clearly brownie-only when you check.
Look for a few moist crumbs on the toothpick rather than waiting for it to come out completely clean. A clean pick can mean the brownie has baked past its fudgy stage. The visual cues matter too: the edges should be set, and the cheesecake layer should look set rather than wet. Using those checks together helps you avoid mistaking the creamy center for underbaked brownie.
The layers also need different handling. The brownie batter is thick enough to hold the pumpkin filling in place, but a heavy-handed swirl can blur the contrast. A few gentle passes with a knife leave visible ribbons instead of turning the top into a single blended layer.
What Makes the Chocolate Base and Pumpkin Layer Work Together
- Unsweetened cocoa powder brings a concentrated chocolate flavor without adding sweetness to the batter. Use cocoa that smells fresh; an inexpensive, fresh container works well here. Sweetened cocoa mix isn’t a good stand-in because it changes both the sweetness and the dry ingredients.
- Melted unsalted butter gives the brownie layer its rich, dense texture. Fresh butter is worth using, but there’s no need for a specialty brand. Oil isn’t a like-for-like replacement; it changes the flavor and how the brownies feel.
- Room-temperature eggs blend more smoothly into both mixtures than cold eggs. They help the brownie batter come together and give the cheesecake layer its structure. For an egg-free version, a direct swap would change how these layers set.
- Softened cream cheese is what makes the pumpkin layer smooth rather than lumpy. A standard block-style cream cheese is a better choice than whipped cream cheese, which has a different texture. Let it soften enough to beat easily before you start.
- Canned pumpkin puree and pumpkin pie spice give the cheesecake layer its pumpkin flavor and warmth. Buy pure pumpkin puree, not pumpkin pie filling, which is already sweetened and seasoned. The canned puree is convenient and consistent; fresh pumpkin is not a direct one-for-one swap here because its moisture can vary.
- All-purpose flour gives the brownie batter enough structure to support the creamy layer. Measure it without packing it down, and fold it in only until no dry streaks remain. A gluten-free option is described below.
Building Two Layers Without Losing the Swirl
Prepare the Pan for Easy Lifting
Heat the oven to 350°F. Grease a 9×13-inch metal baking pan, then line it with parchment paper, leaving overhang on two sides. The grease helps the parchment stay put while you spread the batter. Those parchment overhangs give you a way to lift the cooled brownies from the pan.
Mix the Brownie Batter Until Just Combined
Whisk the melted butter, granulated sugar, and cocoa powder in a medium bowl until smooth. Whisk in the eggs one at a time, then add the vanilla. Fold in the flour and salt just until combined; stop when the last dry streak disappears so you don’t work the flour more than needed.
Beat the Pumpkin Cheesecake Smooth
In another medium bowl, beat the softened cream cheese with the brown sugar until smooth. Beat in the egg, followed by the pumpkin puree and pumpkin pie spice. Scrape the bowl as needed so no firm cream cheese remains stuck at the bottom. Stop mixing once the filling looks even.
Layer the Batters and Make a Light Swirl
Spread about two-thirds of the brownie batter over the parchment. Spoon the pumpkin mixture over the brownie base, then dollop the remaining brownie batter across the top. Draw a knife gently through the dollops to make swirls; avoid mixing down into the base, which can muddy the distinct layers.
Bake, Cool, and Let the Layers Set
Bake for 35–42 minutes, until the edges are set and the cheesecake layer looks set. Check a brownie-only area with a toothpick and look for a few moist crumbs. Cool the pan completely, then refrigerate for at least 2 hours before lifting the brownies out by the parchment and cutting them into squares.
Two Useful Ways to Adapt These Brownies
Gluten-Free Brownie Base
Replace the all-purpose flour with an equal volume of a cup-for-cup gluten-free baking flour blend that includes a binder. The brownie may be a little more delicate, so let it cool and chill fully before lifting and cutting it.
A More Visible Chocolate Swirl
For more chocolate showing on top, reserve a little more brownie batter for the final dollops and spread a thinner layer beneath the pumpkin filling. You’ll get stronger dark ribbons across the top, with a less substantial brownie base under the cheesecake.
Storage and Serving
- Refrigerator: Keep the squares covered in the refrigerator for up to 4 days. The brownie firms up when cold, while the cheesecake layer stays creamy.
- Freezer: Freeze the cut squares in an airtight container, with parchment between layers, for up to 2 months. Thaw them in the refrigerator before serving.
- Serving: Serve chilled for the neatest edges. These are best enjoyed as a cold dessert rather than reheated, which can soften the cheesecake layer and blur the swirl.
Questions That Come Up While Making Pumpkin Cheesecake Brownies
Pumpkin Cheesecake Brownies
Ingredients
Equipment
Method
- Heat the oven to 350°F.
- Grease a 9x13-inch metal baking pan and line it with parchment paper, leaving overhang on two sides.
- In a medium bowl, whisk the melted butter, granulated sugar, and cocoa powder until smooth.
- Whisk in the eggs one at a time and the vanilla.
- Fold in the flour and salt just until combined.
- In another medium bowl, beat the cream cheese and brown sugar until smooth.
- Beat in the egg.
- Beat in the pumpkin puree and pumpkin pie spice just until combined.
- Spread about two-thirds of the brownie batter in the prepared pan.
- Spoon the pumpkin mixture over the brownie batter.
- Dollop the remaining brownie batter on top.
- Gently swirl with a knife.
- Bake for 35–42 minutes, until the edges are set, the cheesecake layer looks set, and a toothpick inserted into a brownie-only area comes out with a few moist crumbs.
- Cool completely in the pan.
- Refrigerate for at least 2 hours.
- Lift the brownies out with the parchment.
- Cut into squares.