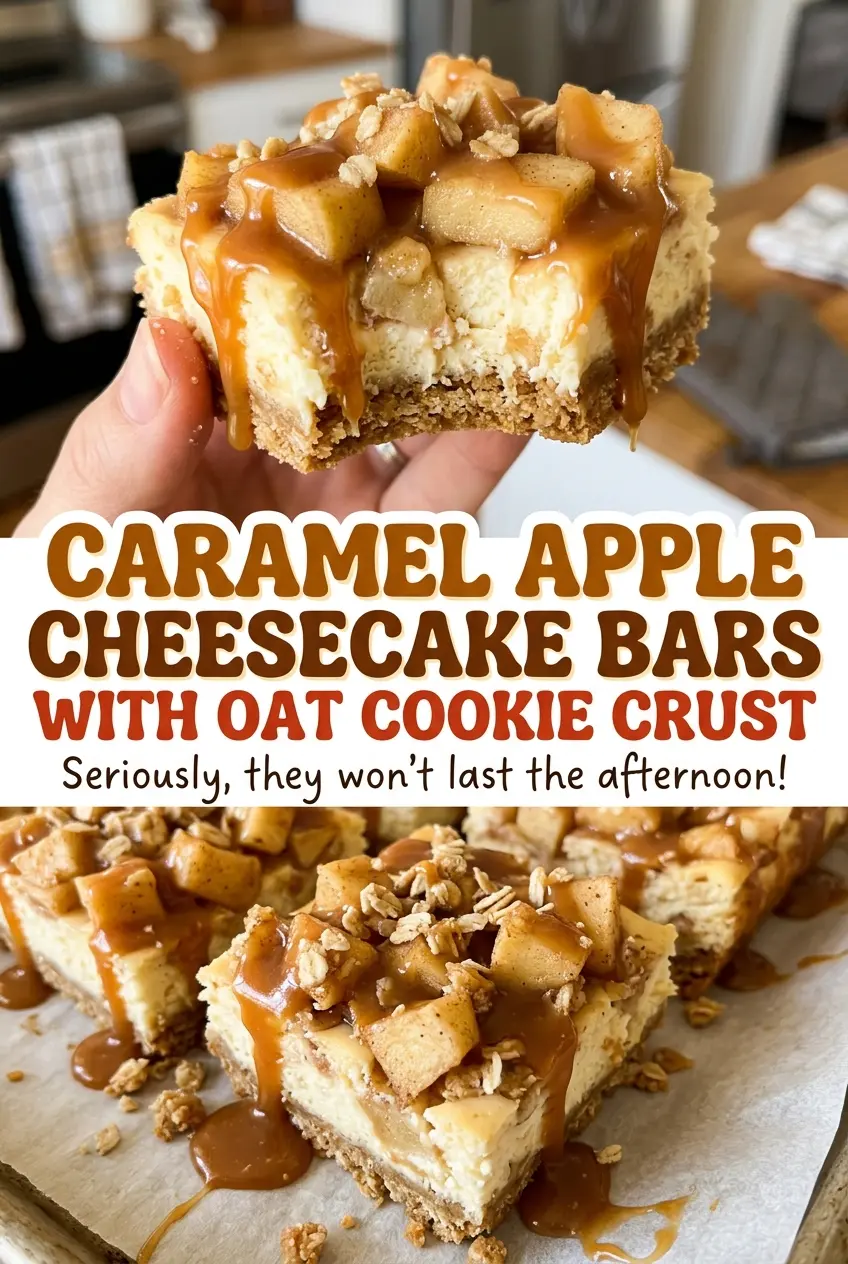
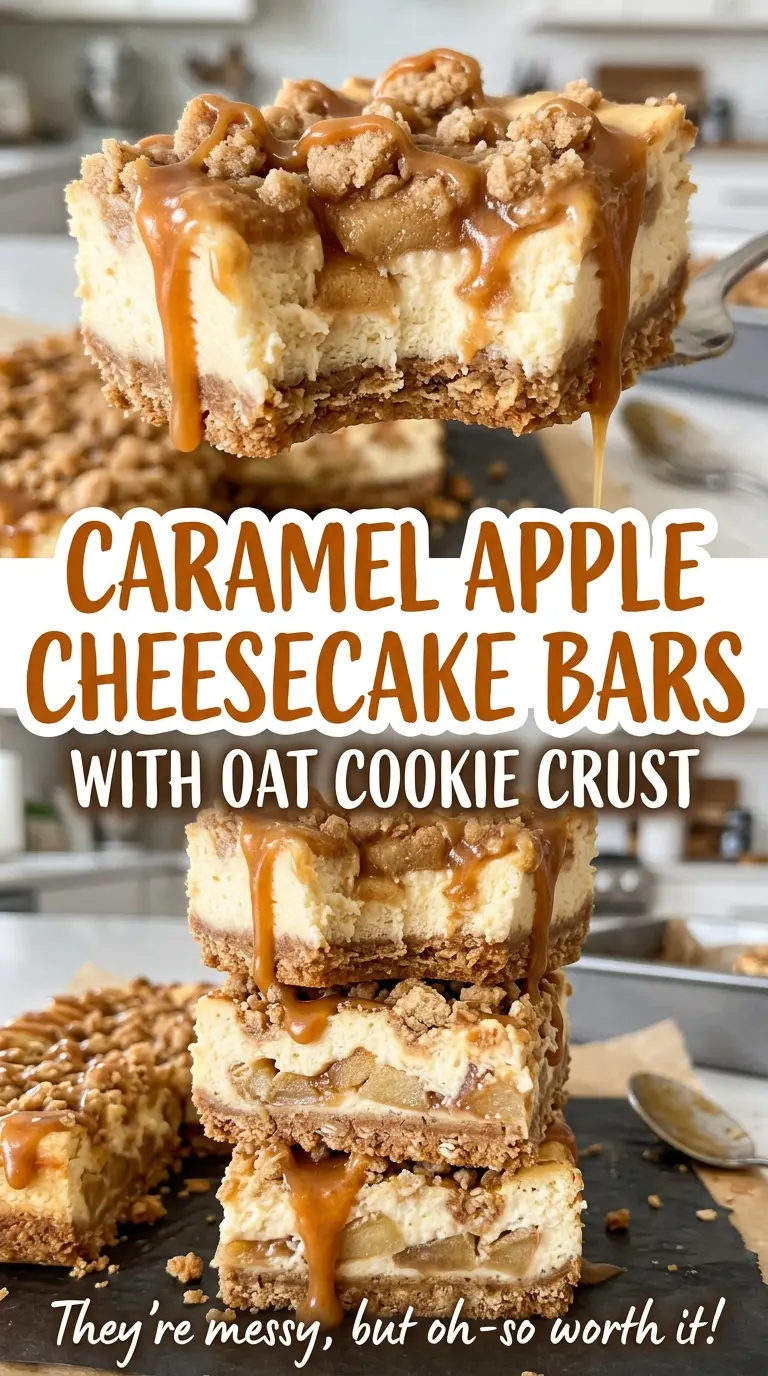
The first clue that these bars are ready to cut is the way the apple slices sit on top: tender, glossy, and just settled into the cheesecake. Underneath, the oat cookie crust gives each bite a little chew instead of disappearing into the creamy filling. I like the tartness of Granny Smith apples here, especially once the caramel goes on.
There are a few separate layers, but each one has a clear job. The crust gets a short bake before the filling goes in, and the apples are coated before they’re arranged on top. That little bit of cornstarch helps manage the moisture from the fruit, so the cheesecake stays creamy rather than turning watery around the apples. After a long chill, the bars cut into neat squares with a soft cheesecake center, tender apples, and a buttery oat base.
Kitchen Note
Warm the caramel in short bursts and stir each time, rather than letting it get hot all at once. Stop as soon as it pours easily; overheated caramel can run too thin across the chilled bars.
Save these caramel apple cheesecake bars for a bake-ahead dessert with a crisp oat crust, tart apples, and a caramel finish.
Why the Apples Need a Little Starch Before They Meet the Cheesecake
Apples bring their own moisture to the oven. As the slices soften, their juices collect at the surface, and without anything to thicken them, that liquid can seep into the cheesecake layer. Cornstarch gives those juices a little body as they bake. It isn’t there to make the fruit taste starchy; it helps the apple topping stay in place instead of leaving a wet layer over the filling.
The way the apples are cut matters, too. Thin slices soften within the cheesecake’s baking time, while a slightly overlapping arrangement gives you fruit in each portion without piling it into a thick mound. Granny Smith apples bring a tart edge that balances the sugar in the filling and caramel. If the apples are cut unevenly, the thick pieces may still feel firm when the cheesecake is ready, so aim for slices of similar thickness and coat them evenly with the sugar, cornstarch, and cinnamon.
What the Oats, Cream Cheese, and Tart Apples Each Bring
- Old-fashioned rolled oats — Their larger flakes give the crust a more substantial, cookie-like bite. Quick oats make a finer, tighter crumb, so stick with rolled oats for the texture this base is meant to have.
- All-purpose flour and brown sugar — Flour binds the oats into a pressable crust, while packed light brown sugar adds a mild molasses note. Break up any brown sugar lumps before mixing so the sweetness is spread through the base.
- Butter — Melted butter moistens the dry crust mixture and helps it hold together when pressed into the pan. Unsalted butter keeps the salt level controlled; if you use salted butter, the crust will taste saltier.
- Cream cheese and sour cream — Softened cream cheese is what gives the filling its dense, smooth body, and sour cream loosens it slightly with a gentle tang. Plain Greek yogurt can replace sour cream in the same amount, though the filling will taste a little tangier.
- Granny Smith apples — Their firm texture holds up under the longer bake, and their tartness cuts through the sweet filling. Another firm baking apple can work, but a softer, sweeter apple will give you a less tart topping that may soften more in the oven.
- Caramel sauce — A ready-made sauce keeps the finish quick and gives the chilled bars a sweet, buttery contrast. Use a sauce that can be warmed and drizzled; a thick caramel candy won’t pour the same way.
Building the Bars in Layers Without Losing the Texture
Press and Pre-Bake the Oat Crust
Heat the oven to 350°F, then coat a 9×13-inch pan with cooking spray. Line it with parchment paper, leaving overhang on two sides, and lightly spray the parchment as well. Whisk the flour, oats, brown sugar, and salt, then stir in the melted butter until the mixture is evenly moistened and press it firmly into the pan. Bake for 12 to 15 minutes, until the edges are lightly browned, then let the crust cool in the pan for 10 minutes.
Mix a Smooth Cheesecake Filling
Beat the softened cream cheese and granulated sugar with an electric mixer on medium speed until smooth, scraping the bowl as needed. Add the eggs one at a time on low speed so each one is incorporated before the next goes in. Mix in the sour cream and vanilla just until combined; once the eggs are added, stop when the mixture looks uniform rather than continuing to beat air into it. Spread the filling evenly over the cooled crust.
Coat the Apples and Bake to a Gentle Jiggle
Toss the peeled, cored, thinly sliced apples with the sugar, cornstarch, and cinnamon until each slice is coated. Arrange them in a slightly overlapping layer across the filling, keeping the fruit spread out rather than heaped in the center. Bake at 350°F for 35 to 45 minutes. The edges should look set, the center should still have a slight jiggle, and a knife should pierce the apples easily.
Chill Completely Before Slicing
Set the pan on a wire rack and let the bars cool to room temperature, about 1 hour, then refrigerate them for at least 4 hours. The chill gives the filling time to firm up; warm bars are much harder to lift and cut cleanly. Drizzle the pourable caramel over the chilled surface, then use the parchment overhang to lift the slab from the pan. Cut it into 16 bars, wiping the knife between cuts for tidy edges.
Two Ways to Adapt These Apple Cheesecake Bars
Make the Oat Crust Gluten-Free
Use a cup-for-cup gluten-free baking flour in place of the all-purpose flour and certified gluten-free rolled oats in place of the oats. Keep the quantities the same and press the crust firmly; the base may be a little more delicate when lifted, so let the bars chill fully before cutting.
Keep the Caramel Off Half the Pan
For a less-sweet finish, drizzle caramel over one half of the chilled slab and leave the other half plain. You’ll get the same apple-and-cheesecake center in every bar, with a clearer tart apple flavor in the unadorned pieces. Mark the dividing line before you cut so it’s easy to choose a side.
Storage and Reheating
- Refrigerator: Keep the bars covered and refrigerated for 3 to 4 days. The oat crust gradually softens as it sits beneath the cheesecake and fruit.
- Freezer: Freeze cut bars without the caramel, wrapped individually and placed in an airtight container, for up to 2 months. Thaw them in the refrigerator, then add warmed caramel.
- Reheating: These bars are best served chilled, so don’t reheat them; warmth softens the cheesecake filling and makes the bars harder to handle.
The Questions That Come Up When Baking These Bars
Caramel Apple Cheesecake Bars with Oat Cookie Crust
Ingredients
Equipment
Method
- Preheat the oven to 350°F.
- Lightly coat a 9x13-inch baking pan with cooking spray.
- Line the pan with parchment paper with overhang on two sides, then lightly spray the parchment.
- Whisk the flour, oats, brown sugar, and salt in a large bowl.
- Stir in the melted butter until evenly moistened.
- Press the crust mixture firmly into the pan.
- Bake for 12 to 15 minutes, until the edges are lightly browned.
- Cool in the pan for 10 minutes.
- Beat the cream cheese and sugar in a large bowl with an electric mixer on medium speed until smooth, scraping down the bowl as needed.
- Beat in the eggs one at a time on low speed.
- Mix in the sour cream and vanilla just until combined.
- Spread the filling evenly over the cooled crust.
- Toss the apples with the sugar, cornstarch, and cinnamon until evenly coated.
- Arrange the apple slices in a slightly overlapping layer over the filling.
- Bake at 350°F for 35 to 45 minutes, until the edges are set, the center has a slight jiggle, and the apples are tender when pierced with a knife.
- Cool the bars in the pan on a wire rack until they reach room temperature, about 1 hour.
- Refrigerate for at least 4 hours.
- Warm the caramel sauce in a microwave-safe bowl in 10-second bursts, stirring between each, just until pourable.
- Drizzle the caramel over the chilled bars.
- Lift the bars from the pan and cut into 16 bars, wiping the knife between cuts.