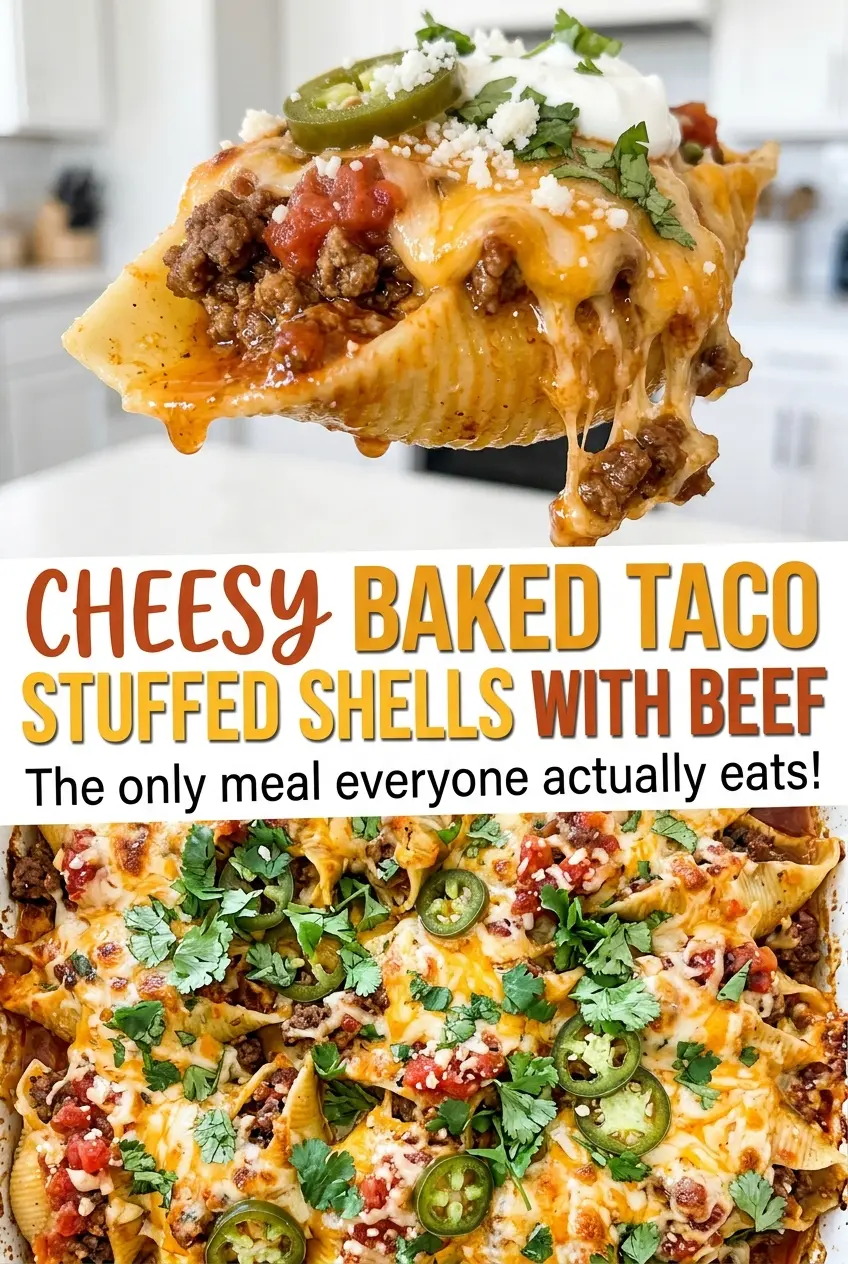
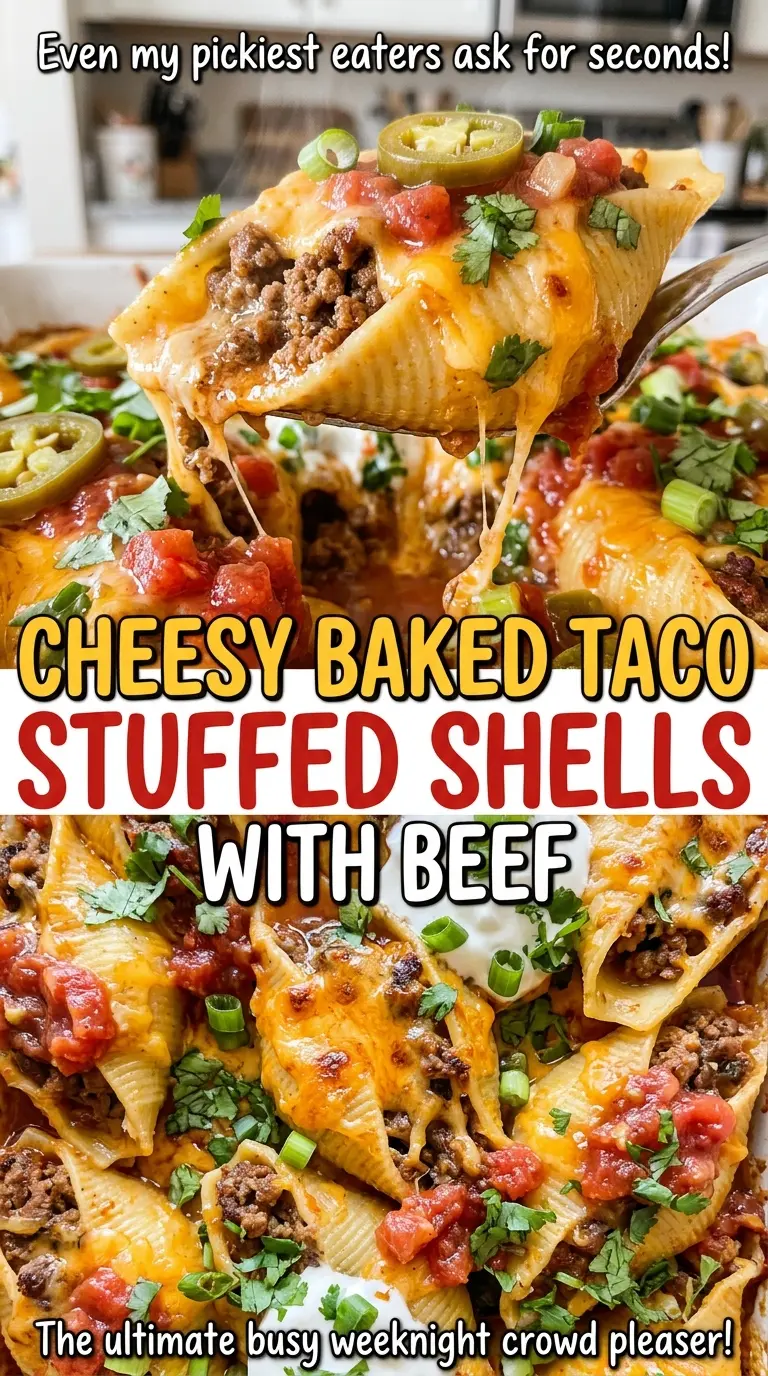
The foil comes off, the sauce is bubbling around the shells, and the cheddar has melted into a blanket over the top. That’s the moment these stuffed shells start looking like more than pasta with taco filling. I like this bake because the beef gets seasoned right in the skillet, then the creamy filling and saucy pasta finish together in one dish.
Jumbo shells need a little less time in the pot than you might expect. They’ll keep cooking in the oven, so I stop them just shy of al dente; that leaves them tender without letting them collapse while you fill and bake them. Cream cheese smooths out the seasoned beef, while salsa and red enchilada sauce give the pan enough moisture to stay saucy. The finished shells are cheesy, hearty, and easy to lift out after a short rest.
Kitchen Note
Give the shells their full five-minute rest before serving. The filling settles as it cools slightly, so it stays tucked in the shells instead of sliding out when you lift them.
Save these cheesy taco stuffed shells for a cozy dinner: seasoned beef, a creamy center, and bubbling salsa-enchilada sauce all in one bake.
Why These Shells Should Be Slightly Underdone Before They Bake
Stuffed shells have two rounds of cooking: the pasta boils first, then sits in hot sauce in the oven. If the shells are fully tender before you fill them, that second round can push them past the point where they hold their shape. They’re harder to handle, and a torn shell lets the filling escape into the sauce.
Take the package’s pasta time as a starting point, then drain the shells about a minute early. They should bend enough to fill, but still feel a little firm at the thickest part. That bit of resistance is useful, not a sign that they need more time in the pot. The covered bake softens them while keeping the beef filling moist.
There’s also a practical reason to avoid cooking them until completely soft: you’ll be handling each shell as you fill it. Drain them carefully and let them cool just enough to handle. If one splits, set it aside rather than forcing filling into it; you can still tuck it into the dish with the others.
What Makes the Filling Creamy and the Sauce Stay Loose
- Jumbo pasta shells — Their shape holds a spoonful of filling and gives the sauce places to gather. Handle them gently after draining, since overcooked shells are more likely to tear during filling.
- Ground beef — The 85% lean beef gives the filling a little richness without making it excessively greasy. Break it into small crumbles as it browns so it mixes evenly with the seasoning and cream cheese.
- Taco seasoning — A packet seasons the beef consistently and includes the spice blend in one step. Add it with the water so it coats the crumbles as the mixture simmers and thickens.
- Cream cheese and Mexican-blend cheese — Softened cream cheese turns the seasoned beef into a cohesive, creamy filling; the shredded blend melts into it and adds a savory cheese flavor. Let the cream cheese soften before stirring it in so it blends smoothly.
- Salsa and red enchilada sauce — Salsa brings tomato and chile flavor, while enchilada sauce makes the base pourable enough to coat the dish. Stirring them together gives the shells a saucy bed and a layer on top without needing a separate sauce-making step.
- Cheddar — The topping melts into a distinct cheesy layer during the uncovered bake. Pre-shredded cheddar works; freshly shredded cheddar tends to melt more evenly if that’s what you have.
How to Fill and Bake the Shells Without Losing the Sauce
Boil the Shells Just Short of Tender
Bring a large pot of water to a boil and cook the jumbo shells for about a minute less than the package directions. Drain them once they’re just shy of al dente, then set them aside. They should be pliable enough to open without cracking, with a slight firmness when you bite the edge. Don’t leave them sitting in the hot water after draining, or they’ll continue to soften.
Build a Creamy Beef Filling
Brown the ground beef in a large skillet over medium heat, breaking it into small pieces as it cooks. Cook until the beef reaches 160°F, then stir in the taco seasoning and water. Simmer for about two minutes, until the liquid thickens and clings to the crumbles rather than pooling in the pan. Take the skillet off the heat before stirring in the softened cream cheese, then mix in the Mexican-blend cheese until combined.
Layer the Sauce Around the Filled Shells
Stir the salsa and red enchilada sauce together in a bowl. Spread a cup of the sauce across the bottom of the cooking-spray-coated 9×13-inch baking dish; this gives the shells sauce underneath as well as over the top. Fill each shell with the beef mixture and arrange them in the dish. Spoon the remaining sauce over the shells, aiming to cover them without knocking the filling out.
Bake Covered, Then Melt the Cheddar
Cover the dish tightly with foil and bake at 375°F for 20 minutes. Remove the foil and scatter the cheddar over the shells, then bake uncovered for 10 minutes. The sauce should bubble around the edges and the cheddar should be melted before the dish comes out. Let it stand for five minutes before serving.
Easy Changes for a Different Heat Level or Dietary Need
Make the topping spicier
Replace the cheddar topping with shredded pepper Jack. It melts over the shells in the same uncovered bake and adds a gentle chile kick without changing the creamy beef filling.
Use ground turkey instead of beef
Swap in ground turkey for a lighter-tasting filling. Brown it in the skillet, then cook it to 165°F before adding the taco seasoning and water; turkey is leaner, so the finished filling may be a little less rich.
Make the dish gluten-free
Use gluten-free jumbo pasta shells, gluten-free taco seasoning, and gluten-free salsa and enchilada sauce. Cook the shells according to their package directions, stopping while they’re still firm enough to fill; gluten-free pasta can be more delicate, so drain and handle it gently.
Storage and Reheating
- Refrigerator: Store covered in an airtight container for 3 to 4 days. The shells soften as they sit, but the sauce helps keep them from drying out.
- Freezer: Freeze cooled portions in an airtight, freezer-safe container for up to 3 months. Thaw overnight in the refrigerator; the pasta will be softer after freezing.
- Reheating: Cover a portion and warm it in a 350°F oven until hot throughout, or microwave it in a covered microwave-safe dish. Reheat leftovers to 165°F, and avoid heating uncovered in the oven, which can dry the exposed pasta.
Questions I Get Asked About These Taco Stuffed Shells
Cheesy Baked Taco Stuffed Shells with Beef
Ingredients
Equipment
Method
- Heat the oven to 375°F.
- Coat a 9x13-inch baking dish with cooking spray.
- Cook the jumbo shells in a large pot of boiling water until just shy of al dente, about 1 minute less than the package directions.
- Drain the shells and set aside.
- In a large skillet over medium heat, cook the ground beef, breaking it up, until browned and cooked to 160°F.
- Stir in the taco seasoning and water.
- Simmer until the mixture thickens, about 2 minutes.
- Remove the skillet from the heat and stir in the cream cheese until smooth.
- Stir in the Mexican-blend cheese.
- Stir the salsa and enchilada sauce together in a bowl.
- Spread 1 cup of sauce in the prepared dish.
- Fill each shell with the beef mixture and arrange the shells in the dish.
- Spoon the remaining sauce over the shells and cover the dish tightly with foil.
- Bake for 20 minutes.
- Remove the foil and sprinkle the cheddar over the shells.
- Bake uncovered for 10 minutes, until the sauce is bubbling and the cheese is melted.
- Let the shells stand for 5 minutes before serving.