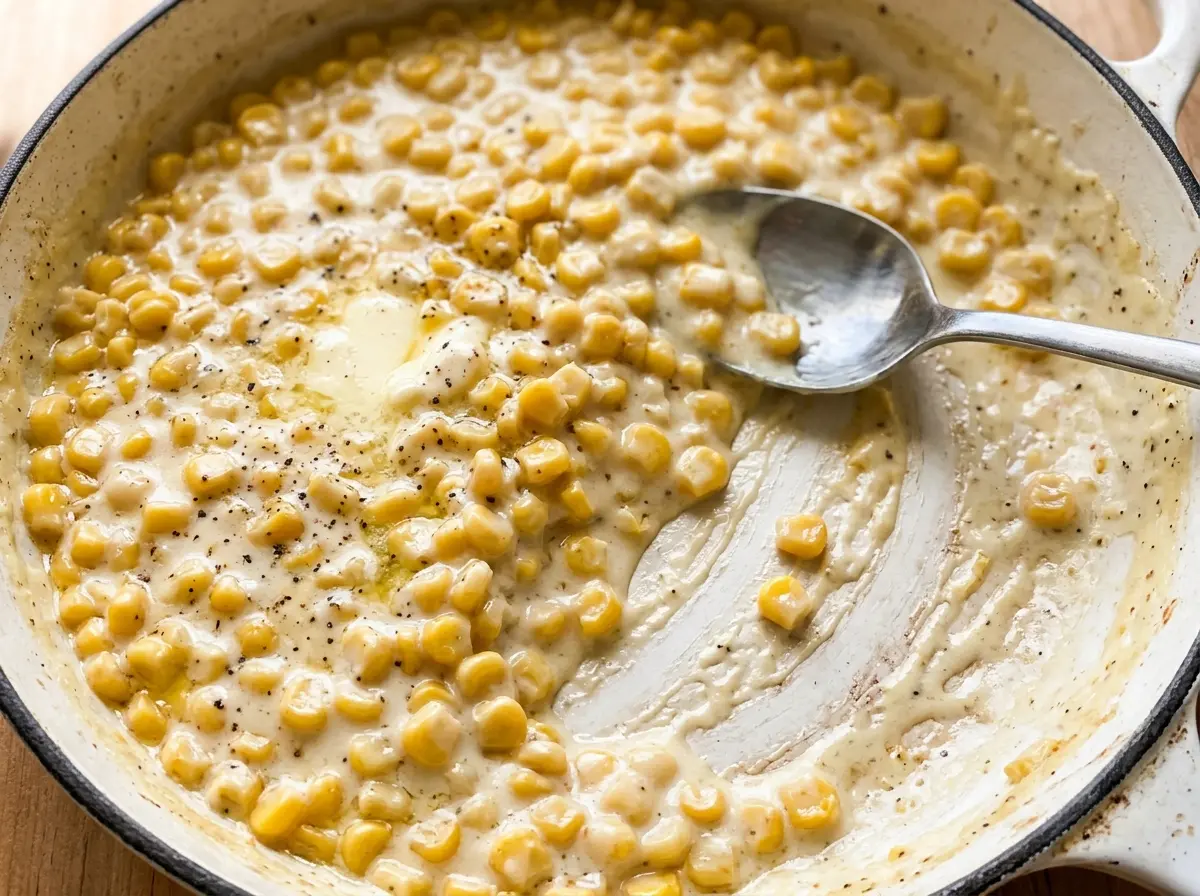
When fresh corn hits melted butter, the kernels start to smell sweet before the cream even goes in. That first few minutes in the pan gives this classic homemade creamed corn a fuller corn flavor, instead of making it taste like cream with a little corn mixed through.
I like using whole ears here because cutting the kernels is only half the job. Scraping the cobs catches the soft, milky bits that cling after the kernels are gone, and they help the finished corn feel naturally creamy.
Heavy cream brings richness, while whole milk keeps the sauce from feeling too heavy. A few pulses with an immersion blender pull some of the kernels into the cream but leave plenty whole, so each spoonful is soft, sweet, and still unmistakably corn.
Kitchen Note
Run the back of your knife down each bare cob after cutting off the kernels. The cloudy, milky pulp is easy to miss, but it’s worth collecting in the bowl with the corn.
Save this classic homemade creamed corn for a fresh-corn side with buttery kernels and a creamy finish.
Why the Corn Gets a Head Start in Butter Before the Cream Goes In
It’s easy to rush straight to the dairy, but giving the kernels a few minutes in butter first makes a difference. The corn cooks for 5–7 minutes before the cream and milk are added. That brief head start lets the kernels warm through and gives the butter time to coat them, so the dairy doesn’t have to do all the work of building flavor.
This is a gentle cooking stage, not a browning step. Stir occasionally and let the corn soften in the butter without trying to sear it or cook off every bit of moisture. Once the cream and milk go in, the pan shifts into a slow simmer. Keeping those stages separate gives you tender corn and a creamy sauce without needing flour or another thickener.
The order also makes the texture easier to judge. You can see how the kernels are softening before the dairy changes the look of the pan. Then, as the mixture simmers, the cream and milk reduce just enough to coat the corn. Aim for a gentle simmer rather than a hard boil; a fast, rolling boil isn’t needed to get the mixture creamy.
Fresh Corn, Cream, and Milk: What Each One Brings

- Fresh sweet corn — Fresh ears provide both the kernels and the tender pulp scraped from the cobs. Choose ears with plump kernels and a fresh, sweet smell; very dry kernels won’t give the same juicy bite. The cob pulp is part of what makes this version distinctive, so kernels alone don’t reproduce the same result.
- Butter — Butter gives the corn a rich base during its first cooking stage. A standard grocery-store butter works well; there’s no need for a specialty variety. The recipe uses kosher salt separately, so heavily salted butter would make the final seasoning less predictable.
- Heavy cream — This supplies the richness and body that make the sauce cling to the kernels. Use heavy cream rather than relying on milk alone; a thinner dairy base won’t give the same creamy finish.
- Whole milk — Milk softens the richness of the cream and keeps the sauce from feeling overly dense. Whole milk is the best fit here; lower-fat milk would make the mixture less full-bodied.
- Granulated sugar — A small amount rounds out the corn’s natural sweetness rather than turning the dish sugary. How sweet the ears taste can vary, but the measured amount keeps the seasoning balanced.
- Kosher salt — Salt brings out the corn’s sweetness and keeps the cream from tasting flat. If you use a different kind of salt, its grain size can change how much fits in a spoon, so the measured kosher salt is the most reliable choice.
- Black pepper — Pepper adds a mild savory edge that cuts through the dairy. Freshly ground pepper gives a more noticeable bite, while pre-ground pepper works when you want a softer finish.
From Cob to Creamy Corn Without Losing the Kernel Texture
Cut the Kernels and Collect the Cob Pulp
Cut the kernels from the husked, silk-free ears into a bowl so they stay together with the liquid they release. Then scrape each cob with the back of a knife to gather its milky pulp. Keep both the kernels and pulp for the pan; the pale pulp can be subtle, but it belongs in the mixture.
Soften the Corn in Butter
Melt the butter in a 3-quart saucepan over medium heat. Add the kernels and collected pulp, then cook for 5–7 minutes, stirring occasionally. The corn should look glossy and begin to soften, not take on a browned crust. If it starts sticking, stir it through the butter and keep the heat at medium.
Simmer Until Tender and Creamy
Stir in the heavy cream, whole milk, sugar, kosher salt, and black pepper. Bring the mixture to a gentle simmer over medium-low heat, then cook for 8–10 minutes, stirring often. Look for tender kernels and a creamy mixture that coats them; if the pan boils vigorously, lower the heat rather than trying to cook it faster.
Pulse Just Enough to Thicken the Spoonful
Turn off the heat before using an immersion blender. Pulse the corn several times, stopping while most of the kernels are still whole. Don’t run the blender continuously: a few short pulses blend some corn into the dairy while preserving the texture of the remaining kernels.
Small Changes That Keep the Corn at the Center
Leave Out the Sugar for a Less-Sweet Side
Omit the granulated sugar if your corn tastes sweet enough on its own or you prefer a more savory side. The cream and corn will still cook together as written, but the finished dish will taste less rounded and more directly corn-forward.
Turn Up the Pepper
Add more black pepper than the listed amount for a sharper, more savory finish. It gives the cream a little extra bite without changing the corn’s sweetness or the cooking method.
Make the Texture Smoother
For a less chunky bowl, pulse the immersion blender a few more times after turning off the heat. More kernels will break down into the cream, giving the corn a smoother, more uniform texture than the classic version.
Storage and Reheating
- Refrigerator: Store in an airtight container for 3–4 days. The corn will thicken as it chills.
- Freezer: Freeze in an airtight container for up to 2 months for best quality. The dairy mixture may separate a little after thawing, so stir it well as it warms.
- Reheating: Warm gently in a saucepan over low heat, stirring often. If it has thickened too much, stir in a small splash of whole milk; high heat can make the dairy separate.
Questions That Come Up While Making Fresh Creamed Corn
Classic Homemade Creamed Corn
Ingredients
Equipment
Method
- Cut the kernels from the ears into a bowl.
- Scrape the cobs with the back of a knife to collect the milky pulp.
- Melt the butter in a 3-quart saucepan over medium heat.
- Add the corn and pulp, and cook for 5–7 minutes, stirring occasionally.
- Stir in the heavy cream, milk, sugar, salt, and pepper.
- Bring to a gentle simmer over medium-low heat and cook for 8–10 minutes, stirring often, until the corn is tender and the mixture is creamy.
- Turn off the heat and pulse the corn with an immersion blender several times, leaving most of the kernels whole.