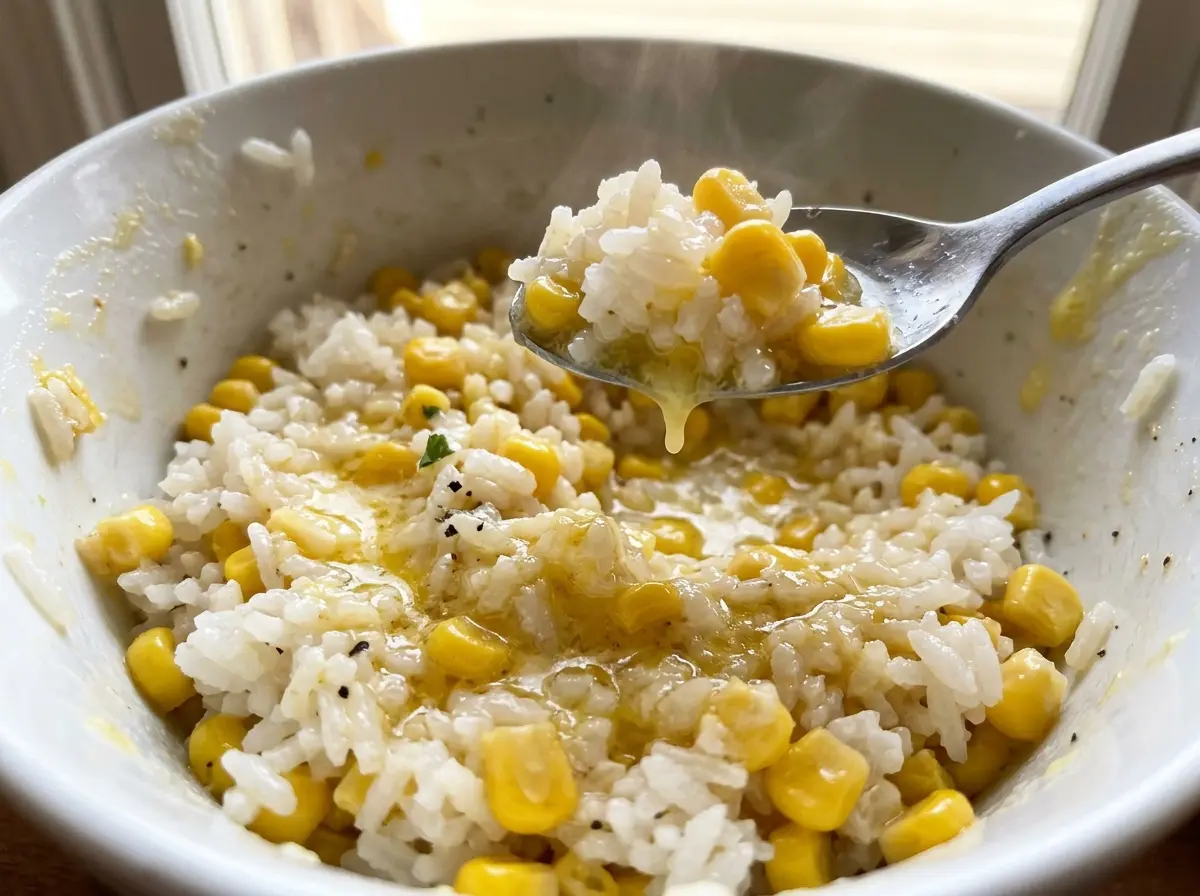
When the water around the rice starts bubbling, it’s tempting to keep checking the pot, but the covered simmer is what gives the grains time to cook evenly. I leave the lid on, then add the drained corn and butter only after the rice is tender. That simple order is what makes Hot Buttered Corn Rice a dependable side instead of a pot of rice with soggy kernels.
The rice cooks in a measured amount of water, so it can absorb the liquid before the corn goes in. Canned whole kernel corn is already tender; it needs warming, not a long simmer. I like how the butter melts into the hot grains while the corn settles through them, leaving each bite buttery without turning the rice heavy. The finished bowl is soft, fluffy rice with sweet corn tucked throughout.
Kitchen Note
Keep the pan covered for the full five-minute rest after the corn and butter go in. The trapped heat warms the corn through and gives the butter time to melt into the rice before you fluff it.
Save Hot Buttered Corn Rice for an easy side with fluffy grains, sweet corn, and butter stirred in right at the end.
Why the Corn Goes In After the Rice, Not Into the Simmering Pot
Rice needs a steady stretch of covered simmering to absorb its cooking water and become tender. Corn from a can is already cooked, so it doesn’t need that same time on the burner. Adding it at the end keeps the corn from getting softer than the rice and avoids putting extra liquid into the pot while the grains are still cooking.
Draining the corn matters for the same reason. The rice is working with a set amount of water; liquid clinging to undrained kernels can make the finished mixture wetter than intended. Once the rice is cooked, the residual heat in the pan is enough to warm the corn while the butter melts through. You get distinct kernels and tender rice rather than a damp, uneven spoonful.
This timing also makes the process easier to judge. First, watch the rice: the cooking water should be absorbed and the grains should be tender. Only then do the corn and butter go in. The corn doesn’t need to compete with the rice for heat or liquid, and you don’t have to guess whether both ingredients are done at once.
Long-Grain Rice and Drained Corn Set the Texture

- Long-grain white rice — Its grains cook up separate and light, which suits a dish where corn is mixed throughout rather than mashed into the rice. Use regular long-grain white rice, not a quick-cooking variety; their cooking needs differ. Keep the rice measured as written rather than estimating from a scoop that may be packed differently.
- Whole kernel corn — Canned kernels bring a consistent, tender bite and are ready to warm once drained. Drain the can well so the corn doesn’t contribute unwanted liquid to the finished rice. Cream-style corn isn’t a good stand-in: it has a creamy consistency and adds moisture instead of keeping the kernels distinct.
- Butter — Butter gives the rice its familiar rich finish and coats the grains as it melts. Since it’s stirred in off the heat, there’s no need to choose an especially high-heat or specialty butter. A plant-based butter alternative works for a dairy-free version, though its flavor may be less rich than dairy butter.
Cook the Rice First, Then Finish It With Corn and Butter
Bring the Rice, Water, and Salt to a Boil
Combine the rice, water, and salt in a 2-quart saucepan and set it over medium-high heat. Wait for the water to reach a boil before covering the pan. Keep an eye on it as it heats; once it bubbles steadily, move straight to the covered simmer rather than leaving it to boil hard. A vigorous boil can make water splash and escape before the rice has had time to cook.
Simmer Covered Until the Grains Are Tender
Cover the saucepan, reduce the heat to low, and simmer for 15 to 18 minutes. The lid holds in the steam that cooks the rice, so resist lifting it to check before the cooking time is nearly up. At the end, look for water that has been absorbed and taste a grain for tenderness. If the rice is still firm, it hasn’t reached the texture you want yet.
Stir in the Corn and Butter Off the Heat
Remove the pan from the heat, then stir in the drained corn and butter. Fold them through the hot rice so the kernels are distributed and the butter can melt without direct burner heat. Cover the pan and let it stand for 5 minutes. Fluff with a fork just before serving hot; a fork separates the grains without pressing them into a dense mass.
Small Swaps That Keep the Rice-Corn Balance
Make It Dairy-Free With Plant-Based Butter
Replace the butter with the same amount of stick-style plant-based butter. It melts into the hot rice in the same finishing step, so the method stays simple; the result may taste a little less creamy or buttery depending on the brand.
Use White Whole Kernel Corn
Swap the yellow canned corn for a 15-ounce can of white whole kernel corn and drain it before stirring it in. The color will be less golden, with a mild corn flavor that still works with the buttery rice. Keep the rice cooking method unchanged.
Storage and Reheating
- Refrigerator: Cool promptly and refrigerate within 2 hours. Keep covered and use within 3 to 4 days; the rice will firm up as it chills.
- Freezer: Freeze in an airtight container for up to 1 month for the best texture. Thaw overnight in the refrigerator before reheating.
- Reheating: Reheat covered in the microwave, stirring once, until steaming throughout and 165°F. Don’t heat it uncovered for a long stretch, or the rice can dry out before the center is hot.
Questions That Come Up When Rice and Corn Share a Pot
Hot Buttered Corn Rice
Ingredients
Equipment
Method
- In a 2-quart saucepan, bring the rice, water, and salt to a boil over medium-high heat.
- Cover, reduce the heat to low, and simmer for 15 to 18 minutes, until the water is absorbed and the rice is tender.
- Remove the pan from the heat and stir in the drained corn and butter.
- Cover and let stand for 5 minutes.
- Fluff the rice with a fork and serve hot.