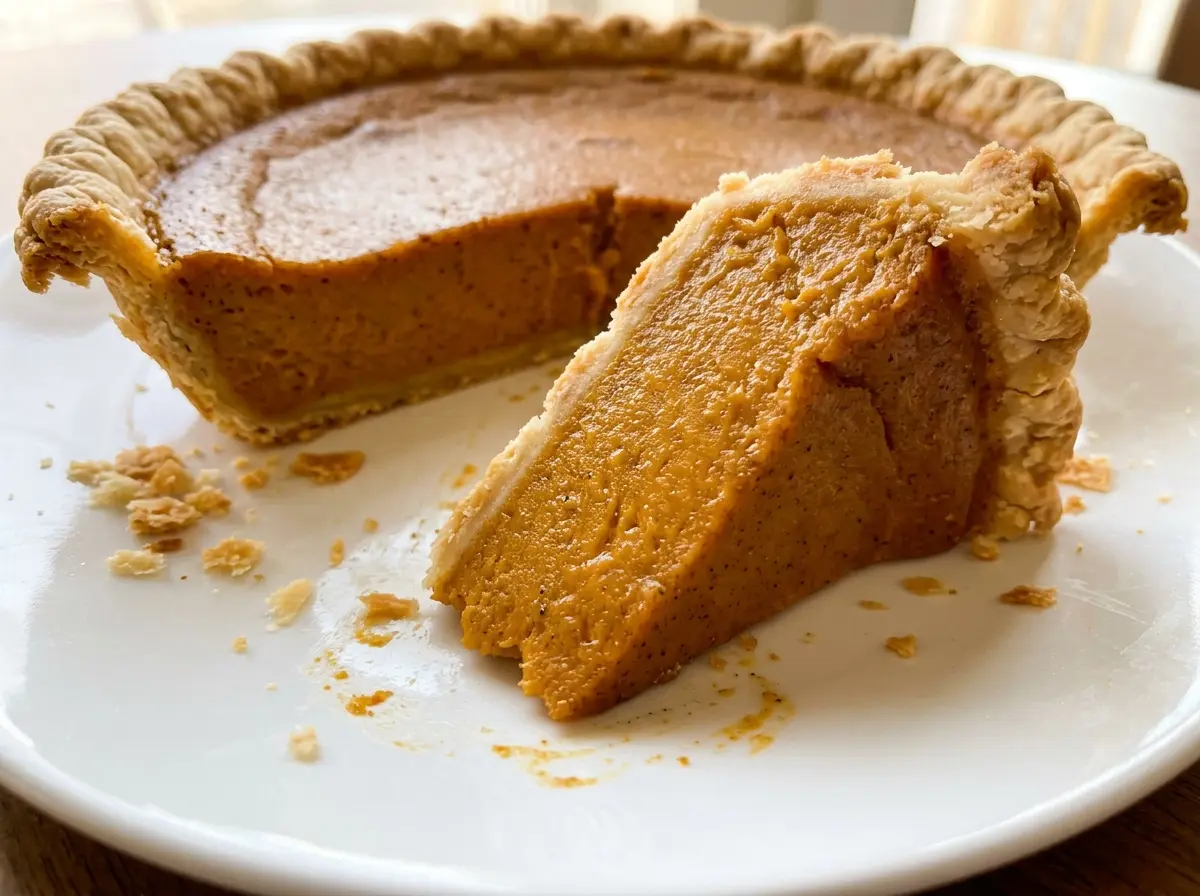
The first clue that pie dough has enough water isn’t a smooth ball; it’s a handful that holds together when squeezed. I stop there, even if the dough still looks shaggy, because adding water until it feels soft makes a flaky crust harder to achieve. For this old fashioned pumpkin pie, cold butter and a little shortening leave visible pieces in the dough, and the shaped shell gets another chill before it meets the filling.
The filling stays classic: pure pumpkin, evaporated milk, eggs, and a short list of warm spices. There’s no need to cook it on the stove or fuss with extra ingredients; whisk it smooth, pour it into the cold shell, and let the oven do the work. Once chilled, each slice has a tender, flaky crust and a smooth pumpkin center that holds its shape.
Kitchen Note
Add the ice water slowly, then squeeze a bit of dough in your hand to check it. Stop as soon as it holds together; a shaggy-looking dough is fine, while a wet, smooth dough is more likely to bake up tough.
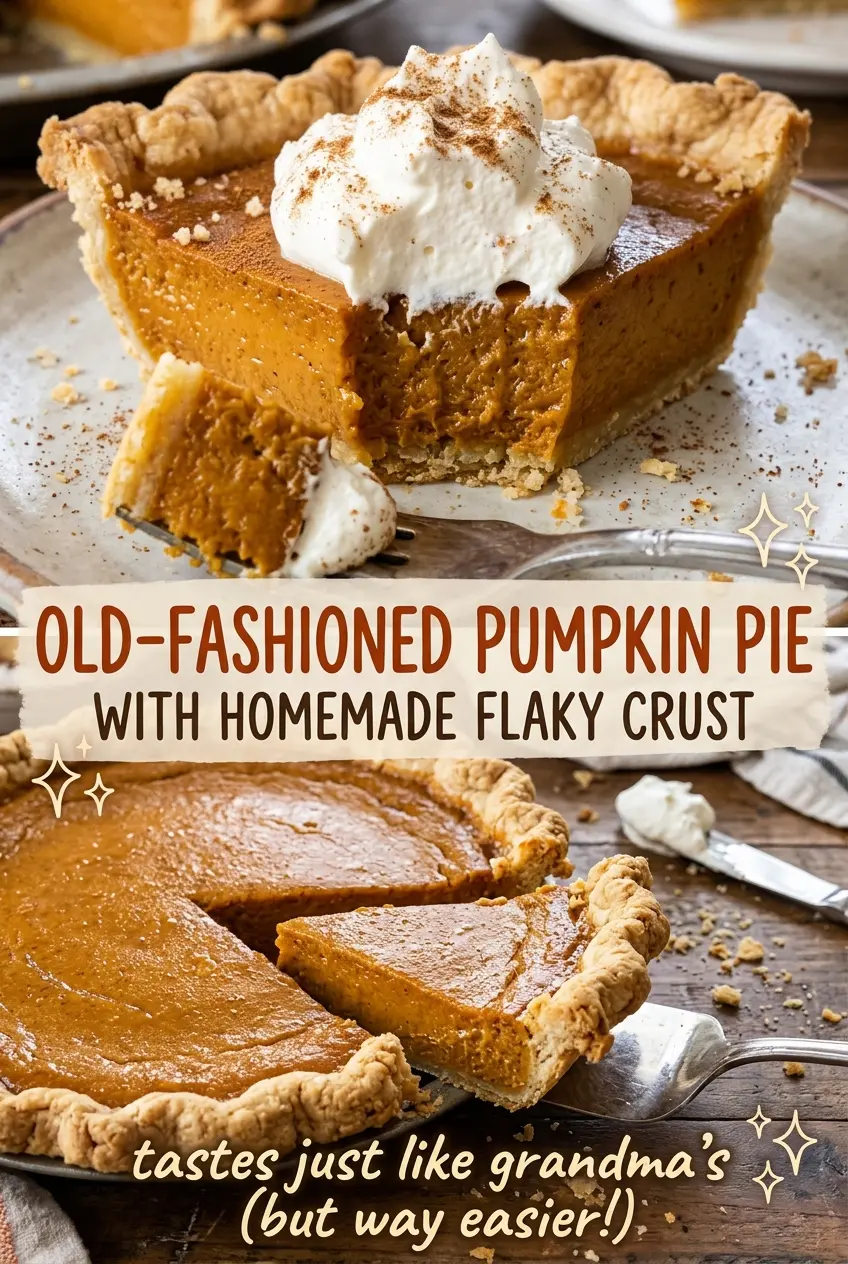
Save this old fashioned pumpkin pie for its homemade flaky crust and classic, gently spiced pumpkin filling.
Why this pumpkin pie starts in a cold, unbaked shell
This pie goes into the oven with its filling already in the raw crust. Chilling the shaped shell firms the butter and shortening again, so the fat stays in distinct pieces as the pastry begins to bake instead of melting into the flour before the crust can set. That’s why the dough gets a rest in the refrigerator before rolling and another short chill after it’s crimped into the pie plate.
The two oven temperatures do different jobs. The first 15 minutes at 425°F give the pastry an initial burst of heat; lowering the oven to 350°F lets the pumpkin custard finish baking more gently. A crust that goes into the oven warm or soft has less chance to keep its shape, and a filling baked too hard can turn dry around the edges before the middle is ready. Keep the shell cold, then let the lower temperature carry the filling through to its delicate set.
There’s no separate blind-baking stage here, which keeps the method manageable without leaving the bottom crust raw. The rimmed baking sheet also gives you a steady surface for moving the filled pie plate and catches any drips on the way to the oven.
What the pumpkin, milk, and crust ingredients each bring
- All-purpose flour — It gives the crust enough structure to hold a clean slice without making it bready. A standard all-purpose flour works well here; there’s no need for a specialty brand. For a gluten-free pie, use a prepared gluten-free shell rather than trying to swap flour in this dough.
- Cold butter and vegetable shortening — Butter brings the pastry flavor, while shortening helps keep the crust tender. Use cold salted butter cut into small cubes so the pieces stay distinct as you work. If you want an all-butter crust, replace the shortening with additional cold salted butter; expect a richer, slightly less tender pastry.
- Pure pumpkin — Canned pure pumpkin is consistent and ready to whisk into the filling. Don’t reach for pumpkin pie filling, which already contains sweetener and spices and would throw off the balance of the custard.
- Evaporated milk and eggs — Evaporated milk has less water than regular milk, giving the filling a fuller texture, and the eggs help it set into slices. Regular milk isn’t a direct replacement; its extra water can leave the center softer.
- Ground spices — Cinnamon leads, with ginger, nutmeg, and cloves adding depth without masking the pumpkin. Fresh, fragrant spices make the biggest difference; if your jars have been open for years, the filling will taste flatter.
From pea-size butter to a gently set pumpkin center
Cut the cold fat into the flour
Use a pastry blender to work the cold butter and shortening into the flour until the pieces range from pea-size to almond-size. The mixture shouldn’t look like fine sand; visible pieces of fat are what create flaky layers. Sprinkle in the first 3 tablespoons of ice water and toss with a fork. Add more water a teaspoon at a time, up to 2 tablespoons, until a squeeze of dough holds together.
Chill, roll, and crimp the shell
Gather the dough into a disk, wrap it, and refrigerate it for at least 1 hour. Roll it on a lightly floured surface into a 12-inch circle, then fit it into a 9-inch pie plate. Trim the overhang to about 1 inch, fold the edge under, and crimp; if the dough cracks as you roll, press it back together gently rather than kneading it. Refrigerate the shaped crust for 15 minutes while the oven heats to 425°F.
Whisk a smooth filling
Whisk the sugar, cinnamon, ginger, nutmeg, cloves, and salt together in a large bowl so the spices are spread through the sweetener. Whisk in the eggs, then the pumpkin and evaporated milk, mixing until the filling looks smooth and evenly colored. Scrape the sides and bottom of the bowl if you see streaks of pumpkin or spice. Pour the filling into the chilled shell.
Bake in two temperatures
Set the pie plate on a rimmed baking sheet and bake for 15 minutes at 425°F. Reduce the oven temperature to 350°F and continue baking for 40 to 50 minutes. The edges should look set while the center still jiggles slightly; a thermometer inserted near the center should read about 175°F. If the crust edge browns too quickly, cover it loosely with foil.
Cool fully before slicing
Move the pie to a wire rack and let it cool for 2 hours. The center will continue to settle as the pie cools, so don’t cut into it while it’s still warm. Refrigerate the pie until chilled before slicing. A sharp knife and a clean wipe between cuts help keep the filling’s surface neat.
Two ways to change the crust or spice balance
Use a gluten-free pie shell
Replace the homemade crust with an unbaked 9-inch gluten-free pie shell and keep the pumpkin filling the same. Follow the shell’s package directions about whether it should be filled unbaked or prepared first, since brands handle differently. The filling stays smooth and warmly spiced, though you won’t get the same homemade butter-and-shortening flakes.
Make the spice blend more ginger-forward
Shift the balance toward ground ginger by using a little more ginger and a little less cinnamon, leaving the nutmeg and cloves in place. The pumpkin tastes warmer and a touch sharper, while the filling still sets the same way. Keep the total amount of spices close to the original blend so they don’t overpower the pumpkin.
Storage and Reheating
- Refrigerator: Cover the chilled pie and refrigerate leftovers for 3 to 4 days. The crust softens gradually as it sits, but the filling stays sliceable.
- Freezer: Freeze the fully cooled pie, wrapped tightly, for up to 1 to 2 months. Thaw it in the refrigerator; the filling may be a little softer after thawing.
- Reheating: This pie is best served chilled, so reheating isn’t needed. Warming the whole pie can soften the custard and make clean slices harder to cut.
Questions about pumpkin pie crust and filling
Old Fashioned Pumpkin Pie with Homemade Flaky Crust
Ingredients
Equipment
Method
- Cut the cold salted butter and cold vegetable shortening into the all-purpose flour with a pastry blender until the pieces range from pea-size to almond-size.
- Sprinkle in 3 tablespoons ice water and toss with a fork.
- Add more ice water 1 teaspoon at a time, up to 2 tablespoons, just until the dough holds together when squeezed.
- Gather the dough into a disk and wrap it.
- Refrigerate the wrapped dough for at least 1 hour.
- On a lightly floured surface, roll the dough into a 12-inch circle.
- Fit the dough into a 9-inch pie plate.
- Trim the overhang to about 1 inch.
- Fold the edge under and crimp.
- Refrigerate the crust for 15 minutes.
- Preheat the oven to 425°F.
- In a large bowl, whisk together the granulated sugar, ground cinnamon, ground ginger, ground nutmeg, ground cloves, and fine salt.
- Whisk in the large eggs, pure pumpkin, and evaporated milk until smooth.
- Pour the filling into the chilled crust.
- Set the pie plate on a rimmed baking sheet.
- Bake for 15 minutes at 425°F, then reduce the oven to 350°F and bake for 40 to 50 minutes, until the edges are set, the center still jiggles slightly, and a thermometer inserted near the center reads about 175°F.
- Loosely cover the crust edge with foil if it browns too quickly.
- Cool on a wire rack for 2 hours.
- Refrigerate until chilled before slicing.