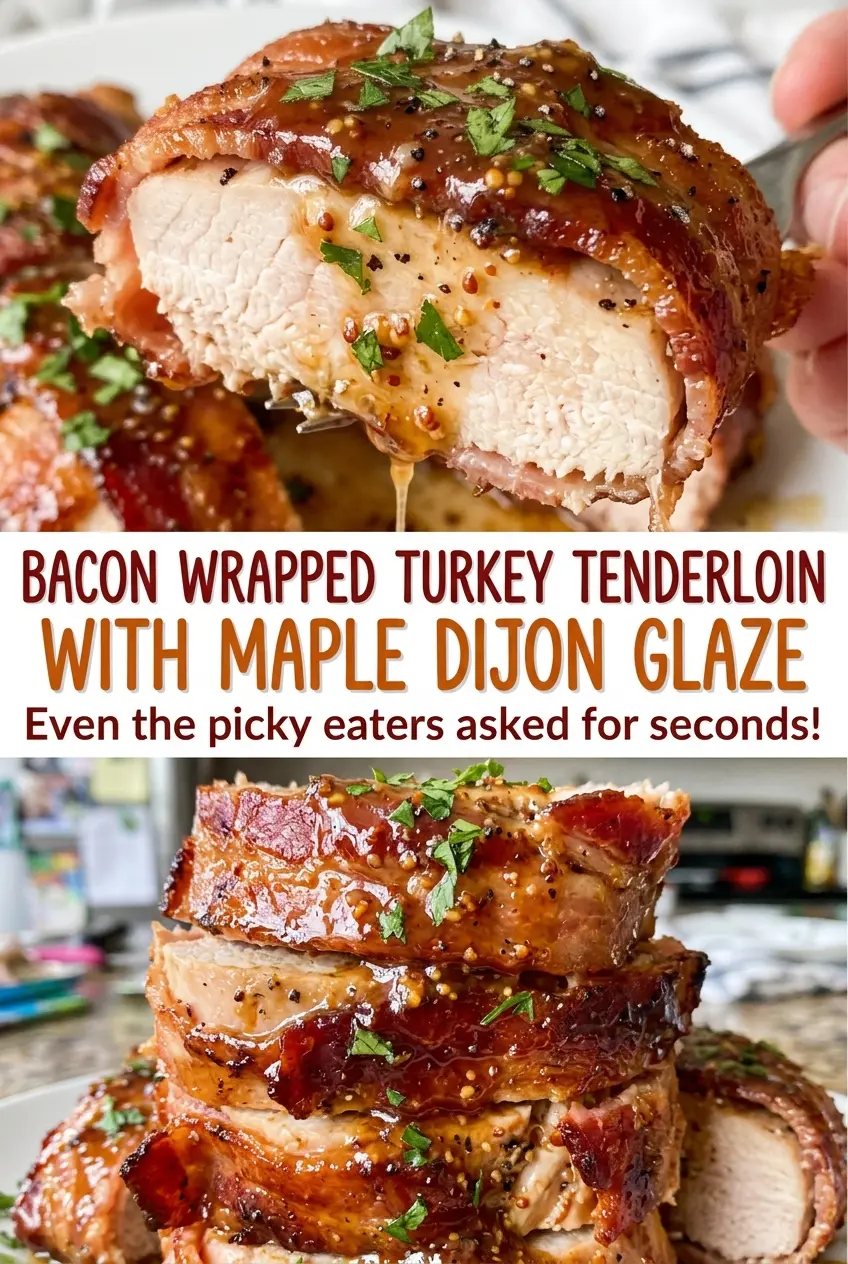
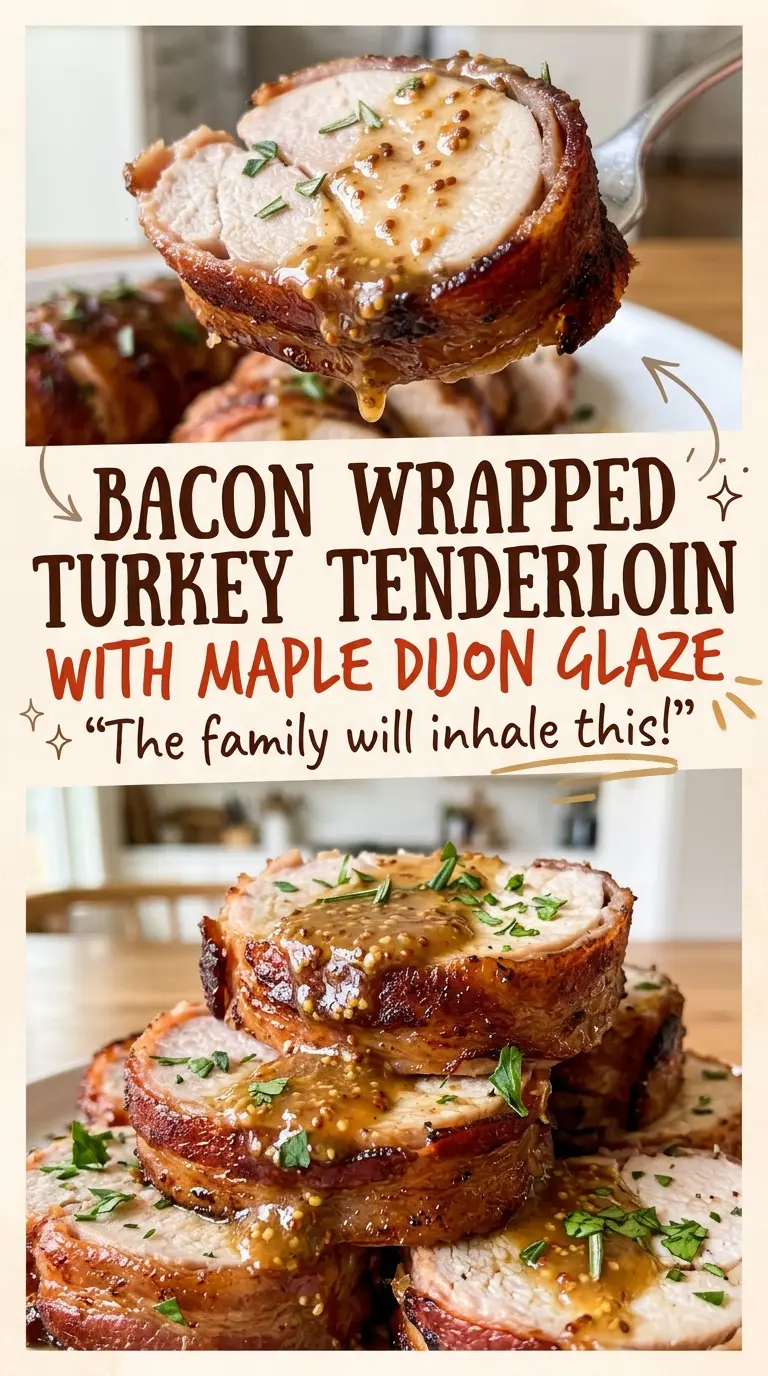
The bacon looks pale when the turkey first goes into the oven, and that’s exactly when I leave it alone. The glaze goes on later, after the bacon has had a head start, so the maple-Dijon coating doesn’t spend the whole roast in the heat. That timing is what makes this bacon wrapped turkey tenderloin with maple Dijon glaze practical: the turkey stays the focus, while the bacon browns and the glaze turns glossy.
I use an oven-safe rack over a foil-lined baking sheet, which keeps the tenderloins lifted above the pan as they roast. Patting the turkey dry first also gives the seasoning and bacon a better chance to stay put instead of sliding around on a damp surface. The glaze takes only a quick whisk, and the garlic gets grated finely enough to blend right in. Once sliced, the tender turkey has a sweet-tangy coating and crisp-edged bacon in every bite.
Kitchen Note
Give the tenderloins their full 10-minute rest before slicing. Cutting too soon lets the juices run onto the board, and the slices won’t stay as moist.
Save this bacon wrapped turkey tenderloin with maple Dijon glaze for a roast with browned bacon and a glossy sweet-tangy finish.
Why the Maple Glaze Goes on After the Bacon Starts Roasting
Maple syrup brings sweetness and helps the glaze turn shiny, but a sugary coating doesn’t need the entire roasting time to develop. I let the bacon and turkey roast first, then brush the maple-Dijon mixture over the tops and sides. That later application gives the glaze time to cling and color without exposing it to the full stretch of oven heat.
The rack matters for a different reason: it lifts the wrapped tenderloins above the foil-lined pan. Air can move around the bacon instead of leaving the underside pressed against the pan surface. Even with that setup, bacon color can vary by oven and by the thickness of the slices. If the turkey reaches its safe temperature before the bacon looks browned enough, a brief broil is the finishing tool—not extra roasting that could dry out the meat. Stay beside the oven during broiling; the glaze and bacon can darken quickly under that direct heat.
This is also why I use regular-cut bacon here. It wraps easily around the tenderloins, and it has a better chance of browning in step with the turkey than a much thicker slice. The goal isn’t to make the bacon brittle; it’s to get browned edges around tender slices of turkey.
What the Maple, Dijon, and Bacon Each Bring to the Tenderloins
- Turkey breast tenderloins — These lean, even pieces roast quickly compared with a whole turkey breast, so the thickest part needs attention rather than relying on color alone. Choose tenderloins of similar size when possible so they finish at a similar pace.
- Regular-cut bacon — It supplies salt, fat, and a savory outer layer around the mild turkey. The slices should overlap slightly so the meat stays covered as the bacon cooks; tuck the ends under each tenderloin to hold the wrap in place.
- Pure maple syrup — Its clean maple sweetness gives the glaze its character. Pancake syrup isn’t a close match; it can make the coating taste more like artificial syrup and less like maple.
- Dijon mustard — Dijon adds tang and a little sharpness, balancing the syrup so the glaze doesn’t taste one-note sweet. A smooth, familiar Dijon is a good choice; a coarse mustard would make the coating less even.
- Apple cider vinegar and garlic — The vinegar gives the glaze a bright edge, while finely grated garlic disperses through it instead of leaving large pieces on the surface. Use a fine grater so the garlic blends into the whisked mixture.
- Kosher salt and black pepper — They season the turkey beneath the bacon and glaze. Distribute them over all sides of the patted-dry tenderloins before wrapping.
How to Roast the Turkey Without Losing the Bacon’s Color
Whisk a Smooth Maple-Dijon Glaze
Whisk the maple syrup, Dijon mustard, apple cider vinegar, and finely grated garlic together in a small bowl. Keep whisking until the mustard is worked evenly through the syrup and the garlic isn’t clumped in one spot. The mixture will be pourable and glossy, ready to brush on after the first stretch of roasting. Set it aside while you prepare the turkey.
Dry, Season, and Wrap Each Tenderloin
Heat the oven to 375°F, line an 18×13-inch rimmed baking sheet with foil, and set an oven-safe wire rack on top. Pat the turkey tenderloins dry, then season all over with kosher salt and black pepper. Wrap each piece with four bacon slices, overlapping the slices slightly and tucking their ends underneath. If the bacon ends sit on top, they’re more likely to loosen as the meat roasts.
Glaze, Roast to Temperature, and Finish the Bacon
Set the tenderloins seam-side down on the rack and roast for 25 minutes. Brush glaze over the tops and sides, then roast for another 15 to 25 minutes, until both tenderloins reach 165°F in the thickest part and the bacon is browned. Check the meat in its thickest section rather than judging doneness by the outside color. If the turkey is ready but the bacon needs more color, broil for 1 to 2 minutes, watching closely.
Rest Before Slicing
Transfer the tenderloins from the oven and let them rest for 10 minutes before slicing and serving. This short pause makes it easier to cut neat portions through the bacon without pushing the juices out of the turkey. Use a sharp knife and slice across the tenderloins into even pieces.
Two Useful Ways to Adjust the Maple-Dijon Version
Make the Glaze Tangier
For a sharper, less-sweet finish, shift the balance of the glaze toward Dijon and apple cider vinegar and away from maple syrup. The turkey keeps its bacon wrapping, but the coating tastes brighter and more mustard-forward. Change the balance modestly so the glaze still brushes easily over the meat.
Make It Gluten-Free
Use gluten-free Dijon mustard and gluten-free bacon in place of versions that contain gluten. Pure maple syrup, turkey, garlic, and apple cider vinegar keep the same sweet-tangy character, while the finished tenderloins remain close in flavor and texture to the original.
Storage and Reheating
- Refrigerator: Store leftovers in a covered container for 3 to 4 days. The bacon softens in the refrigerator, though the turkey stays tender when covered.
- Freezer: Freeze sliced portions in an airtight freezer container for up to 2 to 3 months. Thaw overnight in the refrigerator for more even reheating.
- Reheating: Cover slices and warm them gently in the microwave in short bursts, or in a covered oven-safe dish until hot throughout. Uncovered, high-heat reheating can dry the lean turkey before the bacon warms through.
Questions That Come Up When Making Bacon-Wrapped Turkey
Bacon Wrapped Turkey Tenderloin with Maple Dijon Glaze
Ingredients
Equipment
Method
- Whisk the maple syrup, Dijon mustard, apple cider vinegar, and garlic together in a small bowl.
- Heat the oven to 375°F.
- Line an 18x13-inch rimmed baking sheet with foil.
- Set an oven-safe wire rack on top of the baking sheet.
- Pat the tenderloins dry.
- Season the tenderloins all over with the salt and pepper.
- Wrap each tenderloin with 4 bacon slices, slightly overlapping the slices and tucking the ends underneath.
- Set the tenderloins seam-side down on the rack and roast for 25 minutes.
- Brush the glaze over the tops and sides.
- Roast for 15-25 minutes more, until both tenderloins reach 165°F in the thickest part and the bacon is browned.
- Broil for 1-2 minutes if needed to brown the bacon, watching closely.
- Rest the tenderloins for 10 minutes.
- Slice and serve.