
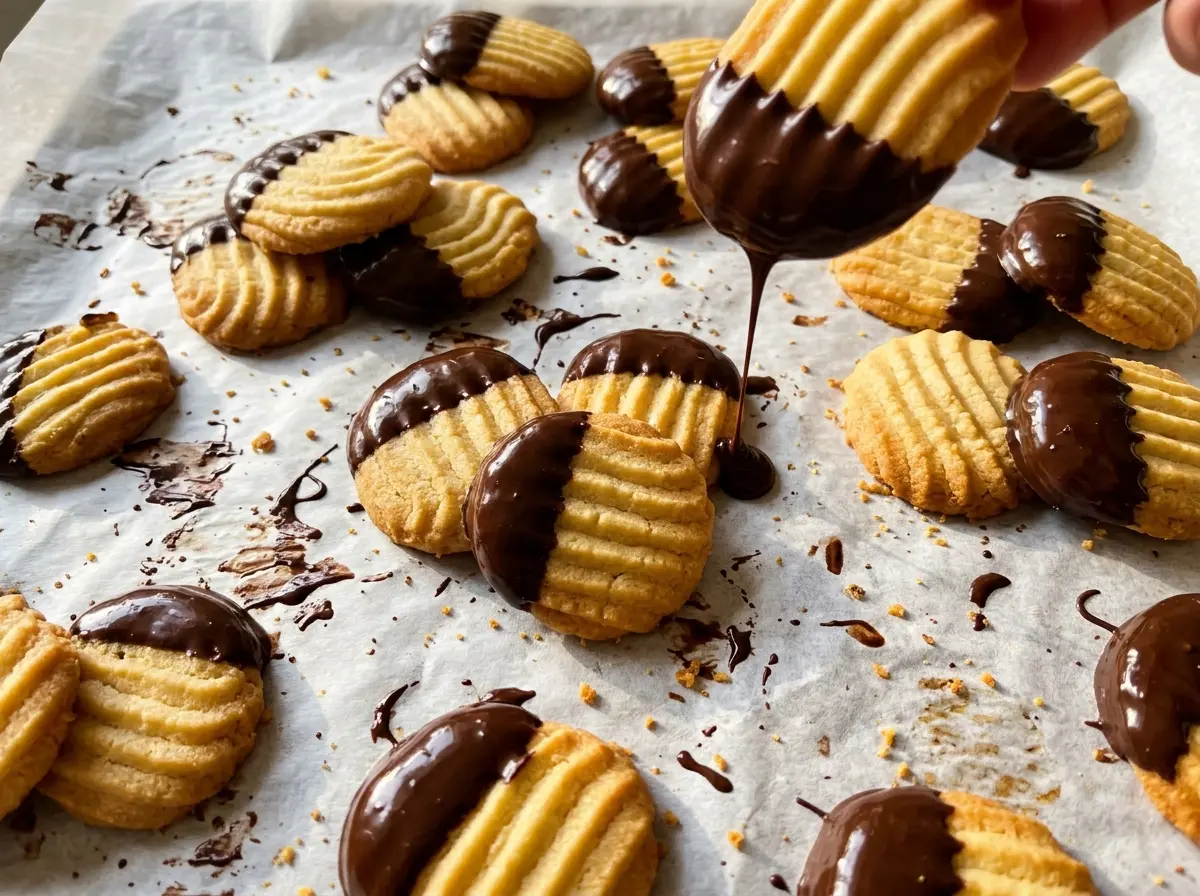
A spritz cookie should leave the press with its ridges intact, not slump into a buttery puddle on the baking sheet. These chocolate dipped spritz cookies hold their little shapes in the oven, then get a half-dip of semisweet chocolate that makes each one feel finished without covering up the buttery cookie.
I keep the dough soft enough to press, but stop mixing as soon as the flour disappears. That balance matters: a stiff dough is hard to press, while extra mixing after the flour goes in can make the cookies less tender. Pressing onto an ungreased sheet gives the dough a surface to grip, and baking just until the edges start to color keeps the centers delicate. Once they’re cool, the chocolate coating is a simple finish: melted gently with a little vegetable oil, then left to set on parchment.
The batch makes 36 cookies, so there’s enough to arrange on a platter or tuck into a tin. Each one has a crisp-edged pressed shape, a soft buttery bite, and a smooth chocolate finish.
Kitchen Note
Pull the cookies when the edges are only just beginning to turn golden. They’re small, and a minute too long can take them from tender to dry.
Save these chocolate dipped spritz cookies for a buttery pressed cookie with a smooth semisweet chocolate finish.
Why Spritz Dough Needs an Ungreased Sheet to Hold Its Shape
A cookie press works by pushing dough through a patterned disk and releasing each shape onto the pan. The dough needs to catch on the baking sheet as it comes out of the press. Grease or parchment creates a slippery layer between dough and pan, which can keep the cookie from releasing cleanly or leave the pattern less defined.
That’s why this dough goes straight onto an ungreased baking sheet. Don’t treat the lack of parchment as an oversight; it’s part of how these cookies are formed. Set the sheet on a steady surface, press each cookie, then lift the press cleanly away. If the dough sticks to the press instead of staying on the pan, check that the sheet is bare and that you’re pressing directly onto it.
There’s a second detail that helps preserve the shapes: the dough is mixed only until it forms a soft mass. Too much flour or extra mixing can make it harder to press through the disk. The right dough feels soft and pliable, not crumbly or runny, and the cookies keep their ridges as they bake.
What Butter, Extracts, and Chocolate Each Bring to These Cookies

- Unsalted butter — Butter gives the cookies their rich, tender texture and carries the vanilla and almond aromas. Use it softened, not melted, so it creams properly with the sugar. A standard grocery-store butter works well; there’s no need to seek out a specialty brand.
- Granulated sugar — The sugar sweetens the dough and helps it turn light and fluffy when beaten with the butter. Keep it granulated here; a different sugar changes the dough texture and how easily it presses.
- Egg — A room-temperature egg blends into the creamed butter more smoothly than a cold one. Set it out before mixing so it doesn’t chill the softened butter.
- Vanilla and almond extracts — Vanilla gives the cookie its familiar aroma, while almond extract adds a distinct, slightly nutty note. The almond extract is easy to leave out if you want a simpler vanilla cookie; the flavor will be less layered.
- All-purpose flour and salt — All-purpose flour gives the dough enough structure to hold the pressed design without turning into a cutout-cookie dough. Whisk the flour with the salt first so the salt is dispersed before the dry mixture goes into the butter.
- Semisweet chocolate chips and vegetable oil — Semisweet chips give the coating a clear chocolate flavor without making the cookies overly sweet. The small chips melt evenly, and the vegetable oil loosens the chocolate so it coats smoothly. A standard bag of chips is a good choice; the chocolate is prominent, but an expensive brand isn’t required.
From Soft Dough to a Smooth Chocolate Dip
Cream the Butter and Sugar
Heat the oven to 375°F and set out two ungreased baking sheets. Beat the softened butter and granulated sugar in a large bowl with an electric mixer on medium speed for about 2 minutes, until the mixture looks light and fluffy. Beat in the room-temperature egg, vanilla extract, and almond extract until combined. If the butter is too firm, it won’t become fluffy in the allotted time, so let it soften before you start.
Mix and Press the Dough
Whisk the flour and salt together in a separate bowl, then add them gradually to the butter mixture on low speed. Stop as soon as a soft dough forms; once the flour is incorporated, more mixing won’t help. Fill the cookie press and press the shapes onto the ungreased baking sheets, spacing them about 1 inch apart. Bake in batches, and let the sheets cool completely between batches.
Bake Until the Edges Just Color
Bake each batch for 7 to 9 minutes, until the cookies are set and the edges are just beginning to turn golden. The centers shouldn’t be deeply browned. Let the cookies rest on the baking sheets for 2 minutes before transferring them to a wire rack. Cool them completely before dipping, or the warm cookies will soften the chocolate coating.
Melt, Dip, and Let the Coating Set
Combine the semisweet chocolate chips and vegetable oil in a microwave-safe bowl. Microwave at 50% power in 20-second intervals, stirring after each one, until the chocolate is smooth. Dip half of each cooled cookie into the chocolate and let the excess drip back into the bowl. Set the cookies on parchment paper until the coating is firm, about 45 minutes.
Three Small Changes for a Different Spritz Cookie
Make Them Vanilla-Forward
Leave out the almond extract and keep the vanilla. The cookies will taste simpler and more buttery, with no almond note competing with the chocolate.
Serve Them Without the Chocolate
Skip the chocolate chips and vegetable oil for a plain butter spritz. You’ll have a more delicate, buttery cookie without the extra sweetness or the wait for a coating to set.
Dip Just the Tips
For a lighter chocolate finish, dip only the outer tip of each cookie instead of half. The smaller coating leaves more of the pressed cookie visible and lets the buttery flavor come through first.
Storage and Reheating
- Room temperature: Store the firm-coated cookies in an airtight container for up to 5 days. Separate layers with parchment so the chocolate doesn’t mark the cookies above it.
- Freezer: Freeze the cooled cookies in an airtight container with parchment between layers for up to 2 months. Thaw them in the closed container at room temperature to limit condensation on the chocolate.
- Reheating: These cookies don’t need reheating; let them come to room temperature if they’re chilled. Don’t microwave chocolate-dipped cookies, since the coating will soften or melt.
Questions That Come Up When Making Spritz Cookies
Chocolate Dipped Spritz Cookies
Ingredients
Equipment
Method
- Preheat the oven to 375°F.
- Set out two ungreased baking sheets.
- In a large bowl, beat the softened butter and granulated sugar with an electric mixer on medium speed until light and fluffy, about 2 minutes.
- Beat in the egg, vanilla extract, and almond extract until combined.
- In a separate bowl, whisk together the all-purpose flour and salt.
- Gradually mix the flour mixture into the butter mixture on low speed just until a soft dough forms.
- Fill a cookie press with the dough.
- Press cookies onto the ungreased baking sheets, spacing them about 1 inch apart.
- Bake in batches, letting the sheets cool completely between batches.
- Bake for 7 to 9 minutes, until the cookies are set and their edges are just beginning to turn golden.
- Let the cookies cool on the baking sheets for 2 minutes.
- Transfer the cookies to a wire rack and cool completely.
- Combine the semisweet chocolate chips and vegetable oil in a microwave-safe bowl.
- Microwave at 50% power in 20-second intervals, stirring each time, until smooth.
- Dip half of each cooled cookie into the chocolate, let excess chocolate drip back into the bowl, and place the cookies on parchment paper until the coating is firm, about 45 minutes.


