
The loose cookie crumbs turn dark and glossy as they meet softened cream cheese, and that’s the moment these Christmas Oreo Balls stop looking like a bowl of crumbs and start becoming truffle filling. The texture changes quickly once everything is evenly mixed, so I work the mixture together before rolling it into little, roughly 1-inch rounds.
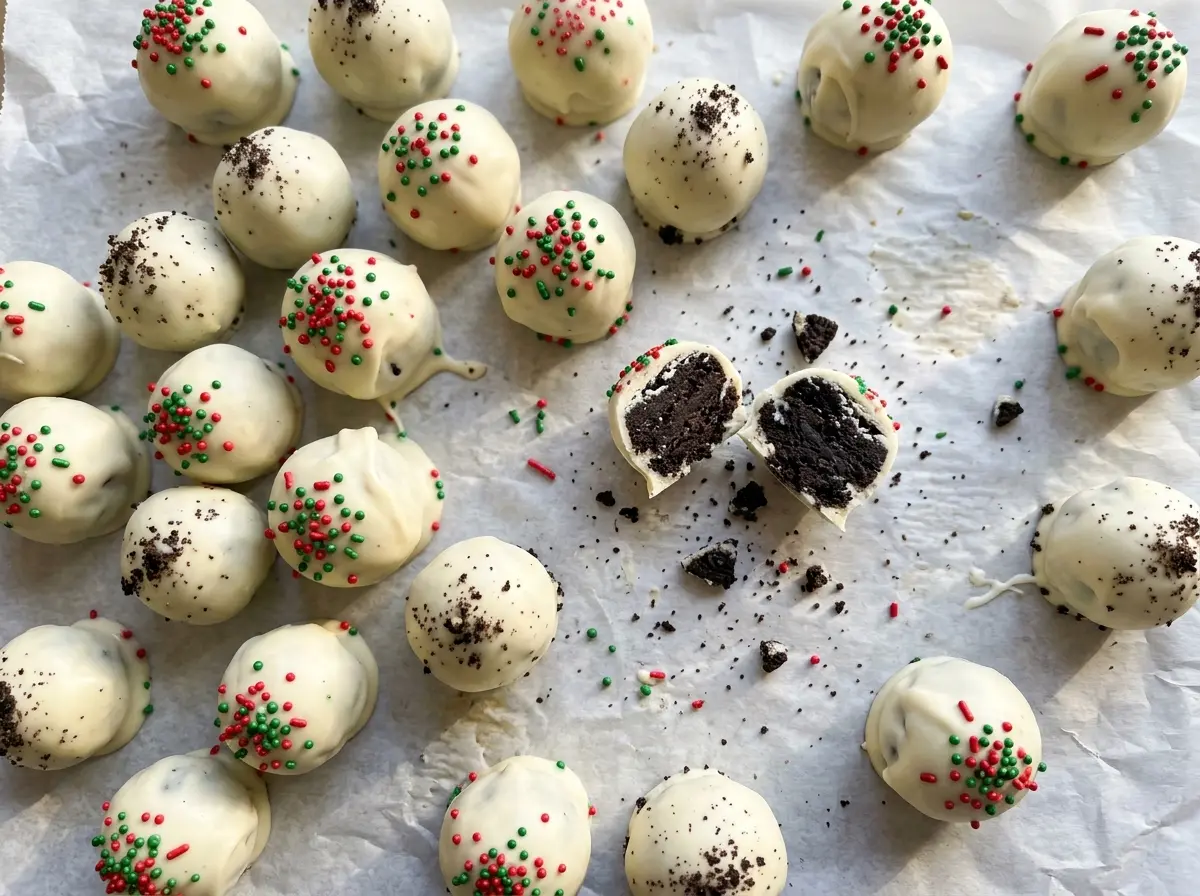
Finely crushing the whole cookies, filling included, gives the cream cheese enough crumb to bind without leaving hard chunks in the centers. A short chill firms the balls for dipping, then the white chocolate coating gives them a clean finish and a place for the sprinkles to stick. The finished bites are creamy inside, sweet at the edges, and easy to pick up from the tray.
Kitchen Note
Have the sprinkles beside the baking sheet before you start dipping. The coating begins to set on a chilled ball, so decorate each one as soon as it goes back on the parchment.
Save these Christmas Oreo Balls for a festive tray of creamy cookie centers, smooth white chocolate, and a sprinkle-covered finish.
Why the Oreo Crumbs Need to Be Fine Before You Mix
These aren’t whole cookies stirred into a cream cheese dip. The cookies need to become a fine, even crumb so they can take up the moisture in the cream cheese and form a filling that rolls into tidy balls. Leave larger pieces behind and they interrupt that smooth texture; you’ll feel the chunks when you bite through the center, and the mixture is harder to shape evenly.
Crush the cookies with their filling still inside. The filling is part of the crumb mixture, not something to scrape out, and removing it changes the balance of the center. A food processor makes quick work of the cookies, but a sealed bag and rolling pin work just as well if you crush them thoroughly. Check the crumbs before adding the cream cheese: they should look consistently fine, without obvious cookie pieces. That little bit of care makes the filling easy to portion and gives each ball the same soft, compact bite.
What the Cookies, Cream Cheese, and Coating Each Bring

- Oreo cookies — The chocolate wafers and sweet filling work together to provide both the cookie flavor and the dry crumb that gives the center its structure. Use crisp cookies so they crush cleanly. Another chocolate sandwich cookie is the closest swap, though its filling and flavor can make the center taste a little different.
- Cream cheese — Softened cream cheese binds the fine crumbs into a smooth, moldable mixture. A block is easier to measure and mix into a firm filling than a loose, spreadable tub product. If you use a block of Neufchâtel in its place, expect a slightly softer center.
- White chocolate melting wafers — These melt into a fluid coating that’s practical for dipping and sets around the chilled centers. For a less-sweet, darker finish, swap in the same quantity of dark chocolate melting wafers. Regular chocolate chips are thicker once melted and don’t give you the same easy dipping texture.
- Christmas sprinkles — Their main job is to add color and a little crunch to the outside. Any dry sprinkle shape or color works; choose pieces small enough to sit neatly on the coating.
From Fine Crumbs to a Smooth, Set Chocolate Shell
Crush the Cookies Until the Crumbs Look Even
Put the whole cookies, filling included, through a food processor until finely crushed, or seal them in a bag and work over them with a rolling pin. With the bag method, press out excess air first so the cookies can move around as you crush them. Break up any larger pieces you spot before mixing; coarse chunks make the filling less uniform.
Mix, Roll, and Chill the Centers
Mix the cookie crumbs and softened cream cheese in a large bowl until the color and texture are even throughout. Scrape around the bottom of the bowl so no streaks of plain cream cheese are left behind. Roll the mixture into 36 balls, about 1 inch each, and arrange them on a parchment-lined baking sheet. Refrigerate for 30 minutes, until the balls feel firm enough to dip without losing their shape.
Melt the Wafers Without Rushing Them
Put the white chocolate melting wafers in a microwave-safe bowl and microwave in 30-second bursts, stirring after each burst. Keep stirring as they soften; the bowl may hold enough heat to finish melting a few wafers between intervals. Stop when the mixture is smooth, rather than continuing to heat it once no solid pieces remain. If you skip the stirring, some wafers can stay solid while other spots get too hot.
Dip, Decorate, and Let the Coating Set
Dip each chilled ball in the melted wafers and let the extra coating drip back into the bowl before returning it to the parchment-lined sheet. A fork or dipping tool can help support each ball as you lift it, but let the excess run off instead of carrying a thick pool of coating onto the tray. Add sprinkles while the coating is still wet. Refrigerate the finished balls for 15 minutes, until the shell has set, then keep them refrigerated until serving.
Three Easy Ways to Change the Flavor or Fit a Dietary Need
Make the centers peppermint
Replace the standard sandwich cookies with peppermint chocolate sandwich cookies, using the same weight. The method stays the same, but the center takes on a minty note that pairs well with the white coating. The exact sweetness and strength of the mint will depend on the cookies you choose.
Make a gluten-free batch
Use gluten-free chocolate sandwich cookies in place of the Oreos, matching the cookie weight. Crush them finely and follow the same mixing and chilling method. The center may have a slightly different cookie flavor, but the cream cheese still brings the crumbs together.
Give the coating a darker finish
Use dark chocolate melting wafers instead of white chocolate wafers for a less-sweet coating with a deeper chocolate taste. The dipping method stays unchanged, and Christmas sprinkles still add a bright contrast against the darker shell.
Storage and Reheating
- Refrigerator: Keep the finished Oreo balls in an airtight container for 3 to 4 days. The coating may lose a little of its crisp snap over time, but the centers stay creamy.
- Freezer: Freeze the set balls in a single layer, then move them to an airtight freezer container with parchment between layers. They keep well for up to 2 months; thaw them in the refrigerator before serving.
- Reheating: These are served chilled, so reheating isn’t needed. Bring them straight from the refrigerator to the serving tray rather than warming the chocolate coating.
Questions That Come Up While Making Christmas Oreo Balls
Christmas Oreo Balls
Ingredients
Equipment
Method
- Finely crush the Oreo cookies, including the filling, in a food processor or in a sealed bag with a rolling pin.
- In a large bowl, mix the softened cream cheese and cookie crumbs until evenly combined.
- Roll the mixture into 36 balls, about 1 inch each.
- Arrange the balls on a parchment-lined baking sheet.
- Refrigerate for 30 minutes, until firm.
- Melt the white chocolate wafers in a microwave-safe bowl in 30-second bursts, stirring after each, until smooth.
- Dip each chilled ball in the melted wafers, letting excess coating drip back into the bowl.
- Return each coated ball to the baking sheet and decorate with sprinkles before the coating sets.
- Refrigerate the Oreo balls for 15 minutes, until the coating is set.
- Keep refrigerated until serving.


