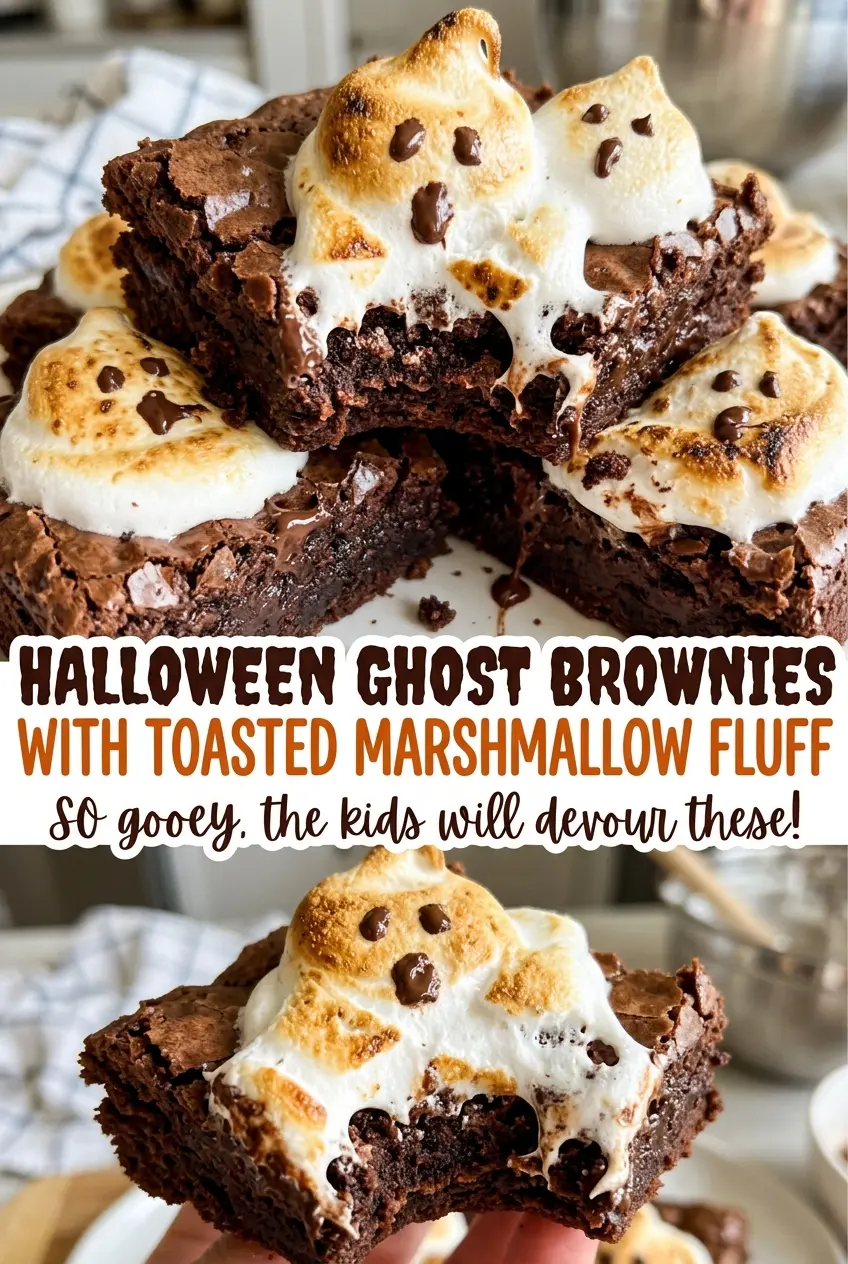
When the butter, sugar, and cocoa turn into a smooth, dark mixture, you can already tell these brownies are going to bake up dense rather than cakey. I like that the batter comes together in one saucepan before the eggs and flour go in, so there’s no bowl of dry cocoa to chase around later. These Halloween ghost brownies get their height from a simple marshmallow topping, not from a complicated frosting.
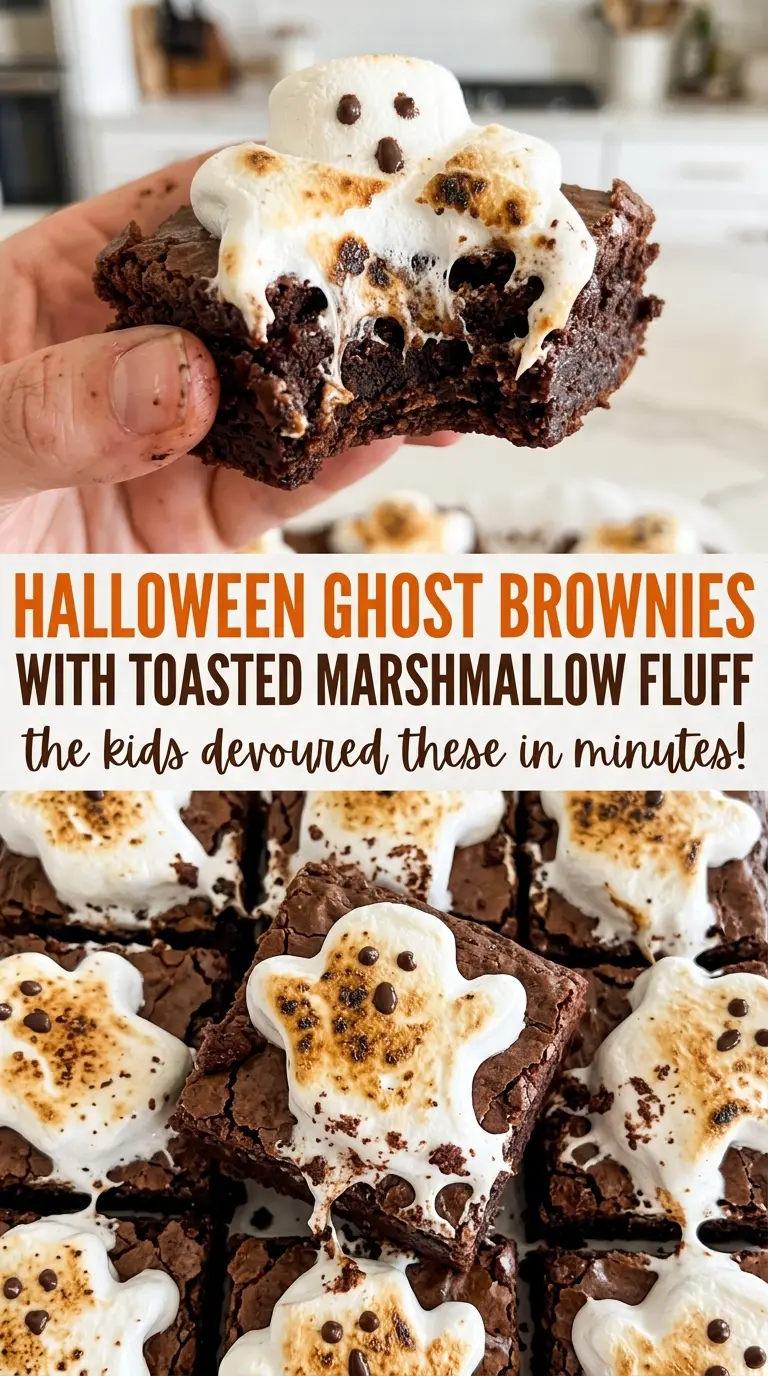
The marshmallow creme and powdered sugar beat into a thick mixture that holds a peaked shape, then a short chill helps it keep that shape while you toast the tops. I pipe each mound right onto a cooled brownie square and finish it with two tiny chocolate-chip eyes. The result is a soft, fudgy base under a lightly toasted, pillowy ghost.
Kitchen Note
Wait until the brownies are completely cool before cutting them. The parchment overhang lets you lift the whole slab out cleanly, so the squares keep their edges instead of crumbling in the pan.
Save these Halloween ghost brownies for a party table: fudgy squares, toasted marshmallow peaks, and chocolate-chip eyes.
Why This Brownie Batter Starts With Cocoa in Warm Butter
Unlike a brownie made by melting chocolate, this one gets its chocolate flavor from cocoa stirred directly into melted butter and sugar. That order matters: the warm butter helps the cocoa disperse into a smooth, dark base before the eggs and flour are added. You’re not relying on a separate chocolate bar to bring both sweetness and fat, so the cocoa stays clear and pronounced.
The flour goes in last and only needs to be folded until the dry streaks disappear. Keep working it after that and the brownies can turn tougher instead of fudgy. There’s no leavener in this batter, so it won’t rise into a fluffy cake; the modest amount of flour gives the squares enough structure to carry their marshmallow ghosts without losing that dense center.
What Gives These Ghosts Their Pipeable Shape
- Unsweetened cocoa and butter — Cocoa supplies the deep chocolate taste, while butter gives the batter richness. A regular grocery-store cocoa works well here; choose one whose flavor you enjoy, since it’s the main chocolate note. The recipe is built around unsweetened cocoa, so sweetened drink mix isn’t a like-for-like replacement.
- Granulated sugar and large eggs — Sugar sweetens the cocoa without adding the extra moisture brown sugar brings, and the eggs bind the batter so each square holds together. Use large eggs for the intended balance; there isn’t a simple egg swap that keeps the same texture.
- All-purpose flour — It gives the brownies enough structure to support the topping. A cup-for-cup gluten-free baking blend designed to replace all-purpose flour is the most practical swap; the crumb may be a little more delicate, so let the brownies cool fully before lifting and cutting them.
- Marshmallow creme and powdered sugar — The creme gives the topping its stretchy, marshmallow character, and powdered sugar thickens it into a mound that can be piped. A standard jar works; this isn’t a place where a premium brand is necessary. Regular marshmallows don’t make the same smooth, pipeable topping.
- Mini semisweet chocolate chips — Their small size makes neat eyes that don’t overwhelm the ghosts. Ordinary baking chips are fine, but full-size chips look oversized on these little mounds.
From Smooth Cocoa Batter to Toasted Ghosts
Prepare the pan and smooth the cocoa base
Heat the oven to 350°F and lightly coat an 8×8-inch metal pan with nonstick cooking spray. Line it with parchment paper, leaving overhanging edges, then lightly spray the parchment too. Melt the butter in a medium saucepan over low heat; take the pan off the heat before stirring in the granulated sugar and cocoa powder. Stir until the mixture looks evenly dark and smooth, with no dry cocoa pockets.
Build and bake the fudgy brownie layer
Whisk in the eggs one at a time, then stir in the vanilla extract. Fold in the flour and table salt just until no dry streaks remain; stop before the batter becomes elastic or overworked. Spread it evenly in the pan so the center and edges bake at the same pace. Bake for 22–27 minutes, until a toothpick inserted in the center comes out with a few moist crumbs rather than wet batter.
Cool completely before cutting
Set the pan on a wire rack and leave the brownies in it until completely cool, about 2 hours. Cutting while the center is warm can drag the soft crumb and leave ragged squares. Once cool, use the parchment overhang to lift the slab from the pan. Cut it into 16 squares before adding any topping.
Pipe, chill, toast, and add the eyes
Beat the marshmallow creme and powdered sugar in a medium bowl with an electric mixer until thick and smooth, about 1–2 minutes. Transfer the mixture to a piping bag or a resealable bag with one corner cut off, then pipe a tall peaked mound onto each square. Chill the brownies for 15–20 minutes so the peaks hold up to the torch. Move a kitchen torch flame constantly over the topping until golden brown spots appear; don’t linger in one place, or the surface can darken too quickly. Press two mini semisweet chocolate chips onto each ghost for eyes.
Small Changes That Keep the Ghosts Recognizable
Make a gluten-free batch
Replace the all-purpose flour with the same amount of a cup-for-cup gluten-free baking blend formulated for baking. Keep the mixing gentle and allow the brownies to cool completely before cutting; the squares may be a touch more fragile, but the cocoa and marshmallow topping stay just as prominent.
Leave the eyes off for a softer look
Skip the chocolate chips and keep the toasted peaks plain. The ghosts look more minimal, and the marshmallow stays the only topping texture, which is handy if you want a simple finish without changing the brownie or fluff.
Pipe shorter ghost caps
Make the mounds lower and rounder instead of pulling them into tall peaks. You’ll get a wider toasted top and a less dramatic ghost silhouette, while keeping the same marshmallow mixture and decorating method.
Storage and Reheating
- Refrigerator: Keep the finished brownies in a covered, airtight container for up to 3 days. The topping firms up when chilled and may feel a little tacky.
- Freezer: Freeze the brownie squares before adding the marshmallow topping. Wrap them individually, place them in an airtight container, and freeze for up to 2 months; thaw in the refrigerator before decorating.
- Reheating: These are best served cool or brought to room temperature. Don’t microwave decorated brownies; the marshmallow can soften and slide off the squares.
The Questions That Come Up Before Torch Time
Halloween Ghost Brownies with Toasted Marshmallow Fluff
Ingredients
Equipment
Method
- Heat the oven to 350°F.
- Lightly coat an 8x8-inch metal baking pan with nonstick cooking spray.
- Line the pan with parchment paper with overhanging edges, and lightly spray the parchment.
- Melt the butter in a medium saucepan over low heat.
- Remove the pan from the heat and stir in the granulated sugar and cocoa powder until smooth.
- Whisk in the eggs one at a time.
- Stir in the vanilla extract.
- Fold in the flour and salt just until no dry streaks remain.
- Spread the batter evenly in the prepared pan.
- Bake for 22–27 minutes, until a toothpick inserted in the center comes out with a few moist crumbs.
- Cool the brownies completely in the pan on a wire rack, about 2 hours.
- Lift them out by the parchment and cut into 16 squares.
- Beat the marshmallow creme and powdered sugar in a medium bowl with an electric mixer until thick and smooth, about 1–2 minutes.
- Transfer the mixture to a piping bag or a resealable bag with one corner cut off.
- Pipe a tall peaked mound onto each brownie.
- Chill for 15–20 minutes.
- Use a kitchen torch to toast the marshmallow topping, moving the flame constantly until golden brown in spots.
- Press 2 chocolate chips onto each ghost for eyes.