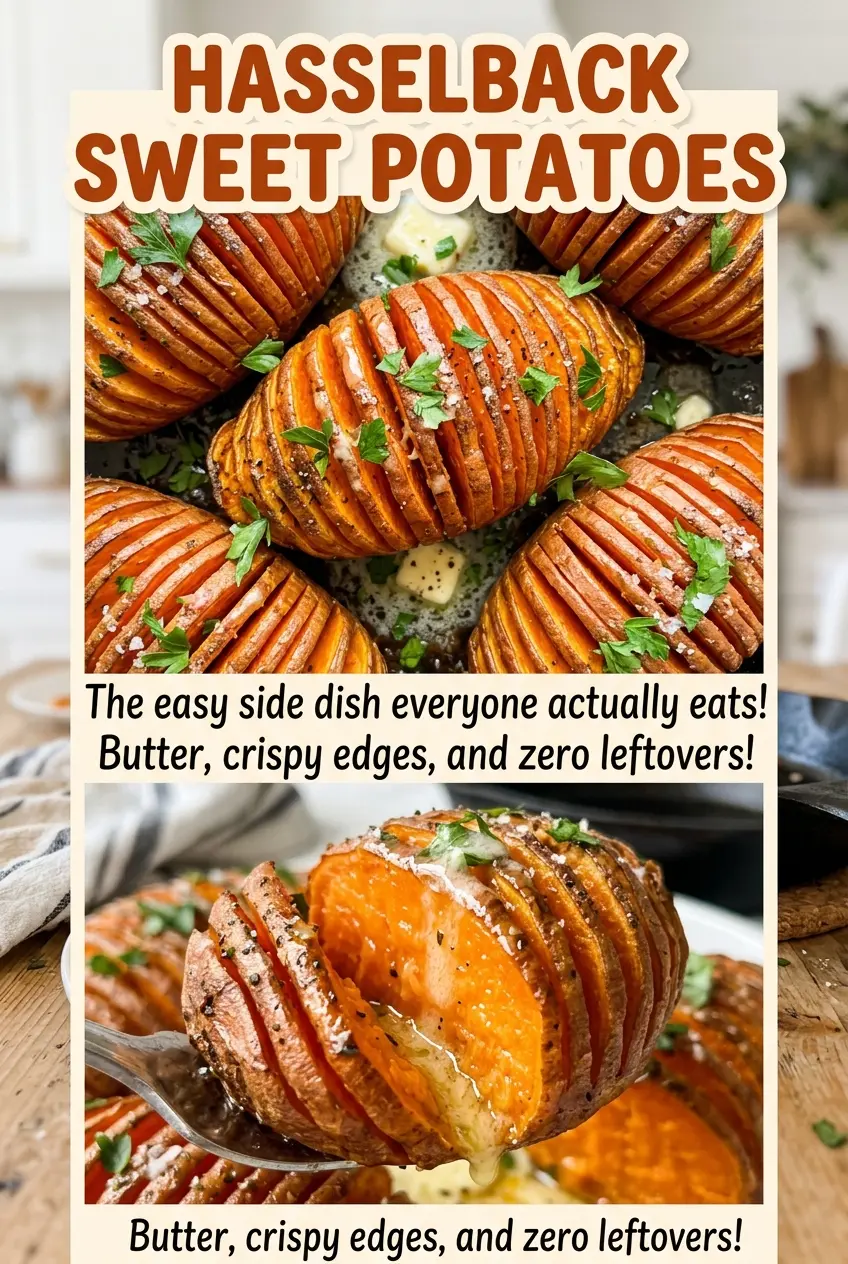
The knife keeps wanting to go straight through the potato, especially near the narrow ends. That’s where the chopsticks earn their place: they stop the blade before it cuts the sweet potato into separate pieces. Once the potatoes fan open in the oven, the thin edges brown while the centers stay tender, which is what makes these Hasselback Sweet Potatoes worth the careful slicing.
I like that this method doesn’t ask for special equipment or a complicated sauce. A rimmed baking sheet, a little olive oil, and thyme butter are enough. The potatoes roast first until the slices begin to separate, then the butter gets brushed over the top and worked between the layers. You get browned edges and the earthy lift of fresh thyme in every bite.
Kitchen Note
Strip the fresh thyme leaves from their stems before stirring them into the melted butter. Woody stems can catch in the brush and won’t spread as neatly between the slices.
Save these Hasselback Sweet Potatoes for their tender centers, browned edges, and fresh thyme butter.
Why the Bottom Strip Keeps These Sweet Potatoes Together
Hasselback potatoes are all about creating lots of exposed edges without turning the potato into a stack of loose slices. Leave a thin, uncut strip along the bottom and the slices stay attached as they soften. They can open like a fan, but the potato still lifts as one piece instead of breaking apart on the baking sheet.
That intact base also gives you a little more control when you brush on the butter later. A cut that goes all the way through leaves thin rounds that can shift or separate while you handle them. The chopsticks or wooden spoon handles act as a physical stop, so you don’t have to guess how far the knife has gone. Keep the cuts close and consistent, too: slices around 1/8 inch thick open more evenly than a mix of thick and paper-thin cuts.
Don’t worry if the potatoes look fairly solid when they first go into the oven. The slices begin to loosen during the first bake, and that opening is what lets the thyme butter reach beyond the outside surface.
Why Medium Sweet Potatoes and Unsalted Butter Make the Cut

- Sweet potatoes — Medium potatoes are easier to slice into an even fan and more likely to finish at a similar pace. Choose firm ones with a shape that sits steadily on the board; an everyday orange-fleshed variety works well, so there’s no need to seek out a specialty type. Scrub and dry them before slicing, since a damp surface makes the oil harder to spread evenly.
- Olive oil — A light coating helps seasonings cling and starts the potatoes roasting without masking their natural sweetness. A basic everyday olive oil is perfectly suitable here; an equal amount of avocado oil is a practical swap if that’s what you keep on hand, though it has a more neutral taste.
- Unsalted butter — Butter brings a richer finish than oil alone and carries the thyme over the exposed surfaces. A regular grocery-store unsalted butter is all you need; choosing unsalted gives you control over the seasoning rather than adding extra salt through the butter.
- Fresh thyme — The leaves give the butter a woodsy, clean aroma that suits the sweet potato without making the topping heavy. If fresh thyme isn’t available, dried thyme works: use about one-third as much, then stir it into the melted butter so it can soften before brushing.
How to Get a Fan That Browns Without Losing Its Base
Set Up the Pan and Cut the Potatoes
Heat the oven to 425°F and line a rimmed baking sheet with parchment paper. Set each scrubbed, dried sweet potato between two chopsticks or wooden spoon handles, then slice crosswise into 1/8-inch-thick pieces. Let the knife stop against the guides each time so the bottom stays intact. Repeat with the remaining potatoes, keeping your cuts steady rather than rushing through the narrow ends.
Oil and Season the Outside
Arrange the sliced potatoes on the prepared baking sheet. Brush them with olive oil, then season with kosher salt and black pepper. Work the oil over the top and sides, but don’t try to force the slices open while they’re still firm. The first stretch in the oven will loosen them.
Let the First Bake Open the Slices
Bake for 20 minutes, until the slices begin to separate. While they roast, melt the butter and stir in the thyme leaves. If the slices still look tightly closed at the end of that first bake, handle them gently as you brush; the openings will continue to widen in the oven.
Brush on Thyme Butter and Roast Until Tender
Brush the potatoes with the butter mixture, working some between the slices. Return the pan to the oven and bake for 30 to 40 minutes more. Look for browned edges, and check that a fork slides easily into the thickest part of a potato. If the center still feels firm, it needs more time.
Three Flavor Changes That Still Let the Sweet Potato Shine
Make the Thyme Butter Dairy-Free
Replace the unsalted butter with the same amount of unsalted plant-based butter and melt it with the thyme. The potatoes still get a rich coating, though the finish may taste a little less buttery depending on the brand. Choose a plain, unsalted style so it doesn’t add an unexpected savory flavor.
Add a Gentle Smoky Note
Stir a pinch of smoked paprika into the melted thyme butter before brushing it over the potatoes. It adds a warm, savory edge that plays well with their sweetness without changing the roasting method. Keep the amount modest so the thyme still comes through.
Trade Thyme for Fresh Sage
Use finely chopped fresh sage in place of the thyme leaves in the butter. Sage makes the finish earthier and a little more savory, while the butter still slips into the opened slices. Chop the leaves finely so they spread across the potatoes instead of clumping on top.
Storage and Reheating
- Refrigerator: Store leftovers in an airtight container for up to 4 days. The slices soften as they chill, so they won’t be quite as crisp around the edges.
- Freezer: They can be frozen, though the texture will be softer after thawing. Cool completely, wrap each potato well, and freeze for up to 2 months; thaw in the refrigerator before reheating.
- Reheating: Warm them in a 350°F oven until heated through. A microwave works when speed matters, but it softens the browned edges further; avoid reheating them for longer than needed.
Questions That Come Up While Making Hasselback Sweet Potatoes
Hasselback Sweet Potatoes
Ingredients
Equipment
Method
- Heat the oven to 425°F.
- Line a rimmed baking sheet with parchment paper.
- Place a sweet potato between two chopsticks or wooden spoon handles and slice crosswise into 1/8-inch-thick slices, stopping when the knife hits the guides so the bottom stays intact; repeat with the remaining potatoes.
- Arrange the potatoes on the baking sheet.
- Brush them with the olive oil and season with the salt and pepper.
- Bake for 20 minutes, until the slices begin to separate.
- Meanwhile, melt the butter.
- Stir the thyme leaves into the melted butter.
- Brush the potatoes with the butter mixture, working some between the slices.
- Bake for 30 to 40 minutes more, until the potatoes are fork-tender and the edges are browned.