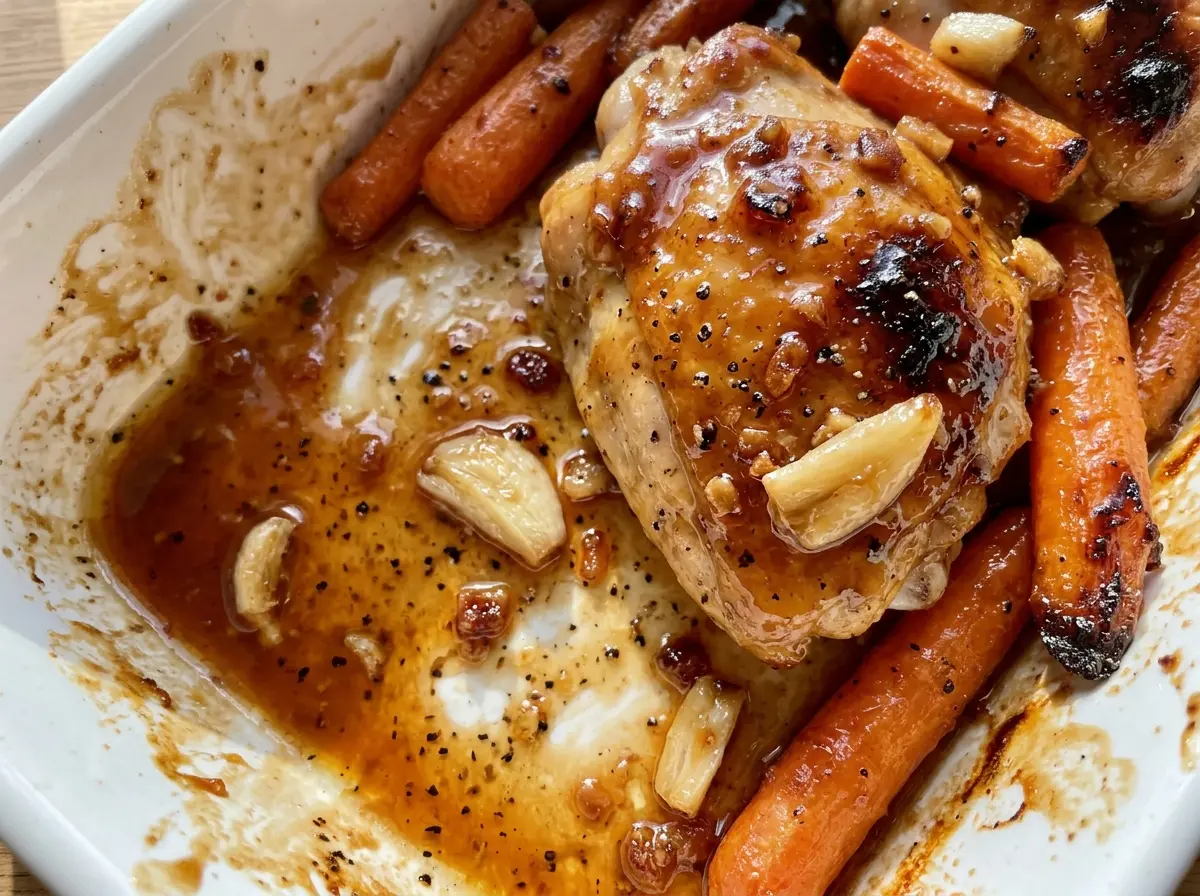
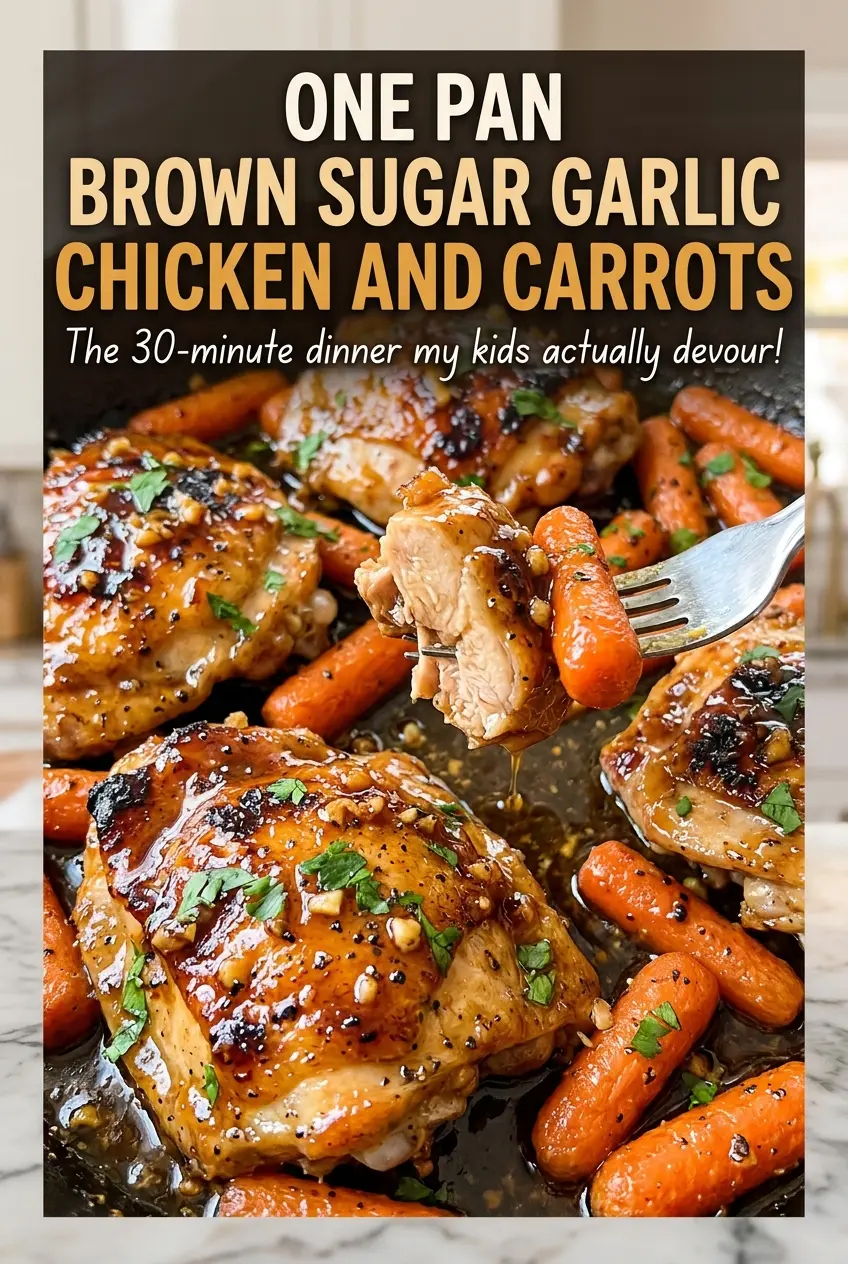
When the brown sugar and butter hit the hot pan, the glaze starts to cling to the chicken while the carrots soften underneath it. I like this one-pan dinner because the thighs and vegetables roast together, but each still gets its own distinct texture: tender carrots and juicy chicken with a sweet, garlicky coating.
The carrot cut matters more than it might seem. Sticks cut 1/4 inch thick have time to become tender during the same roast that brings boneless thighs to temperature, and spreading them in an even layer helps them roast instead of steam. The soy sauce keeps the brown sugar glaze from tasting flat, while melted butter makes it easy to stir and spoon over the chicken. The finished pan is savory-sweet, with plenty of garlic in every bite.
Kitchen Note
Stir the glaze until the melted butter is evenly mixed through the brown sugar, garlic, and soy sauce. If it looks a little grainy, keep stirring; it should be easy to spoon over the thighs, not a dry clump.
Save this brown sugar garlic chicken and carrots for a one-pan dinner with tender vegetables and a glossy, savory-sweet chicken glaze.
The Carrot Cut That Lets the Chicken and Vegetables Finish Together
Chicken thighs and carrots don’t have the same shape or density, so the cut of the carrots is what helps them share a pan successfully. Thin sticks, cut 1/4 inch thick, have enough surface area to soften during the chicken’s roast without turning into mush. Much thicker pieces can still be firm when the thighs are ready, while very thin pieces soften sooner and may lose their shape.
Give the carrots room in an even layer on the rimmed baking sheet, then arrange the chicken among them. This keeps the vegetables exposed to the heat rather than buried under a pile. The carrots get tossed once halfway through roasting, which helps them cook evenly. The thighs stay in place with the glaze spooned over the top, so the sweet garlic coating roasts onto the chicken instead of being stirred through the vegetables. That balance is what makes this feel like a full one-pan dinner rather than chicken sitting on top of undercooked carrots.
The pan size is part of that setup: an 18×13-inch rimmed baking sheet gives the carrots room to spread and holds the chicken in the same layer. Line it with parchment before you start, and the sticky glaze has less chance of becoming a cleanup project.
Why Light Brown Sugar and Boneless Thighs Work So Well in This Glaze
- Boneless, skinless chicken thighs — Thighs stay juicy through a longer roast more reliably than lean chicken breast, and their broad surfaces give the glaze room to coat. Choose pieces that are similar in size so they finish at about the same time. Patting the surface dry also helps the topping stay on the chicken.
- Light brown sugar — Its gentle molasses note gives the glaze sweetness and helps it brown in the oven. Pack it into the measuring cup so the amount is consistent. Dark brown sugar works as a swap if you want a deeper, more pronounced molasses flavor.
- Unsalted butter — Melted butter carries the garlic and sugar into a spoonable mixture and adds a round, savory richness. A standard grocery-store butter is fine here; the garlic and brown sugar are the bigger flavor cues. For a dairy-free version, olive oil can replace the butter in the same amount, though the glaze will taste less buttery.
- Fresh garlic — Minced cloves give the glaze a sharper, more present garlic flavor than a dried seasoning would. Mince it finely so it disperses through the butter and sugar rather than landing in large pieces on a few thighs.
- Soy sauce — It brings salt and savory depth to the sugar glaze, keeping it from tasting like a plain sweet coating. For a gluten-free version, substitute the same amount of gluten-free tamari; it keeps the savory balance without changing the method.
- Carrots — Regular whole carrots are a good choice because you can peel and cut them to a consistent thickness. Uniform sticks roast more evenly than a mix of thick and thin pieces, and there’s no need to seek out specialty carrots for this pan.
Building the Pan So the Glaze Browns While the Carrots Turn Tender
Spread and season the carrots
Heat the oven to 400°F and line an 18×13-inch rimmed baking sheet with parchment paper. Put the peeled carrots, cut into 1/4-inch-thick sticks, on the sheet and toss them with 1 tablespoon olive oil, 1/2 teaspoon salt, and 1/4 teaspoon black pepper. Spread them in an even layer before adding the chicken. A crowded pile is more likely to soften unevenly than roast cleanly.
Dry and season the thighs
Pat 1 1/2 pounds boneless, skinless chicken thighs dry, then season them with the remaining 1/2 teaspoon salt. Arrange the thighs among the carrots, leaving the vegetables distributed around them. Similar-sized thighs are helpful because a much smaller piece may finish before a large one. Keep the chicken arranged on the pan rather than stacking it.
Stir and spoon on the garlic glaze
In a small bowl, stir together 1/4 cup packed light brown sugar, 2 tablespoons melted unsalted butter, 4 minced garlic cloves, and 1 tablespoon soy sauce. Stir until the butter is mixed through and the garlic is distributed. Spoon the mixture over the chicken, keeping most of it on the thighs. The glaze is meant to coat the chicken; it doesn’t need to be tossed with the carrots.
Roast, turn the carrots, then rest the chicken
Roast for 30–35 minutes, turning the carrots once halfway through. Look for tender carrots and check that the thickest part of each thigh reaches 165°F. If the glaze darkens at the edges, judge doneness by the chicken and carrots rather than waiting for the coating to look uniformly dark. Rest the chicken for 5 minutes before serving it with the carrots.
Three Practical Ways to Adapt This Chicken and Carrot Pan
Use parsnips for an earthier vegetable
Replace the carrots with an equal weight of peeled parsnips, cut into the same 1/4-inch-thick sticks. They roast alongside the thighs and bring a more earthy sweetness to the pan. Check that the pieces are tender before serving.
Choose dark brown sugar for deeper molasses flavor
Swap the light brown sugar for the same amount of dark brown sugar. The glaze will have a richer molasses note and may look darker as it roasts, while the garlic and soy sauce still keep the sweetness in balance.
Make the glaze dairy-free with olive oil
Use olive oil in place of the melted butter in the same amount. The glaze will lose the round buttery note but will still carry the brown sugar, garlic, and soy sauce over the chicken.
Storage and Reheating
- Refrigerator: Refrigerate leftovers in an airtight container within 2 hours and use them within 3 to 4 days. The carrots soften more as they sit.
- Freezer: Freeze cooled portions in an airtight freezer-safe container for up to 2 to 3 months for best quality. Thaw overnight in the refrigerator; the carrots will be softer after thawing.
- Reheating: Reheat covered in the microwave in short intervals until hot throughout, turning the chicken and moving the carrots between intervals. Avoid one long blast, which can dry the chicken before the carrots heat evenly.
Questions That Come Up With This Sheet-Pan Chicken
One Pan Brown Sugar Garlic Chicken and Carrots
Ingredients
Equipment
Method
- Heat the oven to 400°F.
- Line an 18x13-inch rimmed baking sheet with parchment paper.
- Toss the carrots on the baking sheet with the olive oil, 1/2 teaspoon salt, and black pepper.
- Spread the carrots in an even layer.
- Pat the chicken dry.
- Season it with the remaining 1/2 teaspoon salt.
- Arrange the chicken among the carrots.
- Stir the brown sugar, melted butter, garlic, and soy sauce together in a small bowl.
- Spoon the mixture over the chicken.
- Roast for 30–35 minutes, turning the carrots once halfway through, until the carrots are tender and the thickest part of each thigh reaches 165°F.
- Rest the chicken for 5 minutes.
- Serve the chicken with the carrots.