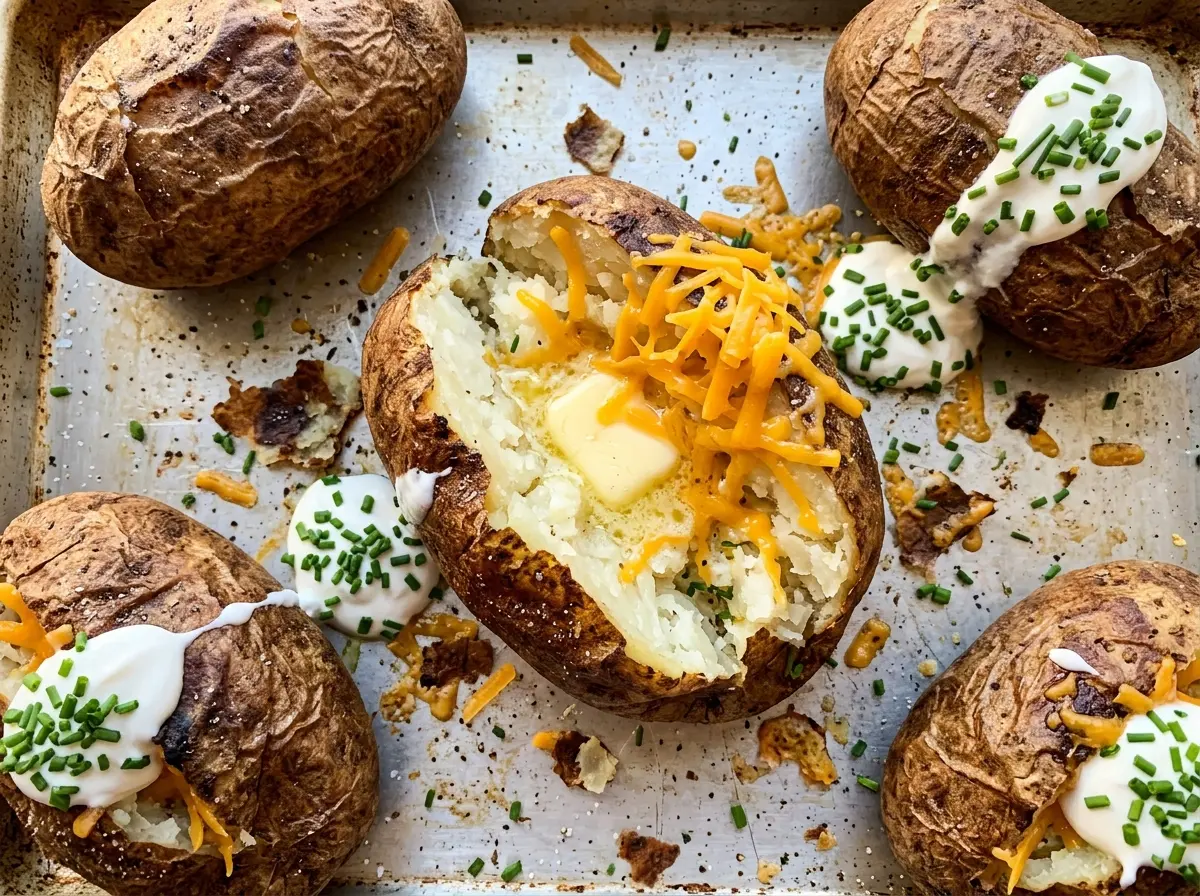
The fork goes into the potato easily, but the skin is still damp and a little limp. That usually means the potatoes went onto the pan before they were fully dry. For Weeknight Baked Potatoes, a quick scrub and a thorough towel-dry set up the russet skins for the oven, while the centers turn soft enough to give under a knife.
I use medium russets, about 8 ounces each, so four potatoes can bake together at 425°F without guessing at wildly different sizes. A rimmed baking sheet keeps them easy to move, and a little vegetable oil with kosher salt gives the skins a simple, savory finish. The oven does the rest.
Give the potatoes 45 to 60 minutes, then judge them by the center rather than the clock alone. Once a knife slides in easily, a five-minute rest makes them easier to handle before you cut the tops open. The result is a tender, fluffy potato with a warm, lightly seasoned skin.
Kitchen Note
Dry each potato well after scrubbing, especially around the little eyes and any creases. Water left on the surface gets in the way of the oil and salt coating the skin evenly.
Save these Weeknight Baked Potatoes for a low-fuss dinner: tender russet centers, seasoned skins, and just three ingredients.
Why the 45-Minute Mark Is a Checkpoint, Not a Promise
Potatoes look close to identical on the outside, but even a small difference in size changes how quickly heat reaches the center. These are medium russets at about 8 ounces apiece, which keeps the timing in a useful range without pretending every potato cooks at the exact same pace. The 45-to-60-minute window gives you room for that natural variation.
At the early end of the range, check one potato by sliding a knife into its center. If it meets resistance, the middle still needs time; return the potatoes to the oven and check again as they continue baking. A browned skin can’t tell you whether the interior is ready, so use the knife test instead of relying on color.
That check matters most when the potatoes are not quite the same size or your oven runs a little differently than mine. Pulling them as soon as the knife moves easily prevents the center from staying firm, while giving them a few more minutes when needed avoids treating the listed time as a finish line. The right doneness cue is in the middle, not on the surface.
What Russets, Oil, and Kosher Salt Each Bring to the Skin

- Russet potatoes — Russets are the right choice when you want a soft, fluffy middle under the skin. Choose potatoes that feel firm and are close in size so they finish at roughly the same time; a different potato variety tends to have a waxier, denser texture. Give each one a scrub to clear away dirt before it goes on the pan.
- Vegetable oil — A light coating helps the outside bake with a less dry, papery feel and gives the salt something to cling to. A basic vegetable oil works well here; there’s no need for a specialty oil because its flavor isn’t meant to lead the dish. Rub it over the whole surface rather than leaving a thick patch in one spot.
- Kosher salt — The salt seasons the outside and adds a little texture to each bite of skin. Kosher salt’s larger crystals are easy to distribute by hand, which is useful when you’re seasoning the potatoes individually. Keep the listed salt type for the closest match; finer salts measure differently by volume.
From Scrubbed Russets to Tender Centers
Get the Oven and Pan Ready
Heat the oven to 425°F and set a rimmed baking sheet aside before you start on the potatoes. Having the pan ready makes it easy to transfer the seasoned potatoes without handling them twice. Let the oven finish preheating before baking so the potatoes start in a properly hot oven.
Scrub, Dry, Prick, and Season
Scrub each potato, then dry it well before adding anything else. Prick each one several times with a fork; these small openings let steam escape as the potato heats. Rub the potatoes with the vegetable oil and kosher salt, covering the surfaces rather than concentrating the coating in one area.
Bake Until the Knife Slides Easily
Set the potatoes on the baking sheet and bake for 45 to 60 minutes. Check the center with a knife: it should slide in easily, without a firm spot resisting the blade. If it doesn’t, put the pan back in and give the potatoes more time; a potato that’s ready at 45 minutes doesn’t mean every one will be.
Rest Before Opening
Once the centers are tender, let the potatoes rest for 5 minutes. That short pause gives you a little time to handle them without rushing, while the potatoes stay hot. Cut a slit in the top of each potato and serve.
Three Simple Ways to Adjust the Batch
A Lower-Sodium Skin
Use 1/4 teaspoon kosher salt in place of the 1/2 teaspoon for a lighter seasoning. The potato itself stays the same, but the skin will taste less salty and the seasoning will be less pronounced in each bite.
An Oil-Free Version
Leave out the vegetable oil and bake the scrubbed, pricked potatoes with the kosher salt. The skin will be drier and the salt won’t cling as evenly, but the centers will still bake through; keep the same oven temperature and check for tenderness with a knife.
Bake a Half Batch
For two potatoes, use 1/2 tablespoon vegetable oil and 1/4 teaspoon kosher salt. Keep the oven at 425°F and use the same doneness check; a smaller batch doesn’t mean the potatoes are ready before their centers are tender.
Storage and Reheating
- Refrigerator: Refrigerate leftover baked potatoes within 2 hours and keep them for 3 to 4 days. The skin softens in storage, while the center stays convenient for another meal.
- Freezer: Baked potatoes can be frozen, though the texture may turn a little grainier after thawing. Cool them, wrap each one well, and freeze for up to 2 months for best quality.
- Reheating: Reheat in a 350°F oven until hot all the way through, or use a microwave for a quicker option. Don’t leave a reheated potato sitting at room temperature; serve it once hot.
Questions That Come Up While Baking Russets
Weeknight Baked Potatoes
Ingredients
Equipment
Method
- Preheat the oven to 425°F and set a rimmed baking sheet aside.
- Scrub the potatoes and dry them well.
- Prick each potato several times with a fork.
- Rub the potatoes with the oil and salt.
- Place the potatoes on the baking sheet and bake for 45 to 60 minutes, until a knife slides easily into the center.
- Let the potatoes rest for 5 minutes.
- Cut a slit in the top of each potato and serve.