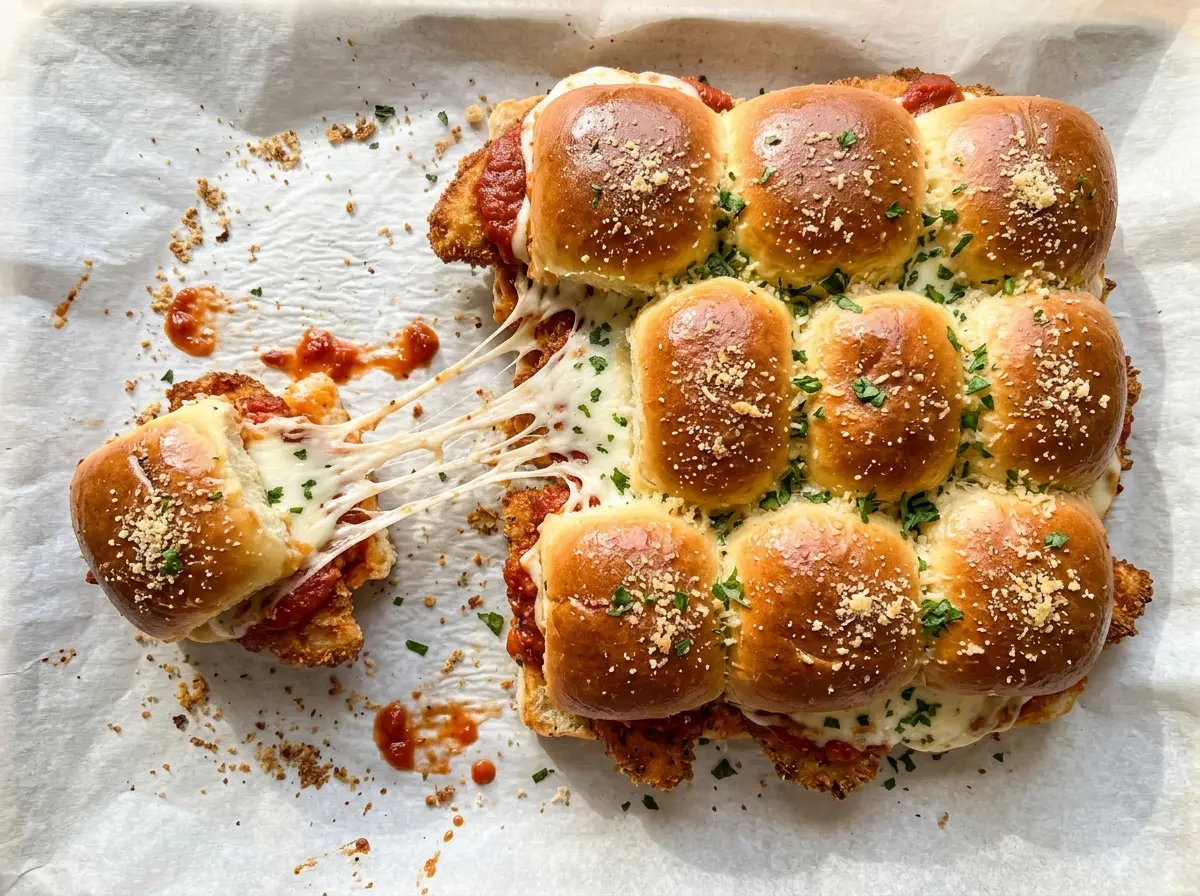
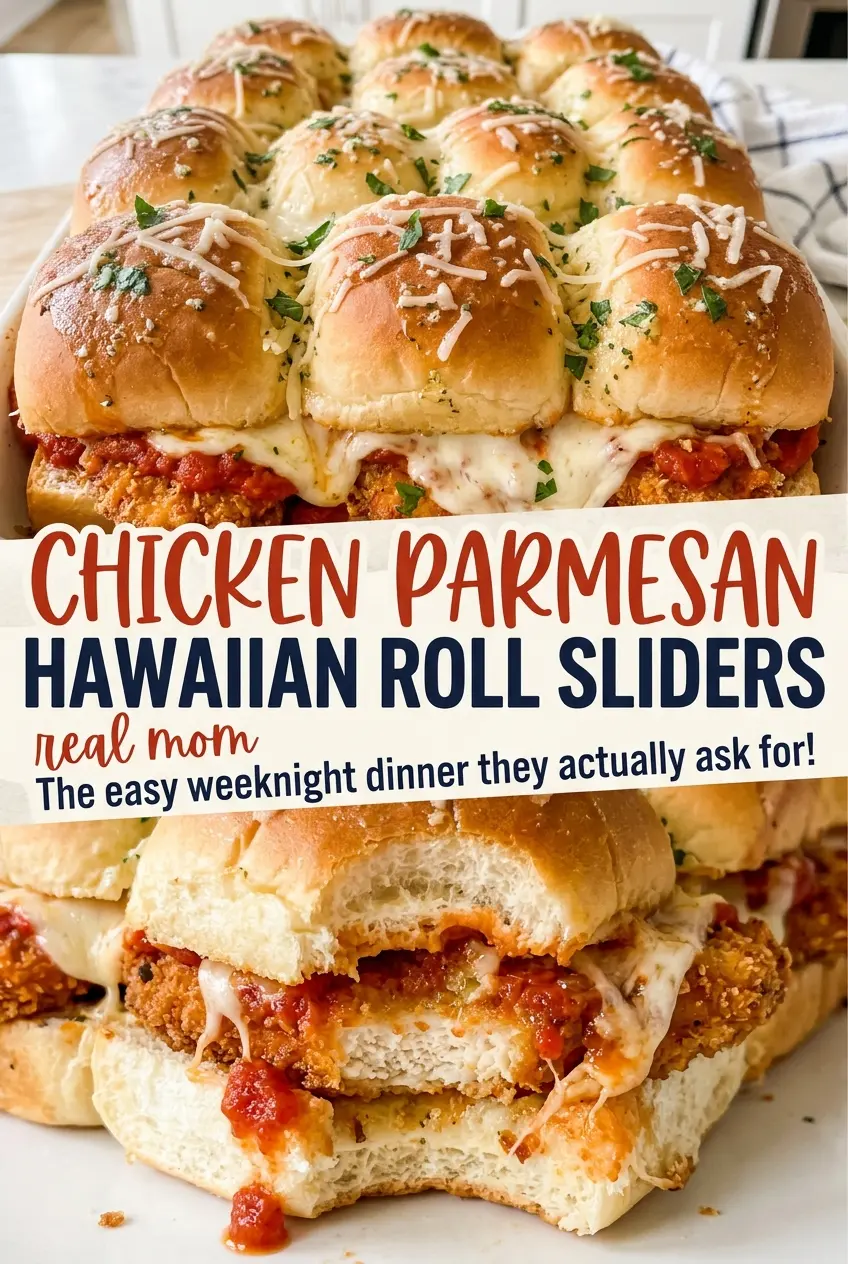
The first sound is a faint crunch when you press the top of a warm roll, then the soft bread gives way to chicken under marinara and melted mozzarella. I like these Chicken Parmesan Hawaiian Roll Sliders because the sweet rolls make a tidy base for a proper breaded cutlet, not just a pile of toppings. The trickiest part isn’t assembly; it’s getting the chicken thin enough to fit the small rolls and cook evenly before the short oven finish.
I cut the breasts into even 1/2-inch cutlets and fry them until the coating turns golden. Once they’re nestled onto the rolls, the sauce and cheese sit on the chicken instead of soaking straight into the bread. Garlic butter gives the tops a savory finish, and a brief rest helps the cheese settle so the sliders pull apart without losing their filling. Each one has a crisp-coated center, a soft sweet roll, and a little stretchy mozzarella. The 12-roll slab is easy to portion as a party tray or serve as a main dish.
Kitchen Note
Drain the fried cutlets on a wire rack, not stacked on top of one another. Air can move around the crust there, so it stays firmer while you finish frying the rest.
Save these Chicken Parmesan Hawaiian Roll Sliders for a crowd-friendly meal with crisp chicken, marinara, and buttery garlic tops.
Why a Half-Inch Cutlet Fits These Sliders Better Than a Thick Piece
A slider bun doesn’t have much height to spare. Thick chicken can tower over the rolls, making each bite awkward and pushing the filling out the sides. Cutlets about a half inch thick fit the 12-roll slab more evenly, and they cook through in the skillet before the assembled sliders go into the oven.
That size also helps the breading stay in balance with the sweet rolls. Panko and Parmesan make a distinct crust around each cutlet, but a thick piece needs longer in the pan; by the time its center cooks, the outside can get too dark. Thin, evenly sized pieces brown quickly and leave the oven stage to do what it should: melt the mozzarella and turn the roll tops golden. If a breast is uneven, cut the thicker portion down so the pieces are close in thickness rather than leaving one large, bulky cutlet among smaller ones.
The finished sliders are easier to pull apart when the chicken portions sit neatly on their own rolls. You get the same bite from the first slider to the last, instead of a few overloaded centers and mostly bread at the edges.
What the Panko, Low-Moisture Mozzarella, and Sweet Rolls Each Bring
- Chicken breasts — Boneless, skinless breasts are easy to cut into even small cutlets. Keep the pieces close to the same thickness so they finish frying at about the same time; patting them dry also gives the flour a better surface to cling to.
- Panko and finely grated Parmesan — The coarse panko flakes create a lighter crunch than a fine crumb, while Parmesan adds a savory, salty note to the coating. Store-brand panko works well; the crumb size matters more here than the label. Finely grated cheese blends into the flakes more evenly than large shreds.
- Eggs and flour — The flour gives the egg something to grip, and the egg helps the crumb mixture stick. Shallow bowls make it easier to coat each cutlet without bending or tearing it. Shake off excess flour before dipping so the coating doesn’t turn pasty.
- Hawaiian sweet rolls — Their soft texture and gentle sweetness balance the savory chicken and marinara. Keep the rolls connected as one slab for the main assembly so the filling stays in place while you build the layers. Their sweetness is a defining part of the result, not just a neutral holder.
- Marinara and low-moisture mozzarella — A thick marinara clings to the chicken instead of running immediately into the rolls, and low-moisture mozzarella melts into a cohesive layer without releasing as much liquid as a wetter cheese. A basic store-brand marinara is fine; choose one that isn’t especially thin.
- Butter, Italian seasoning, and garlic — Stir these together while the butter is melted so the garlic and herbs spread across the roll tops. Mince the garlic finely; large pieces are harder to distribute with a brush and can brown unevenly.
Fry the Cutlets First, Then Let the Oven Finish the Slab
Set Up the Three-Part Coating
Pat the chicken dry and season both sides with kosher salt and black pepper. Set out three shallow bowls: flour in the first, beaten eggs with water in the second, and panko mixed with Parmesan in the third. Coat each cutlet in flour and shake off the excess before dipping it in egg, then press it into the crumb mixture so the surface is covered. Keep one hand for the dry ingredients and one for the egg if you want to avoid building a thick coating on your fingers.
Fry Until Golden and Cooked Through
Heat the vegetable oil in a 12-inch skillet over medium-high heat until it reaches 350°F. Fry the cutlets in batches for 2 to 3 minutes per side; crowding the skillet makes it harder to keep the oil at temperature and brown the coating evenly. Look for a golden exterior and check that the centers reach 165°F. Move each batch to a wire rack as it comes out of the pan.
Build the Slab Without Crushing the Rolls
Heat the oven to 350°F and grease a 9×13-inch baking dish. Slice the rolls horizontally as one slab, keeping the bottoms together, and set that half in the dish. Arrange the chicken cutlets across the rolls, spoon the marinara over the chicken, and cover it with the thinly sliced mozzarella. Set the roll tops back in place without pressing down; a light touch keeps the filling from squeezing toward the edges.
Brush, Bake, and Rest Before Pulling Apart
Stir the melted butter with the Italian seasoning and minced garlic, then brush it across the roll tops. Cover the dish loosely with foil and bake for 10 minutes, then uncover and bake for 5 to 8 minutes more. The cheese should be melted and the tops golden; if the tops are already nicely browned, take the dish out rather than waiting for a darker color. Let the sliders rest for 5 minutes before pulling them apart so the filling has a moment to settle.
Three Practical Ways to Adapt These Chicken Parmesan Sliders
Make a gluten-free version
Replace the all-purpose flour, panko, and Hawaiian sweet rolls with gluten-free versions of those same ingredients. Keep the rest of the method the same, and press the gluten-free crumbs gently onto each cutlet since some blends make a more delicate coating. The rolls and crumb texture will differ by brand, but the chicken, sauce, and cheese layers still work together.
Keep the rolls connected for neat party portions
The slab-style assembly is useful when you want to bake all 12 together and pull them apart at the table. Slice the rolls horizontally as one piece and leave the sides connected while you layer them; you’ll have fewer loose edges to manage, and the filling stays tucked between the top and bottom halves.
Use a lighter layer of marinara
For a less saucy slider, spoon on a thinner layer of the marinara rather than covering every cutlet generously. The chicken and cheese still provide plenty of savory filling, while the rolls stay a little less soft underneath. This is a good adjustment if you prefer the breading to remain more noticeable.
Storage and Reheating
- Refrigerator: Store leftovers in an airtight container for 3 to 4 days. The breading and rolls soften as they sit, but the filling keeps well.
- Freezer: Freeze cooled, fully baked sliders in an airtight container for up to 2 months for best quality. Thaw them overnight in the refrigerator; the rolls may be softer after freezing.
- Reheating: Warm the sliders in a 350°F oven, loosely covered with foil, until hot through, then uncover briefly to bring back some color on top. The microwave is quicker but softens the rolls and coating.
Questions That Come Up When Making These Sliders
Chicken Parmesan Hawaiian Roll Sliders
Ingredients
Equipment
Method
- Pat the chicken dry and season both sides evenly with the salt and pepper.
- Put the flour in a shallow bowl.
- Beat the eggs with the water in a second shallow bowl.
- Mix the panko and Parmesan in a third shallow bowl.
- Coat each cutlet in flour, shaking off the excess, then dip it in egg and press it into the panko mixture to coat.
- Heat the vegetable oil in a 12-inch skillet over medium-high heat to 350°F.
- Fry the cutlets in batches for 2 to 3 minutes per side, until golden brown and the centers reach 165°F, then drain on a wire rack.
- Heat the oven to 350°F.
- Grease a 9x13-inch baking dish.
- Slice the rolls horizontally as one slab and set the bottom half in the dish.
- Arrange the chicken cutlets over the rolls.
- Spoon the marinara evenly over the chicken.
- Top with the mozzarella.
- Replace the roll tops.
- Stir the melted butter, Italian seasoning, and garlic together.
- Brush the mixture over the roll tops.
- Cover the dish loosely with foil and bake for 10 minutes.
- Uncover and bake for 5 to 8 minutes, until the cheese is melted and the roll tops are golden.
- Rest the sliders for 5 minutes before pulling them apart and serving.