
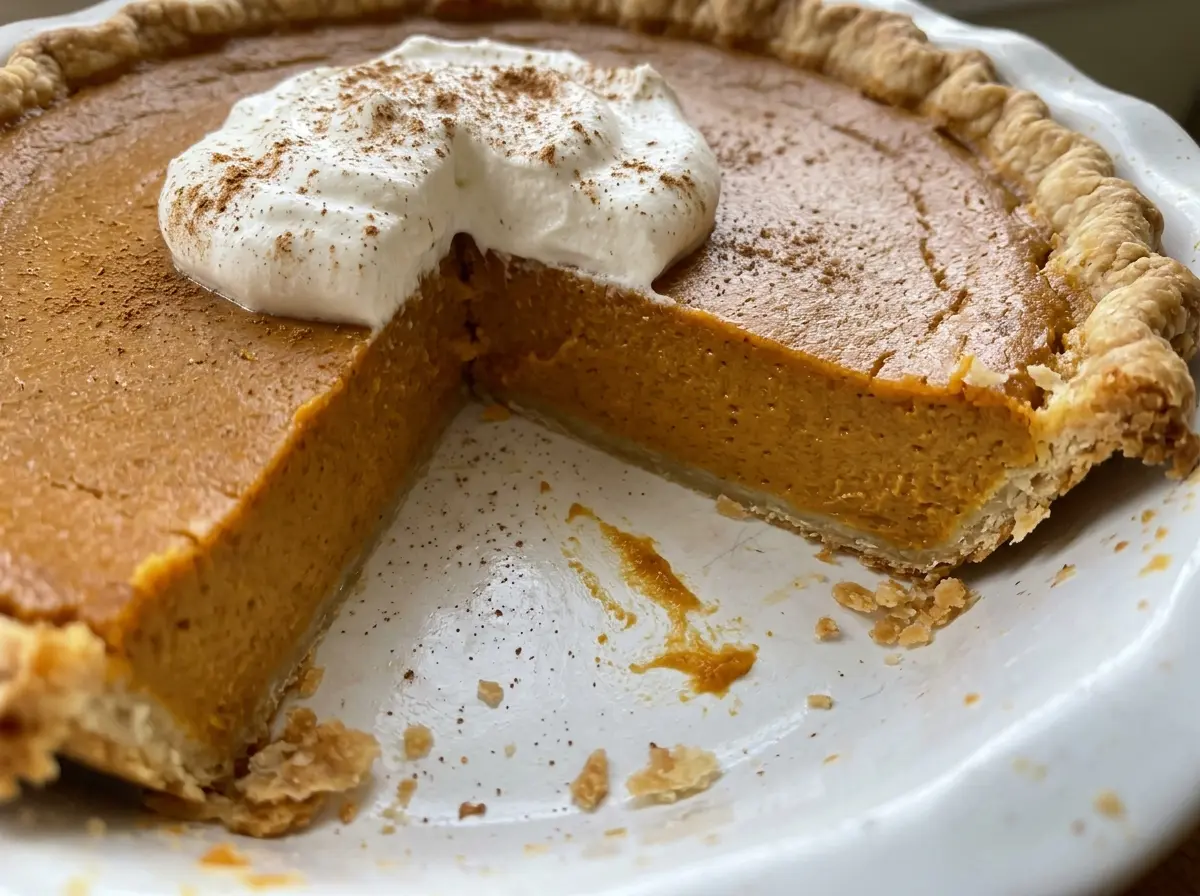
The edges of a pumpkin pie tell you it’s getting close before the center does. They’ll look set while the middle still gives a little when you nudge the pan. That small wobble is right where I want it for this classic pumpkin pie; the filling firms as it cools, and waiting to slice keeps each piece neat.
I use canned pumpkin puree and evaporated milk here because they make a smooth, consistent custard without extra prep. The spices stay warm and familiar, not so strong that they cover the pumpkin. A homemade butter crust gives the filling a sturdy, tender base.
The dough needs a short rest in the refrigerator, and the finished pie needs time to cool and chill. Those pauses are part of the recipe, not busywork. Once cold, the filling cuts cleanly and has that silky texture that belongs on a holiday table.
Kitchen Note
For the crust, stop adding water once a squeezed handful holds together. The dough can still look a little shaggy in the bowl; adding extra water to make it look smooth can leave you with a tougher crust.
Save this classic pumpkin pie for a holiday table: silky spiced filling, a buttery homemade crust, and clean slices after chilling.
Why This Much Pumpkin Filling Needs a Deep-Dish Pie Plate
A full can of pumpkin puree plus eggs and evaporated milk makes a generous amount of filling. The 9-inch deep-dish pie plate gives it room to sit safely below the rim, with pastry around it to hold each slice. A standard, shallower plate has less capacity; filling it to the top risks a spill when you move it to the oven.
The crust also needs to fit the shape of the plate, not just cover its bottom. Rolling the dough into a 12-inch round gives enough pastry to reach up the sides and leave an edge to trim and crimp. If you’re checking your pie plate before you begin, confirm that it’s both 9 inches across and deep-dish. Using the right capacity keeps the filling and crust in proportion, so the baked pie has a clear pastry edge instead of a thin shell crowded with custard.
This is a custard pie, so the filling should be smooth before it goes into the shell and gently set after baking. A deep plate gives that filling room to bake without having to reduce the ingredients or leave some behind. It’s a small piece of equipment that makes the recipe much easier to handle.
What the Pumpkin, Evaporated Milk, and Spices Each Bring

- Pumpkin puree — Choose plain canned puree, not pumpkin pie filling, which is already sweetened and seasoned. The puree gives the custard its pumpkin flavor and body; fresh puree can vary in moisture, so the canned version keeps this bake predictable.
- Evaporated milk — This unsweetened canned milk makes the filling creamy without adding the extra sugar found in sweetened condensed milk. Those two cans aren’t interchangeable here; using condensed milk would make the filling much sweeter and change its balance.
- Eggs — They set the filling into slices instead of leaving it loose. Whisk them first, then add the other filling ingredients, so they’re dispersed throughout the custard rather than sitting in streaks.
- Ground cinnamon, ginger, nutmeg, and cloves — The blend gives the pie its familiar warmth, with cinnamon leading and the smaller amounts of the other spices filling out the flavor. Fresh spices smell fragrant when you open the jars; spices that have been sitting for years will taste flatter.
- Cold unsalted butter — Small, cold pieces are what you cut into the flour for the crust. Unsalted butter lets the divided salt stay controlled; softened butter won’t cut into the flour in the same way.
- All-purpose flour and fine salt — All-purpose flour gives this crust enough structure to roll and crimp, while the salt seasons both the pastry and filling. The salt is divided between them, so keep the portions separate as you prep.
Building the Crust and Baking the Custard Without Guesswork
Cut the butter in until the flour looks pebbly
Whisk the flour with 1/4 teaspoon of the fine salt in a large bowl. Cut in the cold butter with a pastry cutter or your fingertips until the pieces are about pea-size. Drizzle in the ice water and toss with a fork; the mixture should hold together when squeezed, even if loose crumbs remain. Gather it into a disk, wrap it, and refrigerate for 1 hour so the dough is easier to roll.
Fit the dough into the chilled deep-dish plate
Set a rack in the center of the oven and heat it to 425°F. Roll the dough into a 12-inch round, then ease it into a 9-inch deep-dish pie plate rather than stretching it to reach the sides. Trim and crimp the edge, then refrigerate the crust for 15 minutes. This final chill gives the pastry a chance to firm up while you make the filling.
Whisk a smooth, evenly seasoned filling
Whisk the eggs in a large bowl, then whisk in the pumpkin puree, granulated sugar, cinnamon, ginger, nutmeg, cloves, and the remaining 1/2 teaspoon of salt. Gradually whisk in the evaporated milk until the mixture looks smooth. Adding the milk gradually helps it blend into the pumpkin and eggs without leaving pale streaks. Pour the filling into the chilled crust and set the pie plate on a rimmed baking sheet.
Use the wobble and temperature to judge doneness
Bake for 15 minutes at 425°F, then reduce the oven to 350°F and continue baking for 40 to 50 minutes. The edges should look set while the center still has a slight wobble; an instant-read thermometer inserted in the center should read 175°F. If the middle is completely firm in the oven, it has gone past the cue you’re looking for. Cool the pie on a rack for 2 hours, then refrigerate it until fully chilled before slicing.
Two Pastry Approaches That Change How the Crust Comes Together
Use a pastry cutter for a steady, even mix
A pastry cutter gives you control while breaking the butter into pea-size pieces, without warming it as quickly as hands can. It’s a useful choice if your kitchen is warm or you’d rather keep your fingers out of the dough. Stop once the butter pieces are about the size of peas; working them much smaller changes the texture you’re aiming for.
Use your fingertips for a more hands-on crust
You can pinch the cold butter into the flour with your fingertips instead of reaching for a pastry cutter. Work briskly and leave the pieces about pea-size, rather than rubbing the butter until the mixture looks sandy. This gives you a direct feel for the dough, but the butter softens faster in warm hands.
Storage and Reheating
- Refrigerator: Cover the fully chilled pie and refrigerate it for 3 to 4 days. The filling stays sliceable, though the crust gradually softens.
- Freezer: Freeze the fully chilled pie, tightly wrapped, for up to 1 month. Thaw it overnight in the refrigerator; the crust may be a little softer after thawing.
- Reheating: This pie is best served chilled, so there’s no need to reheat it. Microwaving the whole pie can warm it unevenly and loosen the custard.
Questions I Get Asked About This Pumpkin Pie
Classic Pumpkin Pie For Your Holiday Table Recipe
Ingredients
Equipment
Method
- Whisk the flour and 1/4 teaspoon of the salt in a large bowl.
- Cut in the butter with a pastry cutter or your fingertips until the pieces are about pea-size.
- Drizzle in the ice water and toss with a fork until the dough holds together when squeezed.
- Gather the dough into a disk, wrap it, and refrigerate for 1 hour.
- Set a rack in the center of the oven and heat to 425°F.
- Roll the dough into a 12-inch round and fit it into a 9-inch deep-dish pie plate.
- Trim and crimp the edge.
- Refrigerate the crust for 15 minutes.
- Whisk the eggs in a large bowl.
- Whisk in the pumpkin, sugar, cinnamon, ginger, nutmeg, cloves, and the remaining 1/2 teaspoon salt.
- Gradually whisk in the evaporated milk until smooth.
- Pour the filling into the chilled crust.
- Set the pie plate on a rimmed baking sheet.
- Bake for 15 minutes at 425°F.
- Reduce the oven to 350°F and bake for 40 to 50 minutes, until the edges are set, the center has a slight wobble, and an instant-read thermometer inserted in the center reads 175°F.
- Cool the pie on a rack for 2 hours.
- Refrigerate until fully chilled before slicing.


