
The cookie crumbs look sandy when the cream cheese first goes into the food processor, then a few pulses later they pull together into a dark, pliable mixture. That change is the part I watch for when I make Christmas Oreo Bon Bons: the centers should hold their shape without feeling wet or greasy.
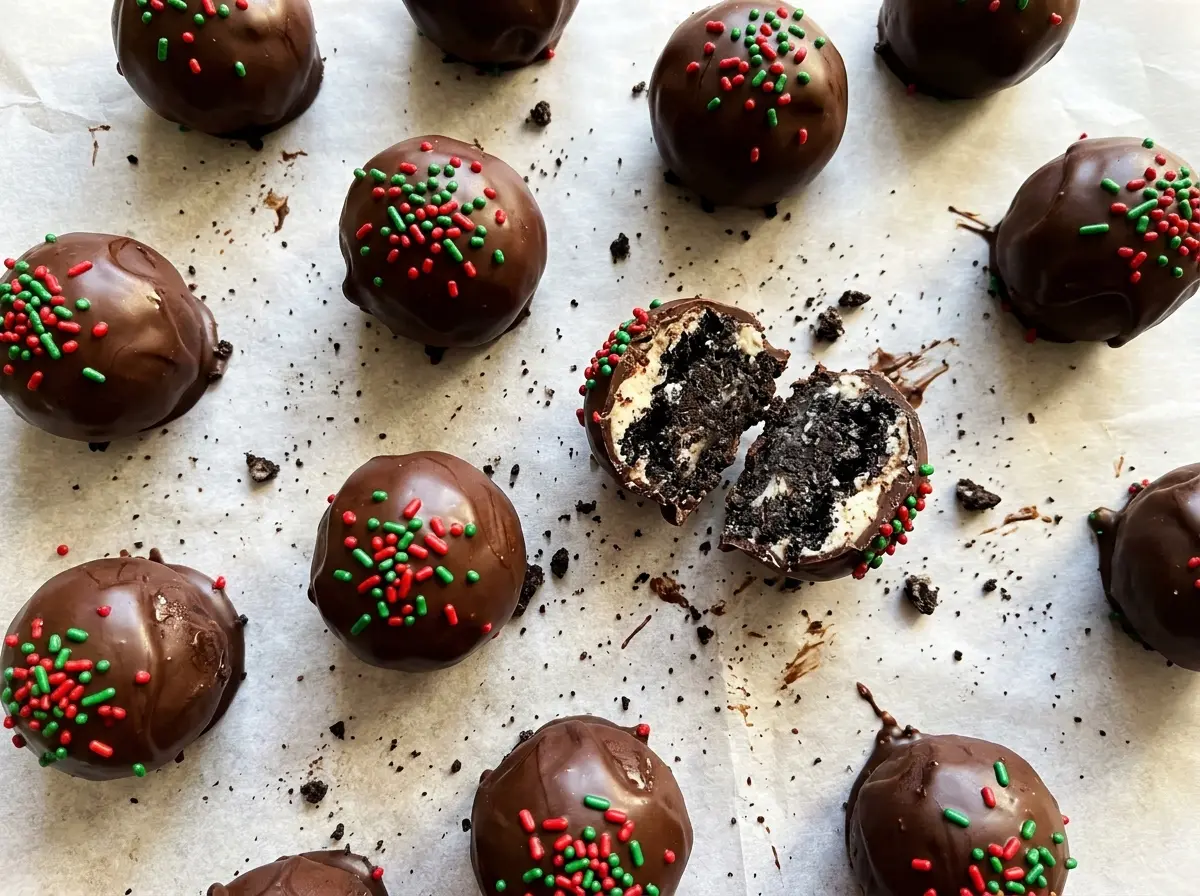
These are no-bake bites with a creamy cookie center, a semisweet chocolate shell, and a scatter of Christmas sprinkles. I like that the centers can chill while I get the coating ready, and the finished bon bons have a tidy, firm outside with a soft middle. They’re rich, so a small one goes a long way.
Kitchen Note
Line the baking sheet with parchment before you start rolling; the cream cheese mixture is tacky, and the paper keeps the centers from sticking as you arrange them. It’s much easier than trying to slide parchment under a full sheet of bon bons.
Save these Christmas Oreo Bon Bons for a holiday treat table: creamy cookie centers, a semisweet shell, and a festive sprinkle finish.
Why Fine Oreo Crumbs Make a Firmer Bon Bon Center
These centers don’t rely on baking to hold their shape. The cream cheese binds the crushed cookies, so the texture of the crumbs matters: a fine, even mixture forms a smooth ball, while larger cookie pieces can leave weak spots that crumble when you roll or dip them. Give the cookies enough pulses to lose their distinct chunks before adding the cream cheese.
Once the cream cheese goes in, the mixture should become cohesive rather than stay loose and sandy. Pulse until it holds together, but stop when it’s evenly combined; the goal isn’t to whip in air or turn it into a fluffy filling. That dense, uniform center is what gives each bon bon a clean bite under the chocolate. It also makes the tablespoon-sized portions easier to shape consistently.
The Ingredients That Decide Whether the Centers Hold and the Coating Sets

- Oreo cookies — The cookies and their creme filling are both part of the center, so crush them whole. A fresh package gives the most predictable cookie texture; removing the filling or using a substantially different cookie changes the balance and can leave the mixture less cohesive.
- Cream cheese — This is the binder and the source of the soft, tangy center. Let it soften so it blends evenly with the crumbs; cold cream cheese can leave pale little streaks in the mixture. Stick with regular cream cheese rather than whipped cream cheese, which has a lighter, airier texture.
- Semisweet chocolate melting wafers — Wafers are made to melt smoothly for dipping, and semisweet chocolate keeps the coating from becoming too sweet next to the cookie center. Choose wafers you enjoy eating, since their flavor is easy to notice in the finished shell.
- Christmas sprinkles — Any small Christmas sprinkle mix works for the decoration. The color and shape are a matter of preference; the useful detail is applying them while the chocolate is still wet so they stay in place.
The Four Stages That Keep the Centers Neat and the Shell Smooth
Crush the Cookies and Bind the Mixture
Pulse the Oreo cookies in a food processor until they’re finely crushed, with no large chunks left. Add the softened cream cheese and pulse again until the mixture is evenly combined and holds together. If the mixture still looks sandy, keep pulsing until it clumps when pressed. Stop once it’s uniform rather than continuing to process it.
Roll Even Centers on Parchment
Scoop the mixture by tablespoonfuls and roll each portion into a ball. Arrange the centers on a parchment-lined baking sheet, leaving a little room between them so you can lift each one for dipping. If a portion looks noticeably larger than the others, adjust it now; evenly sized centers are easier to coat consistently.
Chill Until the Centers Feel Firm
Refrigerate the shaped centers for 30 to 45 minutes, until firm. They should feel set enough to lift without losing their round shape. Don’t rush straight from rolling to dipping: soft centers are more likely to shift or break when they meet the warm coating.
Melt, Dip, Decorate, and Set
Microwave the semisweet chocolate melting wafers in a microwave-safe bowl at 50% power in 30-second intervals, stirring after each, for 2 to 3 minutes total or until smooth. Dip each chilled center in the melted chocolate and let the excess drip back into the bowl before returning it to the baking sheet. Add the sprinkles immediately, while the coating is still wet. Refrigerate for 15 to 20 minutes, until the chocolate is firm.
Three Swaps That Change These Christmas Oreo Bon Bons Without Losing Their Shape
Use White Melting Wafers
Swap the semisweet wafers for white chocolate melting wafers and use the same melting and dipping method. The shell will taste sweeter and look brighter, while the Oreo center stays the same. Christmas sprinkles stand out nicely against the pale coating.
Make a Gluten-Free Batch
Replace the Oreo cookies with gluten-free chocolate sandwich cookies with creme filling. Choose cookies close in size and style to standard Oreos so the crumb-to-filling balance stays similar; the center may have a slightly different texture depending on the cookie brand. Check the package labeling on the cookies and wafers for your dietary needs.
Trade Sprinkles for Crushed Peppermint
Use finely crushed peppermint candy in place of the Christmas sprinkles, scattering it over each bon bon as soon as it’s dipped. The mint adds a cool, candy-like crunch and pairs especially well with the semisweet coating. Keep the pieces small so they sit neatly on the shell.
Make-Ahead and Storage
- Refrigerator: Keep the bon bons in an airtight container for 3 to 4 days. The centers stay soft, while the chocolate shell may lose a little of its fresh snap.
- Freezer: Freeze them in a single layer until firm, then transfer to an airtight container with parchment between layers. Thaw in the refrigerator before serving; the coating may look slightly less glossy after thawing.
- Serving: Serve them chilled and set out only what you plan to eat. Return the rest to the refrigerator within 2 hours.
Questions That Come Up While Making Christmas Oreo Bon Bons
Christmas Oreo Bon Bons
Ingredients
Equipment
Method
- Pulse the Oreo cookies in a food processor until finely crushed.
- Add the cream cheese and pulse until the mixture is evenly combined and holds together.
- Scoop the mixture by tablespoonfuls, roll into balls, and arrange on a parchment-lined baking sheet.
- Refrigerate for 30 to 45 minutes, until firm.
- Microwave the chocolate wafers in a microwave-safe bowl at 50% power in 30-second intervals, stirring after each, for 2 to 3 minutes total or until smooth.
- Dip each chilled center in the melted chocolate, let excess chocolate drip back into the bowl, and return it to the baking sheet.
- Immediately add sprinkles before the coating sets.
- Refrigerate for 15 to 20 minutes, until the chocolate is firm.


