
When the melted chocolate, condensed milk, and butter come together, the mixture turns glossy and thick enough to hold a spoon’s trail for a moment. That’s the point where this Christmas Rocky Road Candy starts to feel less like a bowl of melted chocolate and more like a slab you can slice into tidy pieces.
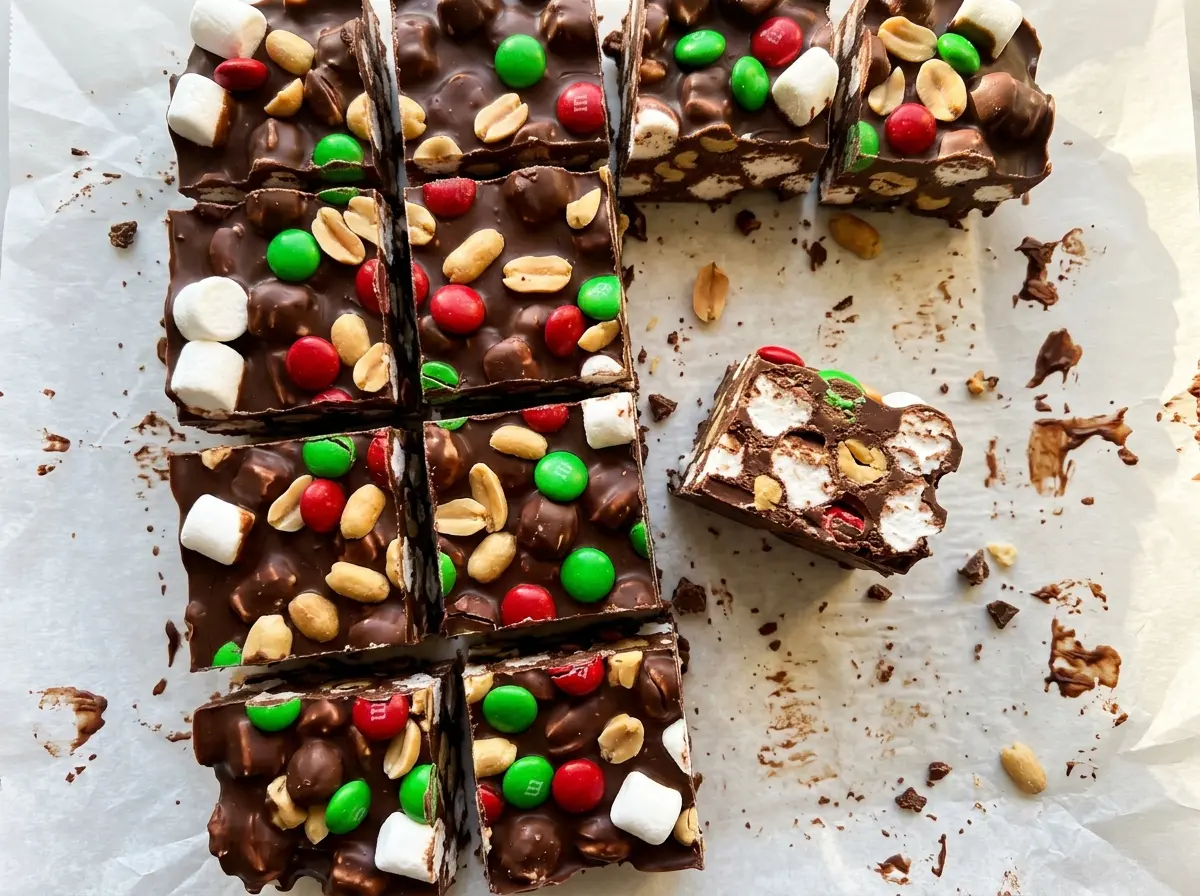
I like this version because the mix-ins bring different things to each bite: mini marshmallows stay soft, roasted salted peanuts add crunch, and red and green candy-coated chocolates make the pieces look festive without any extra decorating. Let the chocolate mixture cool briefly before folding everything in, then give the slab time to firm in the refrigerator. The finished candy is rich and chewy with a little salty crunch in the middle.
Kitchen Note
Leave enough parchment overhang to grip when the candy is firm. That gives you a steady lift out of the pan instead of trying to pry a chocolate slab from the corners.
Save Christmas Rocky Road Candy for a holiday treat with soft marshmallows, salty peanut crunch, and bright red and green candy pieces.
Why This Rocky Road Sets Firm Enough to Cut, Yet Stays Soft
Rocky road candy needs to do two jobs at once: hold its shape when sliced and give way easily when you bite into it. Here, the chocolate is paired with sweetened condensed milk and butter rather than being melted on its own. That combination makes a dense, fudge-like base that can hold the marshmallows and peanuts without turning into a brittle sheet.
The mix-ins matter just as much as the base. Mini marshmallows are small enough to scatter through the candy, while the peanuts bring a salty, crisp contrast to the sweet chocolate. Candy-coated chocolates add another little crunch and keep the red and green colors visible in the cut pieces. If the mixture is spread evenly in the pan, each slice gets a bit of the soft, crunchy, and chocolatey parts instead of leaving all the good bits in one corner.
What Each Ingredient Adds to Christmas Rocky Road

- Semisweet chocolate chips — They form the main chocolate flavor and balance the sweetness of the condensed milk and candy pieces. A standard bag of chips works well here; premium chips aren’t necessary because they’re melted into a rich base. I stick with semisweet rather than switching to a sweeter chocolate, which could make the finished candy cloying.
- Sweetened condensed milk — This thick, sweet milk gives the chocolate mixture its cohesive, soft-set texture. It isn’t interchangeable with a thinner milk; the candy needs the body and sweetness of condensed milk to set into a sliceable slab.
- Unsalted butter — Butter rounds out the chocolate and helps the melted mixture become smooth. Unsalted butter keeps the peanuts’ seasoning from getting lost in extra salt, and it melts right in with the chocolate.
- Vanilla extract — Vanilla fills out the chocolate flavor without taking over. Stir it in after the chocolate mixture is smooth so it’s distributed through the base before the mix-ins go in.
- Mini marshmallows — Their small size makes them easy to distribute throughout the slab, and they stay soft against the firmer chocolate. I wouldn’t replace them with a larger marshmallow size; bigger pieces are harder to spread evenly through this mixture.
- Roasted salted peanuts — These bring the recipe’s salty crunch. Roasted peanuts have a deeper, toastier flavor than plain peanuts, and the salted version gives a useful contrast to the sweet base.
- Red and green candy-coated chocolates — The crisp candy shells add color and a second kind of crunch. Keeping the holiday colors makes the pieces distinctive, while the chocolate centers fit naturally with the semisweet base.
From Glossy Melt to 36 Rocky Road Pieces
Line the Pan Before You Melt
Line a 9×13-inch baking dish with parchment paper before starting the chocolate. The overhang gives you something to hold when it’s time to lift out the firm slab. Set the prepared dish nearby so you can transfer the mixture as soon as the mix-ins are folded through.
Melt the Chocolate Slowly
Combine the chocolate chips, sweetened condensed milk, and butter in a large microwave-safe bowl. Microwave at 50% power in 30-second bursts, stirring after each one, for 2 to 3 minutes total. The mixture is ready when it looks smooth and glossy, with no stubborn chips left after stirring. If it still has a few unmelted spots, stir first; the residual heat can help finish them without another long blast.
Cool Briefly, Then Fold in the Crunch
Stir in the vanilla extract and let the mixture stand for 5 minutes to cool slightly. Fold in the mini marshmallows, roasted salted peanuts, and candy-coated chocolates until they’re spread throughout the chocolate. Work gently so the mix-ins stay intact, but don’t stop while they’re still gathered in one area. The mixture will be thick, so scrape the bottom and sides of the bowl as you fold.
Chill Until Firm and Slice
Scrape the mixture into the prepared dish and spread it into an even layer. Refrigerate for at least 2 hours, until firm enough to lift and cut without slumping. Lift it out using the parchment, let it stand at room temperature for 10 minutes, then cut into 36 pieces. A short rest before cutting makes the slab easier to work with than slicing it straight from the refrigerator.
Two Ways to Change the Look and Cut of This Christmas Candy
Put the Holiday Colors on Top
For a more colorful surface, hold back some of the red and green candy-coated chocolates from the listed cup and press them gently onto the top after spreading the mixture in the dish. The same ingredients go into the batch, but the candies stay visible on the finished pieces instead of being hidden in the chocolate.
Cut Smaller Pieces for a Candy Tray
For smaller portions, cut the chilled slab into more than 36 pieces. Each one will have a little less of the rich chocolate base, which works well when the candy is part of a larger assortment. Keep the pieces similar in size so they’re easy to arrange and serve.
Storage and Reheating
- Refrigerator: Store the pieces in an airtight container for up to 2 weeks. They’ll stay firm when chilled.
- Freezer: Freeze the pieces in an airtight container, separating layers with parchment, for up to 2 months. Thaw them in the refrigerator; the candy coating may look a little less shiny afterward.
- Reheating: This candy doesn’t need reheating. Avoid microwaving pieces, which can soften the chocolate unevenly and make the marshmallows sticky.
Questions That Come Up While Making Rocky Road Candy
Christmas Rocky Road Candy
Ingredients
Equipment
Method
- Line a 9x13-inch baking dish with parchment paper, leaving enough overhang to lift out the candy.
- Combine the chocolate chips, sweetened condensed milk, and butter in a large microwave-safe bowl.
- Microwave at 50% power in 30-second bursts, stirring after each, for 2 to 3 minutes total, until smooth.
- Stir in the vanilla extract.
- Let the mixture stand for 5 minutes to cool slightly.
- Fold in the mini marshmallows, peanuts, and candy-coated chocolates until evenly distributed.
- Scrape the mixture into the prepared dish and spread it into an even layer.
- Refrigerate for at least 2 hours, until firm.
- Lift the candy out using the parchment and let it stand at room temperature for 10 minutes.
- Cut into 36 pieces.


