
The first chocolate shells I made looked fine in the mold, then cracked when I tried to release them. A single thin coat doesn’t leave much room for handling, especially around the rim. For these gingerbread hot cocoa bombs, I give the shells a second coat and let them firm up before filling; that extra layer makes them sturdier without making the chocolate feel too thick.
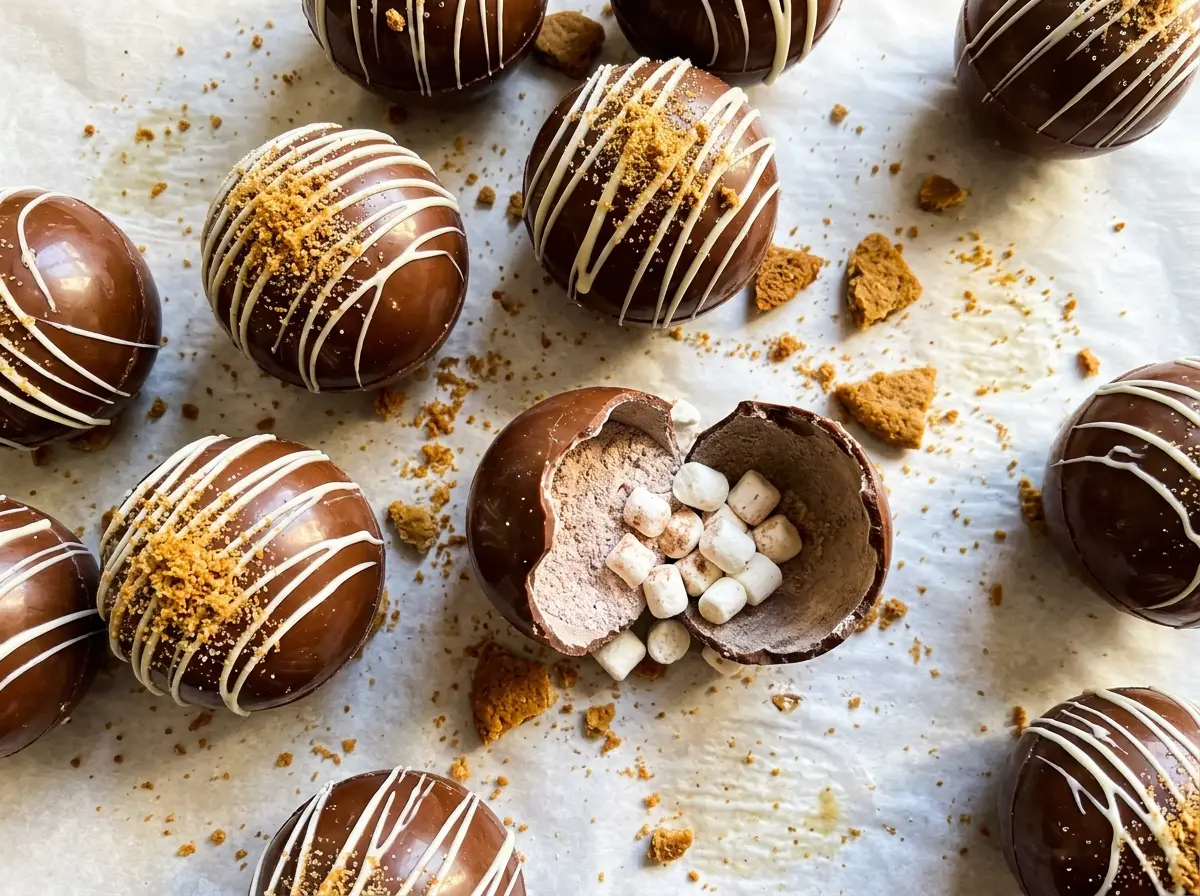
The filling is a quick whisk of cocoa, powdered sugar, and warm gingerbread spices, with mini marshmallows tucked inside each shell. I like that the spice comes from the dry mix itself, so it’s already evenly distributed before the hot milk hits. Once a bomb melts in a mug, the cocoa turns rich and fragrant, with ginger and cinnamon coming through in every sip.
Kitchen Note
Keep the silicone molds supported on the rimmed baking sheet while you work. The flexible mold shifts easily when lifted by one edge, and a steady base makes it easier to coat the shells evenly.
Save these gingerbread hot cocoa bombs for a cozy mug of cocoa with a soft marshmallow center and warming gingerbread spice.
Why the Second Chocolate Coat Keeps These Cocoa Bombs Intact
A chocolate shell has to do more than hold its shape inside the mold. It also has to survive being released, filled, joined to another shell, and lowered into a mug. One coat can leave faint, thin patches that are hard to spot from the top but tend to crack at the edges when you peel back the silicone.
The second coat gives those spots another layer of chocolate, and any remaining melted wafers can go directly onto places that look especially thin. Look across the shells before they go back into the refrigerator: the coating should cover the sides all the way to the rim, not pool heavily at the bottom. After the second chill, the shells should feel firm enough to handle carefully. This is a useful place to slow down; rushing the set can make the chocolate bend instead of release cleanly.
That extra pass also gives the seam a sturdier edge when you join the halves. You still want a gentle touch, but you won’t be relying on a paper-thin rim to hold the filling inside.
What the Chocolate, Cocoa, and Spice Each Bring to the Bomb

- Semisweet chocolate melting wafers — These form the shells and melt into the hot milk. Melting wafers are made for coating and give you a smooth, workable chocolate; use the semisweet kind specified here so the shell’s sweetness stays balanced by the cocoa filling.
- Unsweetened cocoa powder — Cocoa supplies the deep chocolate taste inside the bomb, while the powdered sugar brings sweetness. Whisk them thoroughly so no pockets of cocoa remain in the finished filling.
- Powdered sugar — Its fine texture blends smoothly with the cocoa and spices. Granulated sugar has larger crystals and won’t make the same fine, even filling.
- Ginger, cinnamon, allspice, and cloves — Together, these ground spices give the filling its gingerbread character. Fresh, aromatic spices make the difference here; older spices can taste muted against the chocolate. Keep the listed blend together for the intended balance.
- Mini marshmallows — Their small size lets them fit inside the half-sphere shells and soften when the hot milk is poured over the bomb. Larger marshmallows take up more room and don’t fit the filling format as neatly.
- Whole milk — Whole milk makes a full-bodied cocoa and carries the melted chocolate and spices well. Heat it until steaming, rather than letting it boil over, then pour it over the bomb while it’s hot.
Building the Shells, Filling Them, and Getting the Cocoa Ready
Coat the Molds Without Overheating the Wafers
Set two 6-cavity, 2 1/2-inch silicone half-sphere molds on a rimmed baking sheet. Microwave the semisweet wafers at 50% power in 20-second intervals, stirring after each one; the total time is about 2 minutes. Stop when the chocolate is smooth, since hot spots can remain even when some wafers still look solid. Spoon chocolate into each cavity and spread it across the bottom and sides up to the rim.
Let the First Layer Set, Then Reinforce It
Refrigerate the coated molds for 10 minutes, until the chocolate is set. Spread a second coat over the shells, using any remaining chocolate to reinforce thin spots rather than leaving it unused in the bowl. Chill the molds for another 10 to 15 minutes, until the shells are firm. If a patch still looks translucent or thin, add chocolate there before moving on.
Whisk the Filling and Portion It Carefully
Whisk the cocoa powder, powdered sugar, ginger, cinnamon, allspice, cloves, and salt in a small bowl until the color looks even and no spice streaks remain. Peel one silicone mold away from its six shells, then set those shells open-side up; leave the other six shells in their mold as the bases. Divide the cocoa mixture among the bases, followed by the mini marshmallows. Keep the filling inside the shells so the rims have room to meet.
Seal the Halves and Pour the Milk
Warm a microwave-safe plate in the microwave for 20 seconds. Briefly touch the rim of each empty shell to the warm plate, then place it over a filled base and press gently to seal. Refrigerate the assembled bombs for 10 minutes, until the seams are firm, then gently peel away the silicone mold. For each serving, place one bomb in a 16-ounce mug; heat 8 ounces of milk in a microwave-safe cup for 1 to 2 minutes, until steaming, pour it over the bomb, and stir until melted.
Two Ways to Serve or Share the Same Gingerbread Cocoa Batch
Set Up a Pour-Over Cocoa Station
Arrange the finished bombs beside 16-ounce mugs and heat the whole milk in individual portions as people are ready for cocoa. Each person gets to watch the shell melt as the steaming milk goes in, while the filling and serving amounts stay the same. This works best when the milk is poured just before stirring and drinking.
Package the Finished Bombs as Cocoa Gifts
Once the seams have firmed and the molds are off, place each bomb in its own small treat wrapper or compartment so the shells don’t bump together. Add a note to pour steaming milk over one bomb and stir until melted. The cocoa recipe stays unchanged; the gift format simply makes the six individual servings easy to share.
Storage and Reheating
- Refrigerator: Keep the finished bombs in an airtight container for up to 1 week. Let a chilled container come to room temperature before opening to reduce condensation on the chocolate.
- Freezer: Freezing isn’t recommended; condensation during thawing can leave the chocolate shells damp or marked.
- Reheating: The bombs themselves aren’t reheated. Heat 8 ounces of whole milk per serving for 1 to 2 minutes, until steaming, pour it over one bomb, and stir until melted.
The Questions That Come Up When Making Cocoa Bombs
Gingerbread Hot Cocoa Bombs
Ingredients
Equipment
Method
- Set two 6-cavity, 2 1/2-inch silicone half-sphere molds on a rimmed baking sheet.
- Place the chocolate wafers in a microwave-safe bowl and microwave at 50% power in 20-second intervals, stirring after each, for about 2 minutes total, until smooth.
- Spoon melted chocolate into each cavity and spread it over the bottom and sides up to the rim.
- Refrigerate for 10 minutes until set.
- Spread a second coat of chocolate over the shells, using any remaining chocolate to reinforce thin spots.
- Refrigerate for 10 to 15 minutes until firm.
- Whisk the cocoa powder, powdered sugar, ginger, cinnamon, allspice, cloves, and salt in a small bowl until evenly combined.
- Carefully peel one silicone mold away from its six shells and set the shells open-side up on the baking sheet as the tops.
- Leave the other six shells in their mold as the bases.
- Divide the cocoa mixture among the six bases.
- Divide the mini marshmallows among the bases.
- Warm a microwave-safe plate in the microwave for 20 seconds.
- Briefly touch the rim of each empty shell to the warm plate, then place it over a filled base and press gently to seal.
- Refrigerate the assembled bombs for 10 minutes until the seams are firm.
- Gently peel away the silicone mold.
- Place one bomb in each 16-ounce mug.
- Heat 8 ounces of milk per serving in a microwave-safe cup for 1 to 2 minutes until steaming.
- Pour the milk over a bomb and stir until melted.


