
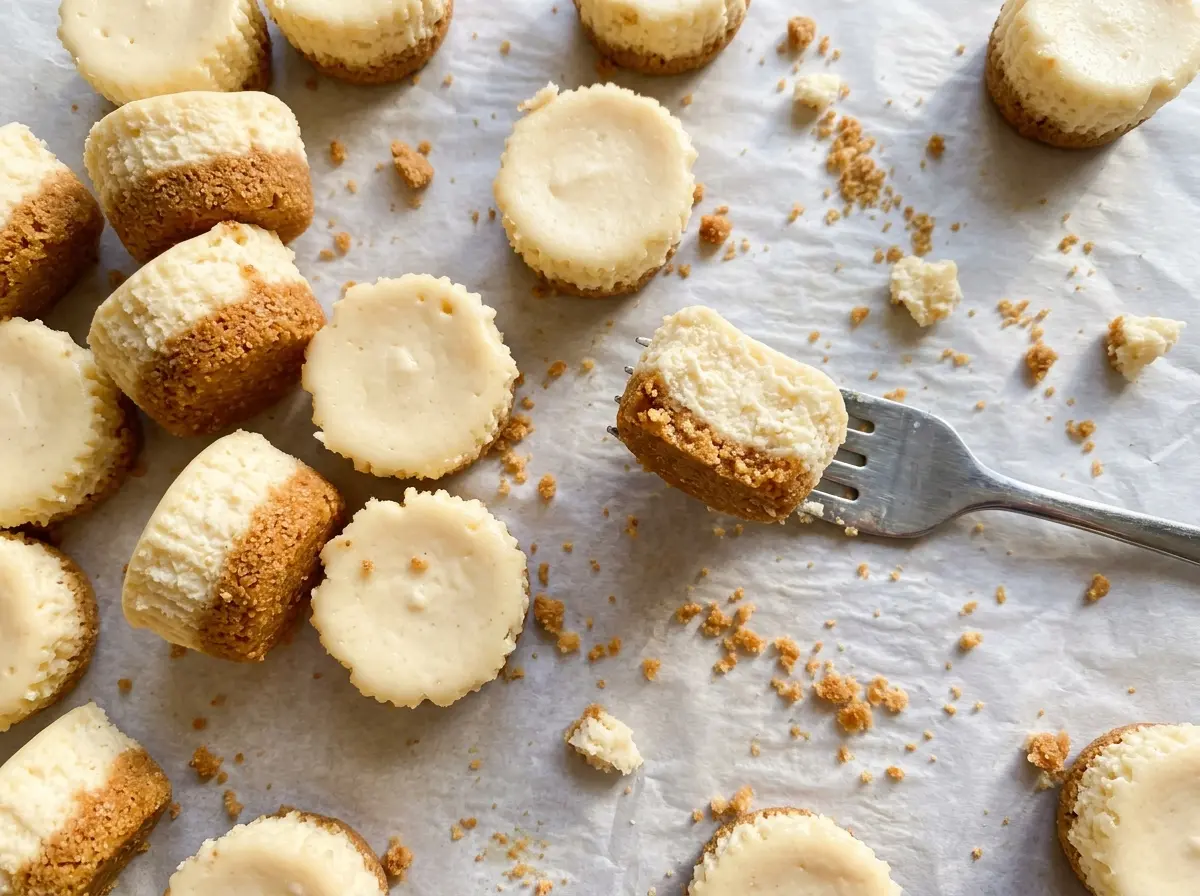
When the mini muffin pan comes out of the oven, the edges of these little cheesecakes should look settled while the centers still move with a soft wobble. That can feel early if you’re used to waiting for a full-size cheesecake to look completely firm, but the bites finish setting as they cool. I bake Mini Cheesecake Bites for Parties in paper liners, so each portion is easy to lift and pass around, with a thin graham cracker base beneath the creamy filling.
The small size makes these easier to portion than a whole cheesecake, and the crust gets a short bake before the filling goes in. I press the crumbs firmly into each liner so the base holds together when you pick up a bite. After baking, a slow cool and a proper chill give the centers time to become creamy and set.
Kitchen Note
I keep the paper liners on until just before serving. Once the bites are chilled and set, they peel away without asking you to handle the delicate sides while they’re warm.
Save these Mini Cheesecake Bites for your next party tray: creamy centers, a crisp graham base, and 24 easy-to-serve portions.
Why Low-Speed Mixing Gives These Mini Cheesecakes a Smooth Set
Cheesecake filling needs to be smooth, but it doesn’t need to be whipped. Beating the cream cheese and sugar at medium-low speed gives them time to blend without working a lot of air into the mixture. Once the eggs go in, the low setting matters even more: extra air can expand in the oven and leave the tops puffed or cracked as the bites cool.
The texture you want in the bowl is thick and even, not light and foamy. Scrape down the sides so a pocket of cream cheese doesn’t stay behind, then stop mixing once the filling looks uniform. The eggs help the centers set, while sour cream keeps the filling from tasting too dense. Gentle mixing lets those ingredients do their work without turning the batter airy.
Why Cream Cheese and Sour Cream Matter in These Bites

- Cream cheese — It gives the filling its familiar tang and structure. Use softened cream cheese so it blends smoothly with the sugar; whipped or spreadable tub styles have a different texture and aren’t a reliable stand-in here.
- Sour cream — This adds a gentle tang and keeps the filling tender. I keep it in rather than swapping in another dairy product, since changing its thickness can affect the finished texture.
- Eggs — They help the filling set into a bite that holds its shape when chilled. Room-temperature eggs blend more evenly into the softened cream cheese than cold ones.
- Graham cracker crumbs and butter — Fine crumbs take up the melted butter evenly and form a compact base. If crushing whole crackers yourself, aim for fine, even crumbs; coarse pieces don’t press into a uniform layer as easily.
- Granulated sugar and vanilla — Sugar sweetens the tangy dairy without changing the filling’s simple flavor, while vanilla rounds it out. Standard vanilla extract works well; there’s no need to use a special variety for this small amount.
From a Five-Minute Crust to a Gently Set Center
Press and briefly bake the graham bases
Heat the oven to 325°F and line a 24-well mini muffin pan with paper liners. Stir the graham cracker crumbs and melted butter until the crumbs look evenly moistened, then divide about 1 teaspoon into each well. Press firmly into the bottoms so the crusts form an even layer rather than loose piles. Bake for 5 minutes.
Mix a smooth, unfluffy filling
Beat the softened cream cheese and granulated sugar with an electric mixer on medium-low speed until smooth, scraping down the bowl as needed. Add the eggs one at a time on low speed, mixing only until each is incorporated. Mix in the sour cream and vanilla at the end. Stop when the filling is even; continuing to beat it won’t improve the texture.
Fill the liners and watch for the center wobble
Divide the filling among the crusts, bringing each portion nearly to the top of its liner. Bake for 15 to 18 minutes. The edges should look set, while the centers still have a slight jiggle; don’t wait for the centers to look completely firm in the oven. If the edges are still fluid, give them a little more time within the bake window.
Cool before chilling
Set the pan on a wire rack and let the bites cool for 30 minutes. Then refrigerate them for at least 3 hours, until they’re chilled and set. The rack cooling gives the hot pan time to lose its heat before the bites go into the refrigerator, and the longer chill firms the centers for serving.
How to Make a Gluten-Free Crust or a Smaller Batch
Use gluten-free graham-style crumbs
Replace the graham cracker crumbs with gluten-free graham-style crumbs, using the same quantity and keeping the butter and filling unchanged. Choose a finely ground crumb and press it firmly into the liners; the finished crust may be a little more delicate depending on the brand.
Make 12 bites instead of 24
Halve each ingredient for a smaller batch and fill 12 wells of the same mini muffin pan. Keep the oven temperature and the per-well portion the same; the crust still gets its short bake, and the filled bites use the same 15-to-18-minute bake window.
Storage and Reheating
- Refrigerator: Store covered for 3 to 4 days; the graham crust will soften a little as it sits. Don’t leave the bites at room temperature for more than 2 hours total.
- Freezer: Freeze the chilled bites in a single layer until firm, then transfer them to an airtight container for up to 2 months. Thaw overnight in the refrigerator.
- Reheating: These are served chilled, so there’s no reheating step. Microwaving can soften the filling and make the crust lose its crisp texture.
Questions That Come Up Before the Party Tray Goes Out
Mini Cheesecake Bites for Parties
Ingredients
Equipment
Method
- Heat the oven to 325°F.
- Line a 24-well mini muffin pan with paper liners.
- Stir the graham cracker crumbs and melted butter together until evenly moistened.
- Divide the crumb mixture among the liners, about 1 teaspoon per well, and press firmly into the bottoms.
- Bake for 5 minutes.
- Beat the cream cheese and sugar with an electric mixer on medium-low speed until smooth, scraping down the bowl as needed.
- Beat in the eggs one at a time on low speed, mixing just until combined.
- Mix in the sour cream and vanilla.
- Divide the filling among the crusts, filling each nearly to the top.
- Bake for 15 to 18 minutes, until the edges are set and the centers still have a slight jiggle.
- Cool in the pan on a wire rack for 30 minutes.
- Refrigerate for at least 3 hours, until chilled and set.
- Peel off the liners just before serving.


