
The chocolate kiss should settle into the center of a warm cookie without swallowing it or splitting the edges. That little moment is what makes Peanut Butter Blossoms feel different from an ordinary peanut butter cookie, and it’s why I like to have every chocolate unwrapped before the baking starts. There’s no scrambling once the hot sheet comes out.
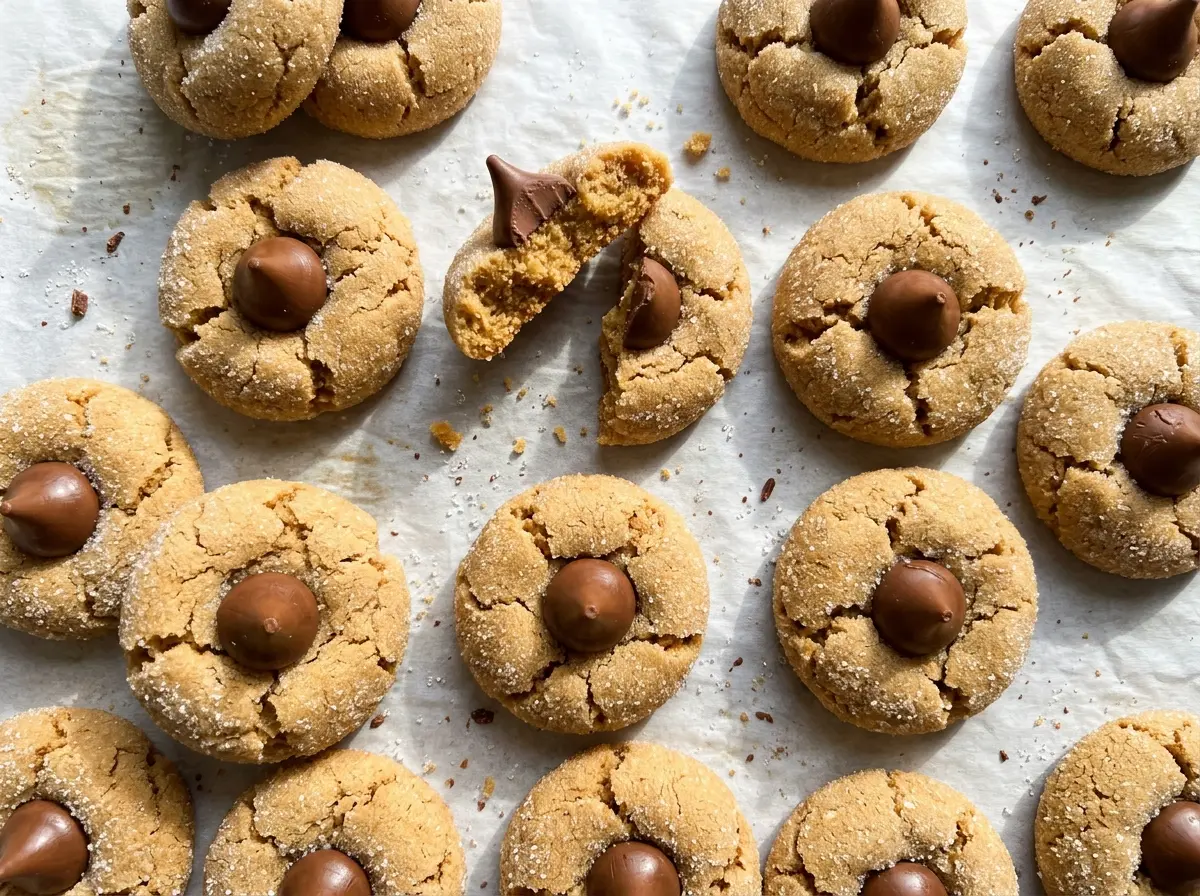
The dough is soft enough to roll in sugar, but it still holds a round shape in the oven. A mix of granulated and brown sugar gives the cookies their gently crisp, crackled outside and tender middle, while creamy peanut butter brings a familiar roasted flavor. Let one cool completely and the chocolate sets into a smooth little cap over the cookie.
Kitchen Note
I unwrap all 36 kisses before the first tray goes in. Pressing one into each cookie right after baking gives the chocolate a neat seat without making you rush around with warm cookies.
Save these Peanut Butter Blossoms for a bake sale or cookie tin: tender peanut butter centers, crackled sugar edges, and a chocolate kiss on every one.
Why Peanut Butter Blossoms Crack Instead of Spreading Flat
These cookies need enough structure to keep a rounded shape as they bake. Creaming the softened butter, peanut butter, and sugars until light and fluffy puts air into the dough; the flour then gives that dough a framework to hold onto. Baking soda helps the cookies puff, and the surface splits into fine cracks as the dough expands.
The coating plays a different role from the sugar mixed into the dough. Rolling each ball in granulated sugar leaves a thin, dry layer on the outside, so the surface gets a slight crunch while the center stays tender. If the dough is mixed until smooth and then worked hard after the flour goes in, the cookies can turn dense instead of softly puffed. Stop mixing as soon as the flour disappears, and let the oven do the rest.
What Each Ingredient Does in a Peanut Butter Blossom

- All-purpose flour and baking soda — Flour gives the cookies their shape, and baking soda helps them rise and crack. Spoon flour into the measuring cup and level it rather than packing it down; too much flour can leave the dough dry and difficult to roll. Check that your baking soda is fresh, since old leavener can leave cookies dense.
- Creamy peanut butter — A smooth, conventional creamy peanut butter blends evenly into the dough and gives every bite the same soft texture. A budget-friendly brand works well here; there’s no need for a specialty jar. Crunchy peanut butter is an easy swap if you want bits of peanut in the cookie, though the texture won’t be as uniform.
- Unsalted butter — Softened butter creams smoothly with the sugars and gives the cookie a tender bite. Use butter that yields when pressed but hasn’t turned shiny or melted. Unsalted butter keeps the salt level predictable, and the flavor of a standard grocery-store stick is just right.
- Granulated and light brown sugars — Granulated sugar sweetens the dough and coats the outside; brown sugar brings a softer, slightly caramel note. Light brown sugar is the right fit for this balance. Keep the sugars as listed rather than replacing one with the other, since their moisture and texture differ.
- Egg, milk, and vanilla — The egg binds the dough, the milk helps it come together, and vanilla rounds out the peanut flavor. Use a fresh egg and the milk you usually keep on hand. There isn’t a direct egg swap that keeps the same texture, but unsweetened oat milk can stand in for dairy milk if needed.
- Milk chocolate kisses — Their familiar shape makes the classic blossom topping, and each cookie gets one. Unwrap them before baking so they’re ready when the cookies come out. Dark chocolate kisses work in the same way if you prefer a less-sweet finish.
Mixing and Baking the Blossoms Without Tough Cookies
Whisk the dry ingredients evenly
Whisk the flour, baking soda, and salt together in a medium bowl before mixing the dough. This spreads the leavener and salt through the flour, so you don’t get a concentrated bite in one cookie. Set the bowl aside while you cream the butter and peanut butter.
Cream the fats, then mix gently
Beat the softened butter, peanut butter, and both sugars until the mixture looks light and fluffy, about 2 minutes. Add the egg, milk, and vanilla, then beat until smooth; a few streaks of butter at this stage mean it needs another moment. Add the flour mixture on low speed and stop as soon as it’s combined. A long mix after the flour goes in can make the cookies firm.
Roll each portion in sugar
Put the reserved granulated sugar in a small bowl, then shape the dough into 1-tablespoon balls. Roll each ball until it has a light, even sugar coating, and arrange the cookies 2 inches apart on parchment-lined rimmed baking sheets. Keeping the portions consistent helps the batch bake evenly and gives each cookie room to puff.
Bake, top, and let the cookies set
Heat the oven to 375°F and bake one sheet at a time for 8 to 10 minutes. Look for puffed cookies with light cracks and edges that appear set; the centers will still be soft. Press a chocolate kiss into the center of each cookie as soon as the sheet comes out. Leave the cookies on the baking sheet for 5 minutes before transferring them to a wire rack to cool completely.
Three Ways to Change Up the Classic Peanut Butter Blossom
A little peanut crunch
Swap creamy peanut butter for crunchy peanut butter in the same amount. The dough still rolls and bakes into blossoms, but the chopped peanuts add a more textured bite and make the cookie less smooth inside.
A darker chocolate center
Use dark chocolate kisses in place of the milk chocolate ones, keeping the same number. The sharper chocolate flavor balances the sweet coating and peanut butter without changing how you shape or bake the cookies.
A dairy-free batch
Replace the butter with an equal amount of dairy-free baking sticks, use unsweetened oat milk instead of dairy milk, and top the cookies with dairy-free chocolate kisses. Choose a firm baking stick rather than soft tub spread so the dough can still hold its shape.
Storage and Reheating
- Refrigerator: Refrigeration isn’t needed. Keep the cookies in an airtight container at room temperature for up to 4 days; the sugar coating softens a little as they sit.
- Freezer: Freeze fully cooled cookies in an airtight container for up to 2 months, with parchment between layers to protect the chocolate. Thaw at room temperature before serving.
- Reheating: These are best at room temperature, so reheating isn’t necessary. Avoid the microwave, which can melt the chocolate center before the cookie warms through.
Questions That Come Up While Making Peanut Butter Blossoms
Peanut Butter Blossoms
Ingredients
Equipment
Method
- Heat the oven to 375°F and line two rimmed baking sheets with parchment paper.
- In a medium bowl, whisk together the flour, baking soda, and salt.
- In a large bowl, beat the butter, peanut butter, 1/2 cup of the granulated sugar, and the brown sugar until light and fluffy, about 2 minutes.
- Beat in the egg, milk, and vanilla until smooth.
- Mix in the flour mixture on low speed just until combined.
- Put the remaining 1/4 cup granulated sugar in a small bowl.
- Shape the dough into 1-tablespoon balls.
- Roll the dough balls in the sugar.
- Arrange the dough balls 2 inches apart on the prepared baking sheets.
- Bake one sheet at a time for 8 to 10 minutes, until the cookies are puffed, lightly cracked, and set at the edges.
- Immediately press a chocolate kiss into the center of each cookie.
- Let the cookies rest on the baking sheet for 5 minutes.
- Transfer the cookies to a wire rack and cool completely.


