
When the food processor turns the Oreo cookies into fine, dark crumbs, you can already see what makes these Peanut Butter Oreo Balls hold together: there’s no loose filling or big cookie pieces to fight with. The cream cheese and creamy peanut butter blend right into the crumbs, making a soft mixture that’s easy to roll once it’s cold.
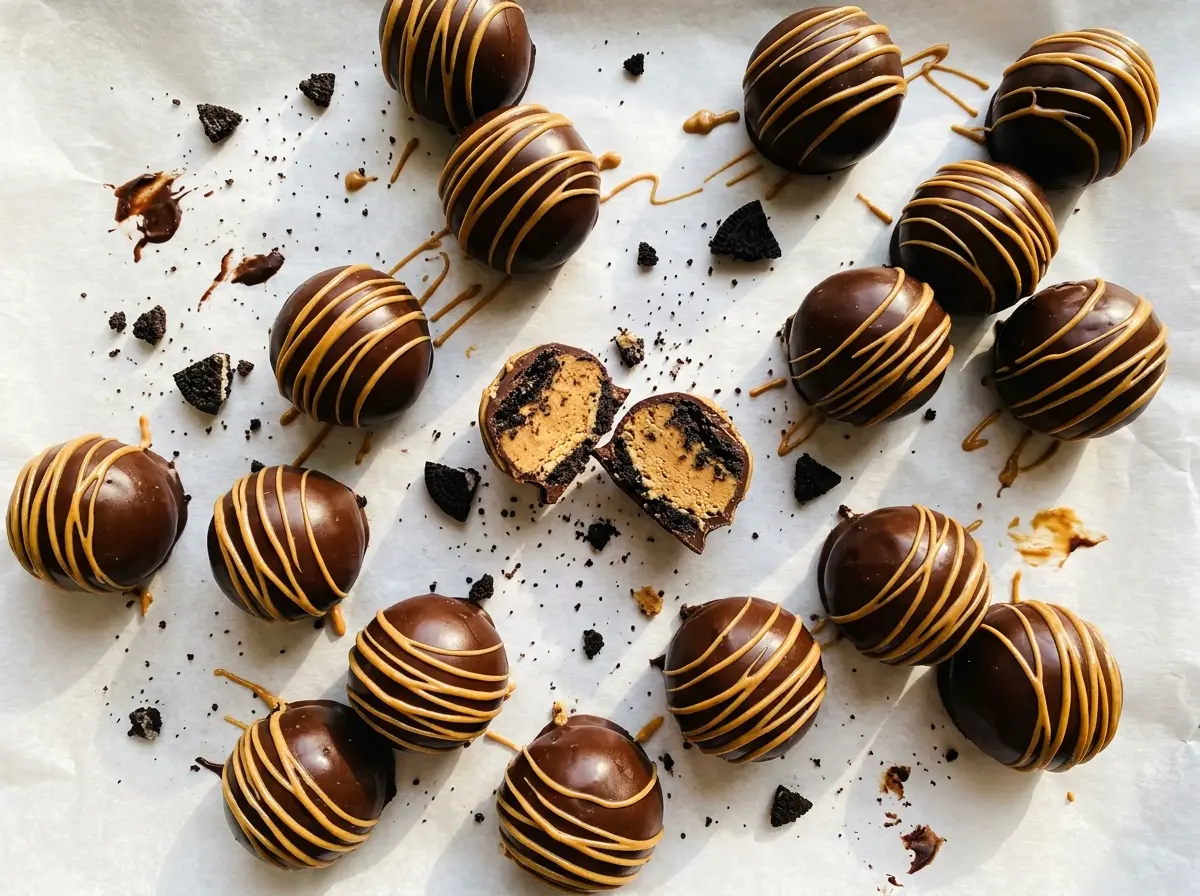
I like this no-bake treat because the centers can be made ahead, then dipped after they’ve firmed up in the refrigerator. The part worth slowing down for is the coating: melt the semisweet chocolate chips in short microwave intervals and stir each time. It gives you a smooth bowl of chocolate for dipping, and a little vegetable oil helps it flow around each chilled ball. The finished centers are rich with cookie and peanut butter, wrapped in a crisp chocolate shell.
Kitchen Note
Give each dipped ball a moment over the bowl so the extra chocolate can drip back before it goes onto the parchment. That little pause keeps a thick puddle from building up around the base.
Save these Peanut Butter Oreo Balls for a make-ahead treat with creamy cookie centers and a crisp semisweet chocolate shell.
Why Fine Oreo Crumbs Matter More Than You’d Think
These centers don’t have a separate dough or a dry binder; the cookie crumbs have to mingle evenly with the cream cheese and peanut butter. If the crumbs are coarse, the mixture can feel patchy as you roll it, with hard bits interrupting an otherwise smooth center. Fine crumbs give the soft ingredients more surface to cling to, so the mixture holds together as one consistent mass.
That texture also affects the finished coating. A lumpy center has an uneven surface, which makes it harder to get a neat, even layer of chocolate around each ball. I process the cookies before adding the cream cheese and peanut butter so I can see that the crumbs are fine first. Then I process the mixture until it looks uniform, rather than stopping when streaks or pockets remain. It’s a small bit of attention at the start that makes the rolling and dipping feel much less fussy.
What the Cookies, Cream Cheese, and Chocolate Each Bring

- Oreo cookies — These provide the chocolate-cookie flavor and most of the structure in the centers. Crush them finely in the food processor; larger crumbs can make rolling uneven. I stick with Oreo cookies for this version because a different cookie can change both the sweetness and how firmly the centers hold.
- Block cream cheese — Cream cheese binds the crumbs and gives the filling its soft, tangy quality. Use it softened so it blends evenly instead of leaving firm little pieces in the mixture. The block form matters here; softer tub-style spreads can make the center too loose to roll as easily.
- Creamy peanut butter — Creamy peanut butter blends into the cookie mixture without adding crunchy bits, so the centers stay smooth. A standard creamy peanut butter is the dependable choice; separated natural peanut butter can bring extra loose oil and change the consistency. I wouldn’t swap in a different nut butter without reworking the balance.
- Semisweet chocolate chips — Semisweet chocolate gives the coating a clear chocolate flavor without making the whole bite as sweet as a milk-chocolate shell might. Choose chips you like eating, since the coating is a distinct part of every bite. Keep them with the vegetable oil listed for dipping; I don’t recommend changing the chocolate type for this tested version.
- Vegetable oil — The oil loosens the melted chips so they coat the chilled centers more smoothly. It doesn’t replace the chocolate; it helps the chocolate move around the ball instead of clinging in a heavy layer. Use it with the semisweet chips rather than leaving it out.
From Fine Crumbs to a Set Chocolate Shell
Process the Cookies Into Fine Crumbs
Line a baking sheet with parchment paper, then finely crush the Oreo cookies in a food processor. Look for small, even crumbs rather than a mix of powder and large chunks. If you spot bigger pieces, keep processing before adding the other ingredients. Starting with even crumbs gives the centers a consistent texture.
Blend the Center Mixture Until Even
Add the softened cream cheese and creamy peanut butter to the crumbs and process until evenly combined. The mixture should look uniform, with no obvious streaks of cream cheese or peanut butter. If you stop while the ingredients are still patchy, some portions may feel softer or stickier than others. Scrape down the bowl if needed so the mixture comes together evenly.
Roll and Chill Until Firm
Scoop the mixture into 30 portions and roll each one into a ball. Arrange them on the parchment-lined baking sheet with a little space between them so they’re easy to lift for dipping. Refrigerate for at least 1 hour, until the centers feel firm; soft centers are more likely to lose their shape when they meet the warm coating. Let firmness, not the clock alone, tell you when they’re ready.
Melt, Dip, and Let the Coating Set
Combine the semisweet chocolate chips and vegetable oil in a microwave-safe bowl. Microwave in 30-second intervals, stirring after each, until the chocolate is smooth; don’t rush past the stirring, since the bowl can hold heat between intervals. Dip each chilled ball, let the excess chocolate drip back into the bowl, and return it to the parchment. Refrigerate the coated balls for 20 to 30 minutes, until the chocolate is set.
Two Ways to Change the Shape Without Changing the Ingredients
Make smaller, party-size bites
Shape the center mixture into smaller balls before chilling, then dip them the same way. You’ll get more pieces than the standard batch, with a little more chocolate in each bite relative to the center. Keep an eye on them while dipping because the smaller pieces are easier to handle with a fork or dipping tool.
Roll squat, oval-shaped truffles
Instead of round balls, gently roll each portion into a short oval. The ingredients and dipping method stay the same, but the shape gives you a different look on a dessert platter and a little more flat surface to rest on the parchment as the coating sets.
Storage and Reheating
- Refrigerator: Store the finished balls in an airtight container for 3 to 4 days. The chocolate can lose a little shine as the temperature changes, but the centers stay creamy.
- Freezer: Freeze the set balls in a single layer, then transfer them to an airtight container with parchment between layers. They keep well for up to 2 months; thaw them in the refrigerator while still covered to limit condensation.
- Reheating: These are served chilled, so there’s no reheating step. Don’t microwave them; the chocolate coating will soften before the centers are ready to serve.
Questions That Come Up When Making Oreo Balls
Peanut Butter Oreo Balls
Ingredients
Equipment
Method
- Line a baking sheet with parchment paper.
- Finely crush the Oreo cookies in a food processor.
- Add the cream cheese and peanut butter to the cookie crumbs and process until evenly combined.
- Scoop the mixture into 30 portions and roll each portion into a ball.
- Arrange the balls on the baking sheet and refrigerate for at least 1 hour, until firm.
- Combine the chocolate chips and vegetable oil in a microwave-safe bowl.
- Microwave in 30-second intervals, stirring after each, until smooth.
- Dip each chilled ball in the melted chocolate and let excess chocolate drip back into the bowl.
- Return the coated balls to the parchment-lined sheet.
- Refrigerate the balls for 20 to 30 minutes, until the coating is set.


