
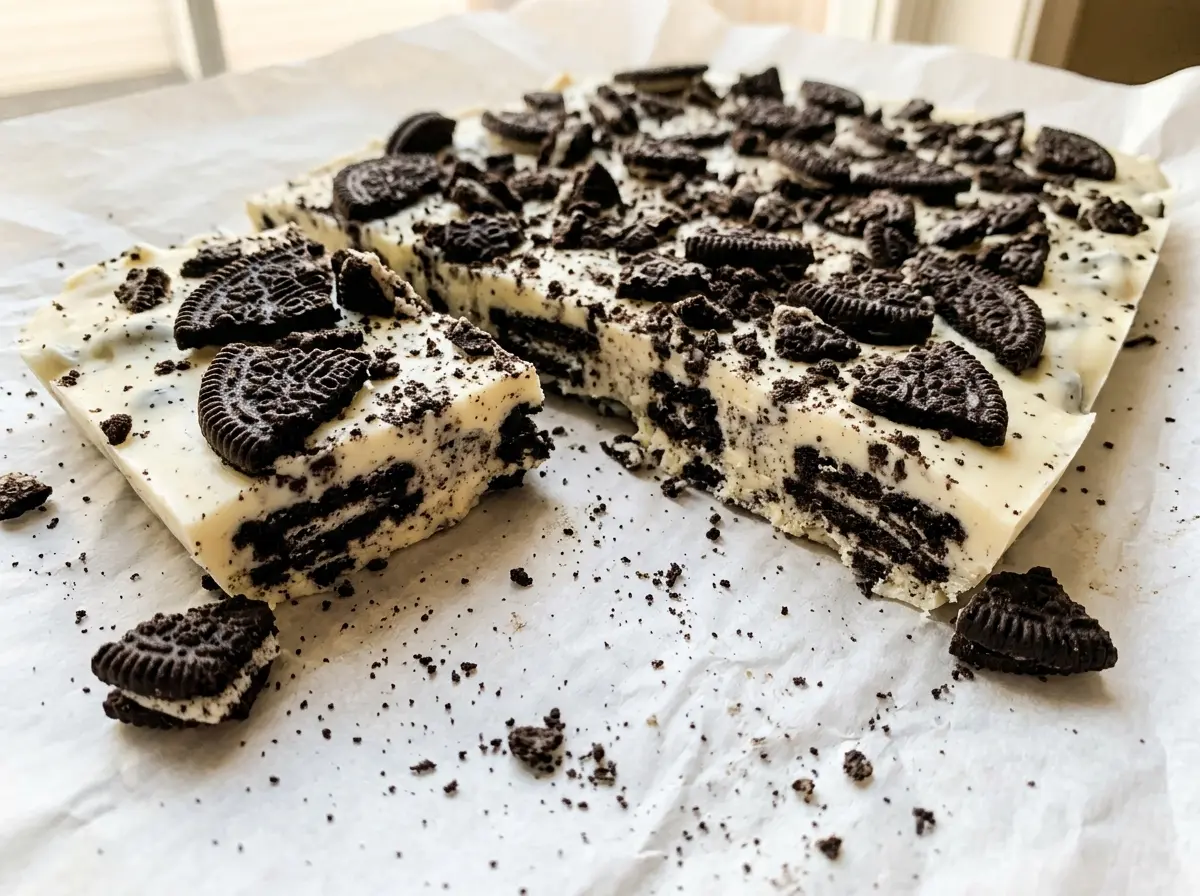
The first thing I notice when the Oreos hit the white chocolate is how quickly the bowl turns into a speckled cookies-and-cream swirl. I like this bark because it gives you a crisp snap, creamy sweetness, and cocoa-cookie crunch without asking you to bake anything. The batch makes 12 servings, and the whole thing sets right on a parchment-lined pan.
Mixing some of the chopped cookies into the chocolate gives every piece a little crunch, while the rest stay visible across the top. That split also keeps the finished bark from looking like a plain sheet of white chocolate once you break it apart.
Keep the cookie pieces coarse enough to notice, spread the mixture across the pan, and let it chill until it’s fully firm. The result is a simple, crunchy cookies and cream Oreo bark with plenty of Oreo in every jagged piece.
Kitchen Note
I keep the Oreo pieces coarse rather than crushing them into crumbs. The larger bits stay recognizable in the finished bark and give each broken piece a proper cookie crunch.
Save this cookies and cream Oreo bark for a no-bake treat with a crisp white chocolate snap and chunky cookie pieces.
Why White Chocolate Needs a Lower-Power Melt Than You Expect
White chocolate doesn’t have the same forgiving, dark color that makes it easy to spot scorching. It can turn thick and grainy if it gets too hot, even while a few chips still look intact. A lower-power melt gives the warmth time to spread through the bowl instead of scorching the chocolate at the edges.
Use 50% microwave power in 30-second intervals, stirring after each one. The stirring matters as much as the timing: it moves softened chocolate around and helps reveal whether the chips need another short burst. Stop when the mixture is smooth, not when you’ve run a particular number of cycles. A few unmelted-looking chips can soften as you stir, so check the texture before putting the bowl back in.
Keep the bowl and spoon dry, too. Even a little water can make melted chocolate seize into a stiff mass instead of turning silky. Once the chocolate is smooth, move on to the cookies while it’s still easy to stir and spread.
What the White Chocolate and Oreos Each Bring to the Bark

- White chocolate chips — They provide the smooth, sweet base and set into the firm pieces that make bark easy to break and serve. Use chips you enjoy eating on their own; their sweetness is front and center here. Chopped white chocolate bars can stand in by weight, though they often melt more fluidly than chips.
- Oreo cookies — Their chocolate wafers bring a cocoa note that cuts through the sweetness of the white chocolate, and the cream filling adds a little extra richness. Coarsely chopped Oreos give you a contrast of crisp cookie and creamy chocolate rather than a uniformly crumbly mixture. Other chocolate sandwich cookies work in the same role, though the filling and wafer flavor will shift the result.
- Parchment paper — This keeps the chocolate from bonding to the pan and lets you lift the set slab out cleanly. Plain parchment is all you need; there’s no reason to grease it, which could leave a slick surface under the chocolate.
How to Layer the Cookies So They Stay Visible
Line the Pan Before the Chocolate Goes in
Line a 9×13-inch rimmed baking sheet with parchment paper before you melt the chips. This gives you a ready surface for the chocolate while it’s smooth and workable. Press the parchment into the corners so the mixture can spread across the full pan. A rimmed sheet also keeps the chocolate contained as you spread it.
Melt the Chips Until Smooth
Put the white chocolate chips in a microwave-safe bowl and heat them at 50% power in 30-second intervals. Stir after every interval, scraping through the softened chocolate so warmth is distributed throughout the bowl. The mixture is ready when it looks smooth and has no firm chips left. If it still feels thick, give it another short interval rather than switching to full power.
Mix Half the Cookies Into the Chocolate
Stir half of the coarsely chopped Oreos into the melted chocolate until the pieces are distributed through it. Work while the chocolate is still fluid; if it starts to stiffen, the mixture will be harder to spread evenly. Pour it onto the prepared pan and spread it across the parchment. Keep the layer as even as you can so the bark sets at a similar thickness from edge to edge.
Add the Topping, Chill, and Break
Scatter the remaining chopped Oreos over the surface, then gently press them into the chocolate so they stay in place. Refrigerate the pan for 30 to 45 minutes, until the bark is fully firm. If the center still feels soft, give it more time rather than trying to break it early. Once firm, break the slab into pieces.
Two Easy Ways to Change the Cookie Layer
Make It With Golden Oreos
Replace the chocolate Oreos with the same number of Golden Oreos, coarsely chopped. You’ll get a more vanilla-forward cookie layer without the cocoa contrast, while keeping the same creamy white chocolate base and crunchy bite.
Make a Gluten-Free Batch
Use gluten-free chocolate sandwich cookies and gluten-free white chocolate chips in place of the regular versions, keeping the same quantity of each. The cookie layer may have a slightly different crunch, but the bark still comes together with the same simple mix, spread, and chill method.
Storage and Reheating
- Refrigerator: Keep the bark in an airtight container for up to 2 weeks. The chocolate will be firm straight from the fridge.
- Freezer: It freezes well in an airtight container for up to 2 months. Thaw it in the refrigerator while still sealed to limit condensation on the chocolate.
- Reheating: It doesn’t need reheating. If the chilled pieces feel too firm, let them sit out briefly before serving; don’t microwave them, since small pieces soften unevenly.
Questions That Come Up While Making Oreo Bark
Cookies and Cream Oreo Bark
Ingredients
Equipment
Method
- Line a 9x13-inch rimmed baking sheet with parchment paper.
- Place the white chocolate chips in a microwave-safe bowl and microwave at 50% power in 30-second intervals, stirring after each, until smooth.
- Stir half of the chopped Oreos into the melted chocolate.
- Spread the mixture evenly on the prepared baking sheet.
- Scatter the remaining Oreos over the top.
- Gently press the remaining Oreos into the bark.
- Refrigerate for 30 to 45 minutes, until fully firm.
- Break the bark into pieces.


