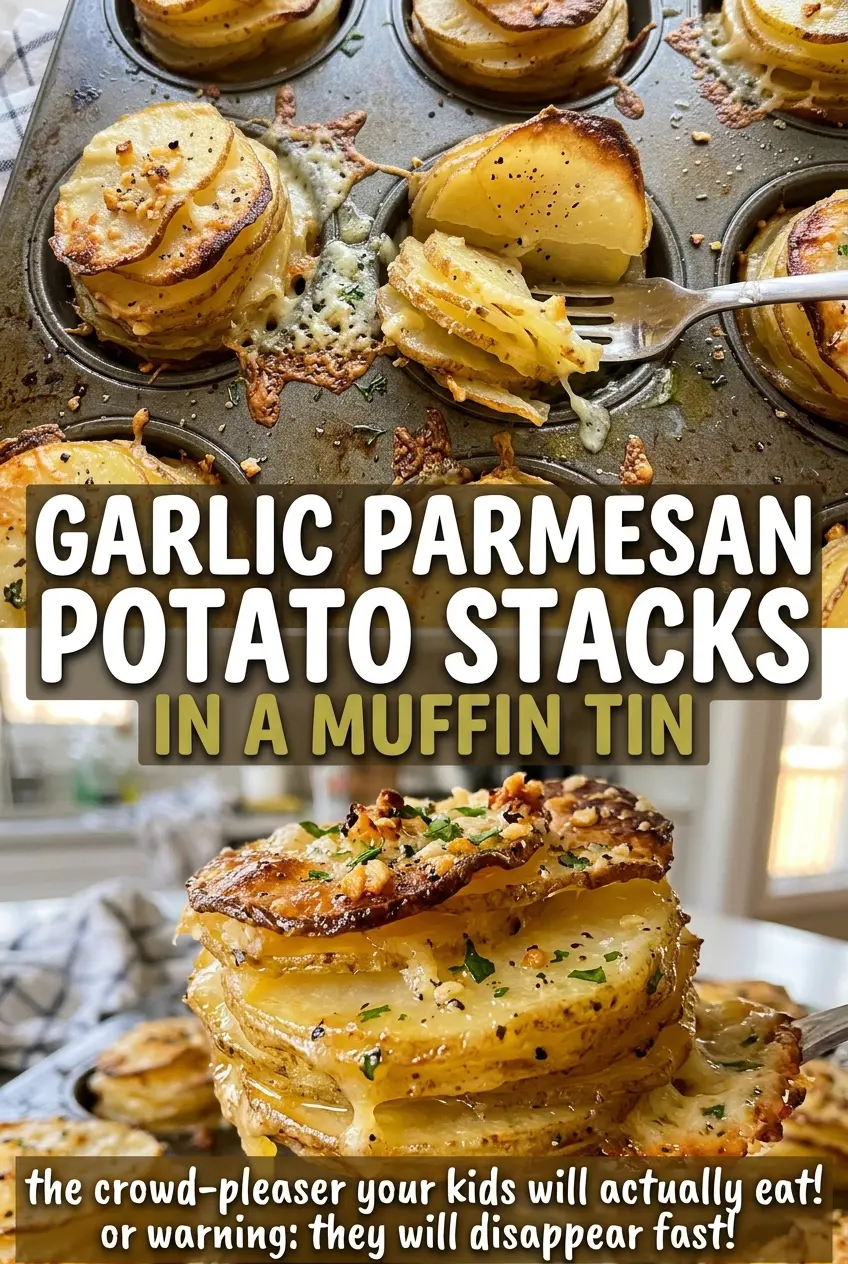
The first thing you notice is how neatly the potato slices fill the muffin cups. A few loose pieces can make a stack look uneven, but once they’re tucked into the wells, each portion has its own place to brown. These garlic Parmesan potato stacks turn simple Yukon Golds into tidy little servings with golden tops and tender centers.
I like this method because the muffin tin gives the slices support as they bake. Butter, garlic, Parmesan, and thyme coat the potatoes before they go into the pan, so every layer gets some of that savory mixture instead of leaving it all on top. Finely grated cheese clings especially well, and any coating left in the bowl belongs with the stacks.
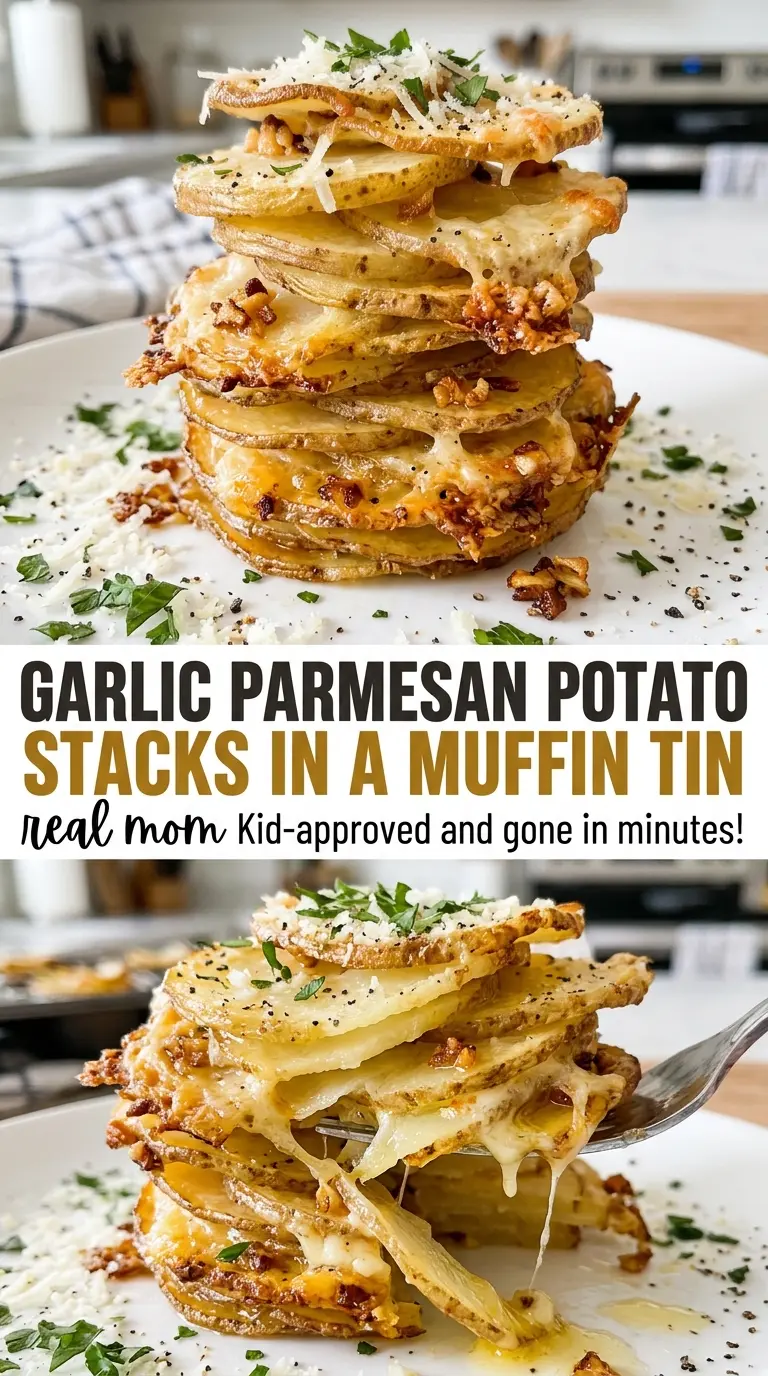
They’re a useful side when you want individual portions without fussing over a serving spoon. The tops come out bronzed, the centers give easily to a knife, and the stacks lift out in layers after a short rest.
Kitchen Note
Give the stacks the full five-minute rest in the pan. They settle into shape, and a small knife can loosen the edges without pulling the layers apart.
Save these garlic Parmesan potato stacks for a side dish with golden tops, tender centers, and individual portions from the muffin tin.
The Muffin Cups Keep These Potatoes From Turning Into One Soft Layer
Potato stacks can look impressive in a tall pile, but a deep mound is harder to cook evenly: the outside gets more heat than the middle, and the slices can slide as they soften. A standard muffin tin gives each portion a defined space and holds the potato slices upright while they bake. That shape also means you can lift out individual servings rather than cutting through a larger pan of layered potatoes.
The 12 wells are there for a reason. Dividing the slices among them gives the stacks room to heat through while the exposed tops turn golden. Packing one cup much higher than the others can leave you with uneven results, so aim for similar stacks across the pan. The slices are thin enough to layer into individual portions, but still substantial enough to keep their shape once the stacks have rested.
Think of the muffin tin as both the baking pan and the portion guide. It won’t make every stack perfectly identical, but consistent portions help the potatoes finish at about the same time. That’s the difference between a tray with a mix of firm and overbrowned pieces and one where each cup is ready together.
Why Yukon Golds and Finely Grated Parmesan Matter Here
- Yukon Gold potatoes — Their creamy texture works well in layered stacks, and the slices keep a pleasing shape as they bake. Scrub them before slicing; there’s no need to peel them for this preparation. Keep the slices close to the specified thickness so they cook at a similar pace. I wouldn’t switch to a much starchier potato here, since the texture and how neatly the stacks hold together can change.
- Finely grated Parmesan — Fine shreds spread through the potato layers and cling to the butter more evenly than large pieces. Freshly grated Parmesan melts into the coating nicely, but a less expensive finely grated option is fine if that’s what you have. Coarser shreds won’t distribute as evenly. There isn’t a direct cheese substitute that gives the same savory, salty finish and browning.
- Unsalted butter — Melted butter carries the garlic and herbs over the potato slices and helps the Parmesan adhere. Unsalted butter keeps the added kosher salt in control. For a dairy-free version, use dairy-free butter and dairy-free Parmesan in the same amounts; the flavor and browning will differ from the original.
- Fresh garlic — Minced cloves disperse through the butter coating, so you get garlic throughout the stacks rather than in one concentrated spot. Mince it finely enough that larger pieces don’t collect in a single layer. Garlic powder won’t give quite the same fresh, savory bite, so I stick with the cloves here.
- Fresh thyme — Chopped leaves give the buttery coating a gentle herbal note. Pick the leaves from the stems before chopping. If fresh thyme isn’t available, leaving it out is a better fit than adding a different herb; the stacks will simply have less herbal flavor.
Build the Stacks So the Centers Cook Before the Tops Get Too Dark
Get the Tin Ready
Heat the oven to 400°F and coat 12 cups of a standard muffin tin with nonstick cooking spray. Cover the bottoms and sides of the wells so the potato layers can release after baking. Set the tin within reach before you start stacking; once the potatoes are coated, it’s easier to work while the slices are together in the bowl. Use a standard muffin tin rather than changing the size of the wells.
Coat Every Slice
Toss the potato slices in a large bowl with the melted butter, minced garlic, finely grated Parmesan, chopped thyme, kosher salt, and black pepper. Turn the slices until the coating is spread across them instead of settling at the bottom of the bowl. If some pieces look bare, keep tossing until they pick up the butter and cheese. This even coating gives the layers seasoning throughout, not only on the exposed tops.
Fill the Muffin Cups Evenly
Stack the coated slices in the prepared muffin cups, dividing the potatoes among all 12 wells. Keep the portions reasonably even so one tall stack doesn’t lag behind the shorter ones. Scrape the remaining cheese and butter from the bowl and divide it among the stacks; don’t leave that flavorful coating behind. The slices should sit neatly in each cup rather than spilling loosely across the top of the tin.
Bake Until the Knife Slides Through
Bake for 40 to 50 minutes, until the tops are golden and a knife slides easily through the centers. Start judging by both cues: a browned top alone doesn’t tell you whether the middle is tender. If the knife meets resistance, the centers need more oven time. Once they’re baked, let the stacks rest in the tin for five minutes, then loosen the edges with a small knife and lift them out.
Small Changes That Keep the Potato Stacks Balanced
A dairy-free batch
Replace the butter with dairy-free butter and the Parmesan with dairy-free Parmesan, keeping the same amounts. The stacks still get a savory coating, though the flavor and browning won’t match dairy butter and Parmesan exactly. Choose finely grated dairy-free Parmesan so it can spread over the slices.
A gentler garlic note
Use one minced garlic clove instead of two when you want the Parmesan and thyme to come forward more. The butter coating will still carry garlic through the layers, just with a milder edge. Keep the rest of the ingredients and the baking method unchanged.
Thyme-free stacks
Leave out the fresh thyme for a simpler garlic-and-Parmesan flavor. No other adjustment is needed, and the butter and cheese still coat the potato slices as they bake. This is a handy option when fresh thyme isn’t on hand.
Storage and Reheating
- Refrigerator: Store leftovers in a covered container for up to 3 days. The potato layers soften in the refrigerator, so the edges won’t be as crisp as they were fresh from the oven.
- Freezer: Freezing isn’t my first choice for these stacks; cooked potato can turn soft or grainy after thawing, and the layered texture suffers.
- Reheating: Warm the stacks uncovered in a 400°F oven until heated through. Avoid covering them, since trapped steam softens the browned tops further.
Questions That Come Up Before the Muffin Tin Goes in the Oven
Garlic Parmesan Potato Stacks in a Muffin Tin
Ingredients
Equipment
Method
- Heat the oven to 400°F.
- Coat 12 cups of a standard muffin tin with nonstick cooking spray.
- In a large bowl, toss the potato slices with the melted butter, garlic, Parmesan, thyme, salt, and pepper until evenly coated.
- Stack the potato slices in the muffin cups, dividing any cheese and butter left in the bowl among the stacks.
- Bake for 40 to 50 minutes, until the stacks are golden on top and a knife slides easily through the centers.
- Let the stacks rest in the pan for 5 minutes.
- Loosen the edges with a small knife and lift the stacks out to serve.