
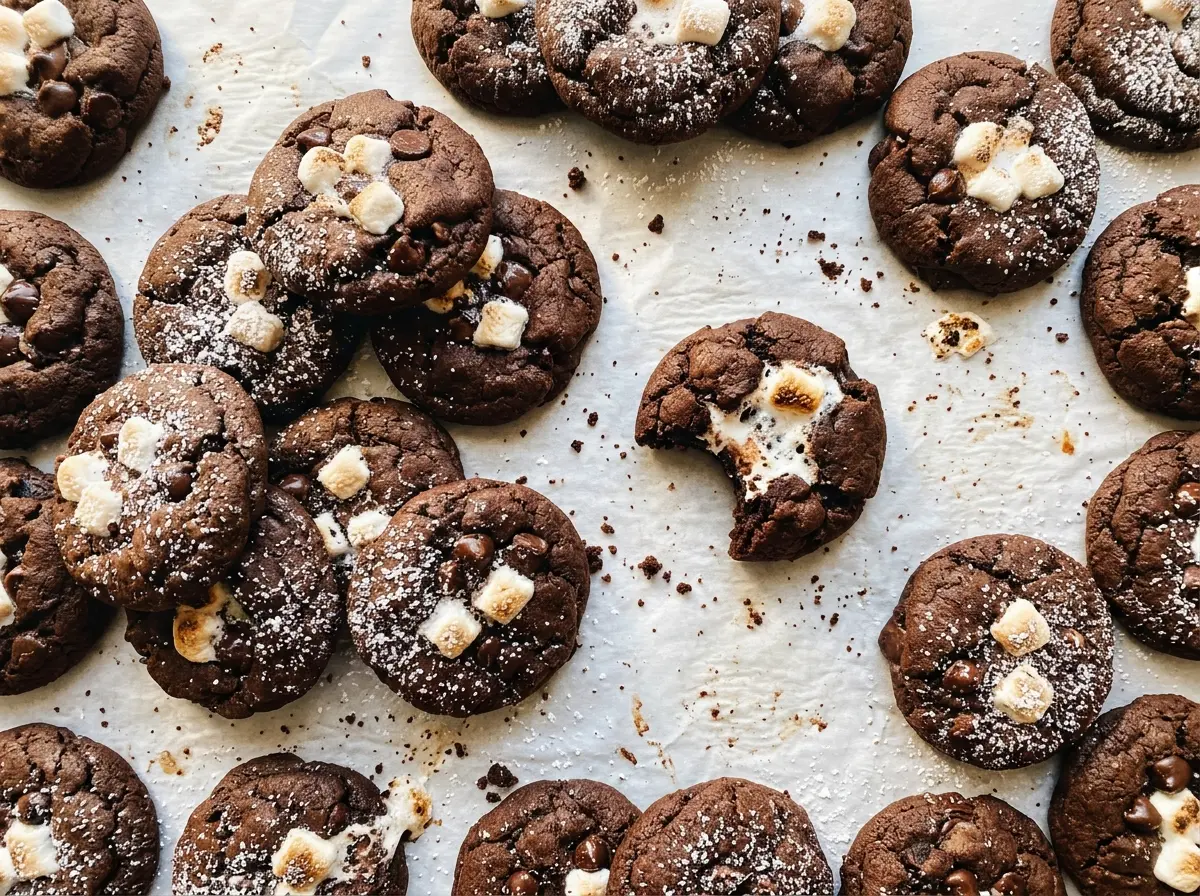
At the eight-minute mark, these cookies still look soft when I pull the pans out to add the marshmallows. That’s exactly when I want them: the cookie edges have started to set, but there’s still time for the topping to soften without disappearing into the chocolate dough. The short second bake gives Hot Cocoa Marshmallow Cookies their familiar cocoa-and-marshmallow finish.
I use both instant hot cocoa mix and unsweetened cocoa powder, so the cookies taste like hot cocoa without relying on the mix alone for their chocolate flavor. The dough is easy to portion, and baking the cookies before adding the marshmallows keeps the topping soft while the edges finish setting. They cool right on the baking sheets for a few minutes before they move to a rack, which gives the warm cookies a chance to firm up.
Kitchen Note
Put each marshmallow half on cut-side down so it settles against the cookie instead of wobbling on top. The marshmallows should be soft after their short return to the oven, not browned.
Save these Hot Cocoa Marshmallow Cookies for a batch with rich cocoa dough and a soft marshmallow top.
Why the Marshmallow Goes on After the Cookies Have Started Baking
Putting the marshmallow on at the beginning sounds like the easiest way to make a one-step cookie, but it gives the topping the full baking time to soften. These cookies need eight minutes in the oven before the marshmallow goes on. That head start lets the dough begin setting first, so the cookie can finish baking while the marshmallow softens during its shorter turn in the oven.
That timing matters because the cookie and topping don’t need the same amount of heat. The cocoa dough needs enough time for its edges to set, while a marshmallow only needs to become soft. Adding it partway through avoids asking one baking time to do two different jobs. It also gives you a clear visual check at the end: set edges on the cookies and soft marshmallows on top.
The same idea applies when you’re arranging the pans: keep the portions spaced about 2 inches apart so the cookies have room to spread without crowding one another. The dough is portioned into 24 cookies, which fit across two prepared baking sheets. That spacing makes it easier to place one marshmallow half on each cookie when the pans come out.
What the Cocoa Mix Adds That Cocoa Powder Alone Can’t

- Instant hot cocoa mix — This brings the sweet, familiar hot-cocoa character to the dough. Keep it alongside the unsweetened cocoa rather than swapping one for the other; the mix contributes sweetness that plain cocoa doesn’t.
- Unsweetened cocoa powder — This deepens the chocolate taste without adding the sweetness of another cocoa mix. A familiar store-brand cocoa works well here; the important distinction is that it’s unsweetened.
- All-purpose flour — Flour gives the dough structure and helps the cookies hold the marshmallow topping. For a gluten-free batch, a cup-for-cup gluten-free baking blend is the most practical replacement, though the finished texture may vary by blend.
- Butter and the two sugars — Softened butter creams smoothly with the granulated and light brown sugars. The granulated sugar helps the cookies spread, while brown sugar adds moisture and a deeper sweetness. The butter should be soft enough to beat, not melted.
- Eggs and vanilla — The eggs bind the dough, and adding them one at a time helps them blend into the creamed butter and sugar. Vanilla rounds out the cocoa flavor; use the extract you keep for baking rather than skipping it.
- Semisweet chocolate chips — They leave pockets of chocolate in the baked cookies. Chopped semisweet chocolate can stand in if that’s what you have, though the pieces will be less uniform.
- Large marshmallows — Halved crosswise, they make a soft cap that stays visible on each cookie. Smaller marshmallows won’t give the same single, centered topping, so large ones are worth using here.
Mixing and Baking the Cookies in Two Stages
Whisk the Cocoa Dry Ingredients
Heat the oven to 350°F and line two 18×13-inch baking sheets with parchment paper. Whisk the flour, instant hot cocoa mix, unsweetened cocoa powder, baking soda, and salt together in a medium bowl. A thorough whisk distributes the cocoa and leavening through the flour before they meet the wet ingredients. Break up any visible cocoa clumps as you go.
Cream the Butter and Sugars
Beat the softened butter with the granulated sugar and packed light brown sugar in a large bowl using an electric mixer on medium speed. Stop when the mixture looks light and fluffy, about 2 minutes. Beat in the eggs one at a time, then add the vanilla. If the butter is too firm, it won’t cream smoothly; if it’s melted, the mixture won’t have the same fluffy texture.
Finish the Dough and Portion It
Add the flour mixture on low speed and mix only until no dry streaks remain. Stir in the chocolate chips, then scoop the dough into 24 portions of about 2 tablespoons each. Arrange them on the prepared sheets about 2 inches apart. Mixing past the point where the flour disappears can make the cookies tougher, so stop once the dough is evenly combined.
Add the Marshmallows for the Short Second Bake
Bake the cookies at 350°F for 8 minutes, then take the sheets out and place one marshmallow half, cut-side down, on each cookie. Return the pans to the oven for 2–3 minutes, until the edges are set and the marshmallows are soft. The topping should be soft rather than browned. Cool the cookies on the baking sheets for 5 minutes, then transfer them to a wire rack to cool.
Three Useful Ways to Adapt the Batch
Make a gluten-free batch
Replace the all-purpose flour with a cup-for-cup gluten-free baking blend intended for cookies. Choose a blend that includes a binder for a better chance of holding the dough together; expect the cookies to have a slightly different texture than the all-purpose flour version.
Lean into the cocoa and skip the chips
Leave out the semisweet chocolate chips if you want a smoother, more cocoa-forward cookie without distinct chocolate pockets. The dough still bakes with the same marshmallow topping, but the bites won’t have that extra hit of melted chocolate.
Use all light brown sugar for a softer chew
Replace the granulated sugar with an equal amount of packed light brown sugar. The cookies will taste a little deeper and feel softer, with less of the crispness granulated sugar brings.
Storage and Reheating
- Refrigerator: Keep the cookies in an airtight container for up to 5 days. They’ll firm up in the refrigerator, and the marshmallow topping may turn tacky; room temperature is better for a short hold.
- Freezer: Freeze the cooled cookies in a single layer until firm, then place them in an airtight container with parchment between layers for up to 2 months. The marshmallows may soften after thawing.
- Reheating: Warm a cookie briefly in the microwave, just until it’s no longer cold. Don’t overheat it, because the marshmallow can become very hot and sticky.
Questions That Come Up While Baking These Cocoa Cookies
Hot Cocoa Marshmallow Cookies
Ingredients
Equipment
Method
- Heat the oven to 350°F.
- Line two 18x13-inch baking sheets with parchment paper.
- Whisk the flour, hot cocoa mix, cocoa powder, baking soda, and salt together in a medium bowl.
- Beat the butter, granulated sugar, and brown sugar in a large bowl with an electric mixer on medium speed until light and fluffy, about 2 minutes.
- Beat in the eggs one at a time.
- Beat in the vanilla.
- Mix in the flour mixture on low speed just until no dry streaks remain.
- Stir in the chocolate chips.
- Scoop the dough into 24 portions, about 2 tablespoons each.
- Space the portions about 2 inches apart on the prepared baking sheets.
- Bake at 350°F for 8 minutes.
- Remove the sheets from the oven and place one marshmallow half, cut-side down, on each cookie.
- Return the sheets to the oven and bake for 2–3 minutes, until the cookie edges are set and the marshmallows are soft.
- Cool the cookies on the baking sheets for 5 minutes.
- Transfer the cookies to a wire rack to cool.


