
When the turkey breast hits the hot Instant Pot, give it time to brown instead of rushing it straight to pressure. Those golden patches build a deeper base for the gravy, and the whole roast stays easy to handle on the trivet. This Instant Pot turkey breast with gravy is made with a boneless roast, a handful of seasonings, and broth already in the pot.
I like that the turkey cooks above the broth rather than sitting in it. Onion and celery flavor the cooking liquid underneath, which becomes the starting point for a proper roux gravy. The thermometer settles the doneness question far better than judging the outside of a roast, while a short rest gives the slices a chance to hold together. The result is tender turkey with a smooth, savory gravy ready for the table.

Kitchen Note
Don’t rush the natural pressure release. Letting the pot sit for 10 minutes before releasing the remaining pressure gives the roast a gentler transition out of cooking, and the thermometer tells you whether it needs more time.
Save this Instant Pot turkey breast with gravy for a tender, neatly sliced roast and a from-scratch gravy made from its savory cooking liquid.
Why Browning the Turkey First Makes Better Gravy
A pressure cooker makes the turkey convenient, but pressure alone doesn’t create the browned flavor you want in the gravy. Searing the seasoned roast on all sides adds color to the surface and leaves browned bits on the bottom of the pot. Those bits are concentrated flavor, not something to scrub away before the broth goes in.
After browning, the onion, celery, and first portion of broth go into that same pot. Scraping the bottom while the broth is in there lifts the browned bits into the cooking liquid and helps prevent them from sticking during pressure cooking. The vegetables add savory depth as the turkey cooks above them on the trivet. Straining the liquid later gives you a clean base for gravy without needing to blend the vegetables into it. Take a moment to loosen the bottom well; a pot with stuck-on bits is harder to bring to pressure cleanly, and those bits are exactly what you want in the gravy.
What the Turkey, Broth, and Roux Each Bring to This Pot
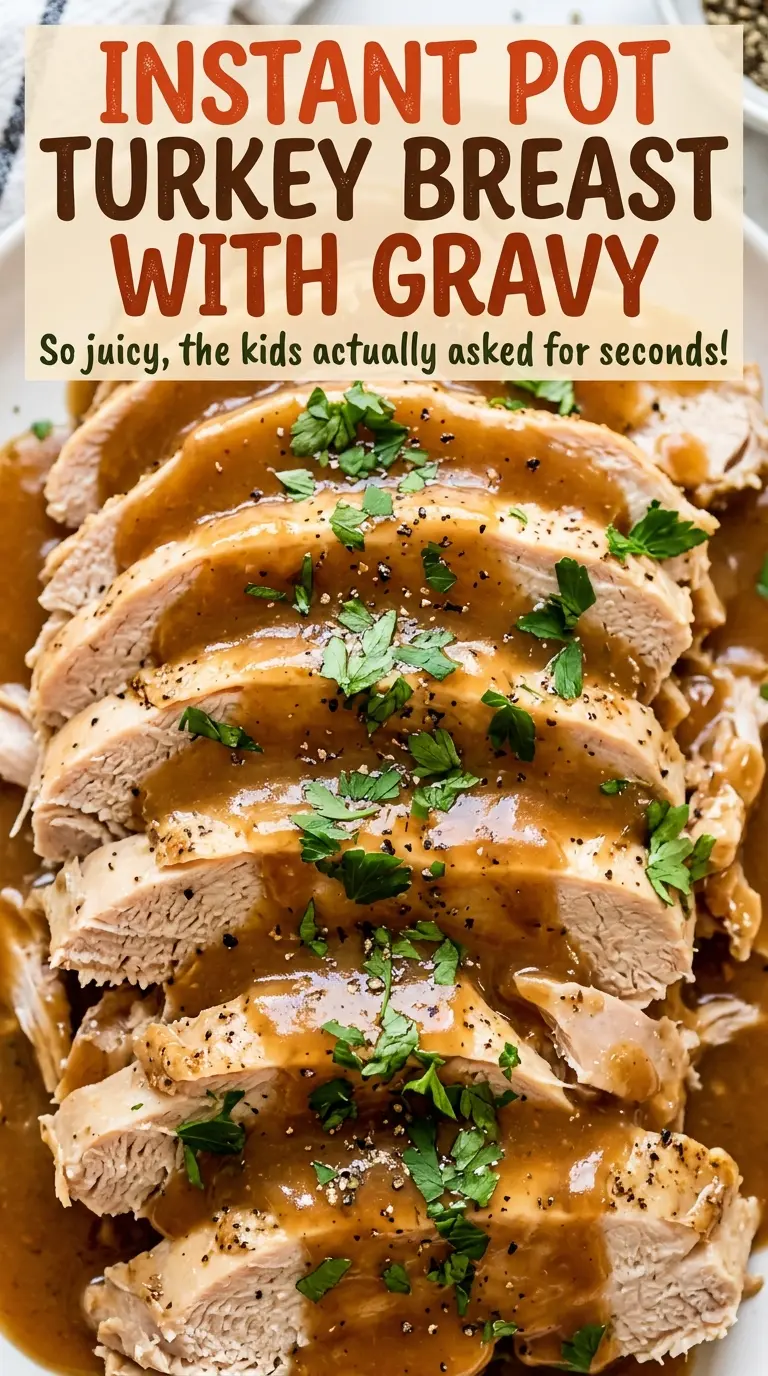
- Boneless turkey breast roast — A fully thawed three-pound roast fits the timing here. Keep the cooking netting on if the roast has it; it helps the roast hold its shape while you brown and pressure-cook it. Remove the netting before slicing.
- Olive oil and the dry seasonings — The oil gives the turkey a surface that can brown in the hot pot. Garlic powder, dried thyme, paprika, kosher salt, and black pepper season the outside without adding a wet coating that would interfere with browning. Fresh, aromatic spices give a clearer flavor, though everyday dried seasonings work well here.
- Yellow onion and celery — These flavor the broth while the turkey cooks, then get strained out. Cut the celery into the stated pieces and quarter the onion so they release flavor into the liquid without turning into tiny bits that are difficult to strain.
- Low-sodium chicken broth — Low-sodium broth keeps the finished gravy from becoming overly salty as it simmers and thickens. The broth is divided: some goes into the pot with the vegetables, and the rest joins the strained liquid in the gravy.
- Butter and all-purpose flour — Together they make the roux that thickens the gravy and gives it a smooth, full-bodied texture. Cook the flour in the melted butter for the full minute before adding liquid; raw flour flavor is unpleasant, and this brief cooking step helps avoid it.
From a Golden Sear to Gravy That Coats a Spoon
Season and Brown Every Side
Pat the fully thawed turkey dry, then season all over with the salt, pepper, garlic powder, thyme, and paprika. Heat the oil using the Instant Pot’s Sauté setting and brown the roast on all sides, allowing 8–10 minutes total. Move it to a plate once the outside has color; it doesn’t need to be cooked through at this stage. If the roast is difficult to turn, use tongs and give it another moment rather than tearing the browned surface.
Lift the Browned Bits and Set the Trivet
Add the quartered onion, celery, and 1 cup of broth to the pot. Scrape the bottom thoroughly so the browned bits loosen into the liquid, then turn off Sauté and set the trivet in the pot. Place the turkey on the trivet above the broth and vegetables. Keeping the roast on the trivet lets the liquid flavor it without leaving the bottom sitting in broth.
Pressure-Cook, Release, and Check the Center
Seal the lid and cook on High Pressure for 18 minutes. Let pressure release naturally for 10 minutes, then carefully release what remains. Check the thickest part of the roast with an instant-read thermometer: it needs to reach 165°F. If it hasn’t, pressure-cook for 2 more minutes, allow a 5-minute natural release, and check again; repeat that sequence if needed. Transfer the cooked roast to a cutting board, remove any netting, and rest it for 10 minutes before slicing.
Turn the Cooking Liquid into Gravy
Strain the pot liquid into a heatproof measuring cup and discard the onion and celery. Set the Instant Pot to Sauté and melt the butter, then whisk in the flour and cook for 1 minute. Gradually whisk in the strained cooking liquid along with the remaining broth, keeping your whisk moving as the liquid goes in so the roux incorporates smoothly. Simmer for 3–5 minutes, whisking, until the gravy thickens enough to coat the back of a spoon; then slice the rested turkey and serve it with the gravy.
Two Simple Ways to Change the Roast or Its Sauce
Leave Out the Paprika for a Milder Roast
Skip the paprika and keep the rest of the seasoning the same. The turkey will lose paprika’s warm color and earthy note, while the garlic and thyme still give the roast a savory coating.
Make a Lighter, Jus-Style Sauce
For a thinner sauce, leave out the butter and flour. Strain the cooking liquid and whisk in the remaining broth; the result is lighter and less rich than roux-thickened gravy, but it keeps the onion-and-celery flavor from the pot.
Storage and Reheating
- Refrigerator: Refrigerate sliced turkey and gravy in separate airtight containers within 2 hours; both keep for 3–4 days. The chilled gravy will be thicker than when freshly made.
- Freezer: Freeze turkey and gravy separately in airtight freezer-safe containers for up to 2–3 months for best quality. Thaw them in the refrigerator before reheating.
- Reheating: Warm the turkey covered with a little gravy so the slices don’t dry out, and reheat the rest of the gravy gently while whisking. Avoid heating the turkey uncovered for a long stretch, which can leave lean breast meat dry.
Questions That Come Up While Cooking This Turkey
Instant Pot Turkey Breast with Gravy
Ingredients
Equipment
Method
- Pat the turkey dry and season all over with the salt, pepper, garlic powder, thyme, and paprika.
- Set a 6-quart Instant Pot to Sauté and heat the olive oil; brown the turkey on all sides for 8–10 minutes total.
- Transfer the browned turkey to a plate.
- Add the onion, celery, and 1 cup of the broth to the pot, scraping up any browned bits.
- Turn off Sauté and set the trivet in the pot.
- Place the turkey on the trivet, seal the lid, and cook on High Pressure for 18 minutes.
- Let the pressure release naturally for 10 minutes.
- Carefully release the remaining pressure.
- Check the thickest part of the turkey with an instant-read thermometer; it must reach 165°F.
- If needed, pressure-cook for 2 more minutes.
- Let the pressure release naturally for 5 minutes, repeating until it reaches 165°F.
- Transfer the turkey to a cutting board and remove any netting.
- Let the turkey rest for 10 minutes.
- Strain the cooking liquid into a heatproof measuring cup and discard the solids.
- Set the Instant Pot to Sauté and melt the butter.
- Whisk in the flour and cook for 1 minute.
- Gradually whisk in the strained cooking liquid and the remaining 1 cup broth.
- Simmer for 3–5 minutes, whisking, until the gravy thickens and coats the back of a spoon.
- Slice the turkey and serve with the gravy.